# All The Mods 10

Guides and tutorials for ATM10!

# Occultism Rituals | ATM10

<div id="bkmrk-introduction-%C2%A0-occul"><table style="border-collapse: collapse !important; width: 100%; border-left: 4px solid #a855a0; border-top: none; border-right: none; border-bottom: none; background-color: rgba(168, 85, 160, 0.08);"><tbody><tr><td style="padding: 8px 16px; overflow: visible; hyphens: none;">**Introduction**

Occultism Rituals are advanced magical structures used in ATM10 to summon spirits, automate resources, and unlock powerful progression systems. Rituals are built using chalk circles, pedestals, and spirit-based components, forming the core of Occultism automation and progression.

As players progress, rituals become increasingly complex, enabling higher-tier spirits, advanced crafting automation, and powerful late-game summoning systems.

</td></tr></tbody></table>

</div>## Overview

Rituals in Occultism are structured magical setups used for summoning, automation, and advanced crafting.

They require precise setup using chalk circles, pedestals, and spirit fire to function correctly.

<div id="bkmrk-used-for-spirit-summ">- Used for spirit summoning and automation
- Enable advanced crafting and progression
- Require structured chalk-drawn circles
- Scale in complexity with progression

<table style="border-collapse: collapse !important; width: 100%;"><tbody><tr style="background-color: rgb(168, 85, 160);"><td style="padding: 8px 16px; hyphens: none; color: #ffffff; font-weight: bold;">Feature</td><td style="padding: 8px 16px; hyphens: none; color: #ffffff; font-weight: bold;">Rituals</td></tr><tr><td style="padding: 8px 16px; hyphens: none;">Spirit Summoning</td><td style="padding: 8px 16px; hyphens: none;">✔</td></tr><tr style="background-color: rgba(168, 85, 160, 0.04);"><td style="padding: 8px 16px; hyphens: none;">Automation</td><td style="padding: 8px 16px; hyphens: none;">✔</td></tr><tr><td style="padding: 8px 16px; hyphens: none;">Multi-Step Setup</td><td style="padding: 8px 16px; hyphens: none;">✔</td></tr><tr style="background-color: rgba(168, 85, 160, 0.04);"><td style="padding: 8px 16px; hyphens: none;">Progression-Based Scaling</td><td style="padding: 8px 16px; hyphens: none;">✔</td></tr></tbody></table>

</div>## Core Requirements

### Basic Items Needed

<div id="bkmrk-ritual-chalk-%28white%2C">- Ritual Chalk (White, Golden, Otherworld)
- Ritual Dowsing Rod
- Ritual Pedestals
- Spirit Fire
- Spirit Tablets (for advanced rituals)

<table style="border-collapse: collapse !important; width: 100%; border-left: 4px solid #a855a0; border-top: none; border-right: none; border-bottom: none; background-color: rgba(168, 85, 160, 0.08);"><tbody><tr><td style="padding: 8px 16px; hyphens: none;">**Information**

Ritual recipes and layouts may vary between ATM10 versions. Always check JEI for the most up-to-date requirements.

</td></tr></tbody></table>

</div>## Chalk Progression

<div id="bkmrk-tier-purpose-notes-w"><table style="border-collapse: collapse !important; width: 100%;"><tbody><tr style="background-color: rgb(168, 85, 160);"><td style="padding: 8px 16px; hyphens: none; color: #ffffff; font-weight: bold;">Tier</td><td style="padding: 8px 16px; hyphens: none; color: #ffffff; font-weight: bold;">Purpose</td><td style="padding: 8px 16px; hyphens: none; color: #ffffff; font-weight: bold;">Notes</td></tr><tr><td style="padding: 8px 16px; hyphens: none;">White Chalk</td><td style="padding: 8px 16px; hyphens: none;">Early rituals</td><td style="padding: 8px 16px; hyphens: none;">Basic spirit summoning</td></tr><tr style="background-color: rgba(168, 85, 160, 0.04);"><td style="padding: 8px 16px; hyphens: none;">Golden Chalk</td><td style="padding: 8px 16px; hyphens: none;">Mid-game rituals</td><td style="padding: 8px 16px; hyphens: none;">Unlocks stronger spirits</td></tr><tr><td style="padding: 8px 16px; hyphens: none;">Otherworld Chalk</td><td style="padding: 8px 16px; hyphens: none;">Late-game rituals</td><td style="padding: 8px 16px; hyphens: none;">Required for high-tier demons</td></tr></tbody></table>

</div>## How Rituals Work

Rituals follow a structured three-step process involving setup, placement, and activation.

### Step 1: Draw the Circle

Use ritual chalk to draw the correct circle pattern. Each ritual requires a specific layout and size.

### Step 2: Place Components

<div id="bkmrk-place-pedestals-in-d">- Place pedestals in designated positions
- Add required items to each pedestal
- Place spirit fire at the center

</div>### Step 3: Activate Ritual

Use the Ritual Dowsing Rod on the center block to activate the ritual. If correctly built, it will begin immediately.

<div id="bkmrk-tip-ritual-failures-"><table style="border-collapse: collapse !important; width: 100%; border-left: 4px solid #a855a0; border-top: none; border-right: none; border-bottom: none; background-color: rgba(168, 85, 160, 0.08);"><tbody><tr><td style="padding: 8px 16px; hyphens: none;">**Tip**

Ritual failures are almost always caused by incorrect circle layout or missing pedestal items. Double-check setup before activation.

</td></tr></tbody></table>

</div>## Spirit System Overview

<div id="bkmrk-foliot---basic-autom">- **Foliot** - Basic automation and resource gathering
- **Djinni** - Mid-tier crafting and utility tasks
- **Afrit** - Advanced processing and fire-based automation
- **Marid** - High-tier rare automation and support functions

</div>## Common Rituals

### Foliot Summoning

Summons basic worker spirits used for early automation tasks such as gathering resources.

### Storage Binding Ritual

Links spirits to storage systems, enabling remote access and automated item management.

### Spirit Tier Upgrade Ritual

Upgrades spirits through progression tiers (Foliot to Djinni to Afrit).

## Mid-Game Ritual Uses

<div id="bkmrk-automated-crafting-s">- Automated crafting systems
- Ore processing and refinement
- Resource generation loops
- Storage logistics automation

</div>## Advanced Ritual Concepts

### Demon Summoning

High-tier rituals used to bind powerful entities for automation and utility. These require rare materials and complex multi-layer circle designs.

### Multi-Pedestal Rituals

Advanced rituals that require multiple pedestals with synchronized item inputs for transformation or progression effects.

<div id="bkmrk-warning-advanced-rit"><table style="border-collapse: collapse !important; width: 100%; border-left: 4px solid #a855a0; border-top: none; border-right: none; border-bottom: none; background-color: rgba(168, 85, 160, 0.08);"><tbody><tr><td style="padding: 8px 16px; hyphens: none;">**Warning**

Advanced rituals often fail if even one pedestal input is incorrect. Automation setups should be tested before scaling.

</td></tr></tbody></table>

</div>## Common Mistakes

<div id="bkmrk-using-incorrect-chal">- Using incorrect chalk tier
- Misaligned ritual circles
- Missing pedestal items
- Incorrect spirit fire placement
- Activating rituals prematurely

</div>## Pro Tips

<div id="bkmrk-build-rituals-in-fla">- Build rituals in flat, chunk-loaded areas
- Pre-plan layouts before drawing chalk
- Label ritual setups for reuse
- Keep spare chalk for recovery

<table style="border-collapse: collapse !important; width: 100%; border-left: 4px solid #a855a0; border-top: none; border-right: none; border-bottom: none; background-color: rgba(168, 85, 160, 0.08);"><tbody><tr><td style="padding: 8px 16px; hyphens: none;">**Tip**

Once optimized, rituals become one of the strongest automation tools in Occultism, especially when combined with spirit upgrades.

</td></tr></tbody></table>

</div>## Quick Summary

<div id="bkmrk-chalk-defines-struct">- Chalk defines structure
- Pedestals hold required items
- Spirit fire activates rituals
- Dowsing rod triggers execution
- Spirits enable automation and progression

</div>

# Fusion Reactor | ATM10

<div id="bkmrk-the%C2%A0fusion-reactor-i"><table style="border-collapse: collapse !important; width: 100%; border-left: 4px solid #a855a0; border-top: none; border-right: none; border-bottom: none; background-color: rgba(168, 85, 160, 0.08);"><tbody><tr><td style="padding: 8px 16px; overflow: visible; hyphens: none;">The Fusion Reactor is Mekanism's end-game multiblock power generator capable of producing enormous amounts of energy through nuclear fusion. Unlike the Fission Reactor, the Fusion Reactor cannot melt down, making it one of the safest large-scale power generation methods available in All The Mods 10.

This guide explains how to construct the reactor, understand the Reactor Controller, produce D-T Fuel, ignite the reaction, and maintain continuous power generation.

</td></tr></tbody></table>

</div>## Overview

The Fusion Reactor consumes **D-T Fuel** (Deuterium-Tritium Fuel) to sustain a fusion reaction. Once ignited, it continuously generates energy while fuel is supplied.

The reactor can operate in one of two modes:

<div id="bkmrk-passive-mode---gener">- **Passive Mode** - Generates FE directly.
- **Water-Cooled Mode** - Produces Steam for an Industrial Turbine, resulting in significantly higher power output.

<table style="border-collapse: collapse !important; width: 100%;"><thead><tr><th style="padding: 8px 16px; hyphens: none; text-align: left; background-color: rgb(168, 85, 160); color: #ffffff; font-weight: bold;">Feature</th><th style="padding: 8px 16px; hyphens: none; text-align: left; background-color: rgb(168, 85, 160); color: #ffffff; font-weight: bold;">Fusion Reactor</th></tr></thead><tbody><tr><td style="padding: 8px 16px; hyphens: none;">Meltdown Risk</td><td style="padding: 8px 16px; hyphens: none;">None</td></tr><tr style="background-color: rgba(168, 85, 160, 0.04);"><td style="padding: 8px 16px; hyphens: none;">Fuel Type</td><td style="padding: 8px 16px; hyphens: none;">D-T Fuel</td></tr><tr><td style="padding: 8px 16px; hyphens: none;">Power Output</td><td style="padding: 8px 16px; hyphens: none;">Very High</td></tr><tr style="background-color: rgba(168, 85, 160, 0.04);"><td style="padding: 8px 16px; hyphens: none;">Cooling Options</td><td style="padding: 8px 16px; hyphens: none;">Passive or Water-Cooled</td></tr><tr><td style="padding: 8px 16px; hyphens: none;">Ignition Required</td><td style="padding: 8px 16px; hyphens: none;">Yes</td></tr></tbody></table>

</div>## Required Components

Before constructing the Fusion Reactor, gather the following components.

<div id="bkmrk-component-required-p"><table style="border-collapse: collapse !important; width: 100%;"><thead><tr><th style="padding: 8px 16px; hyphens: none; text-align: left; background-color: rgb(168, 85, 160); color: #ffffff; font-weight: bold;">Component</th><th style="padding: 8px 16px; hyphens: none; text-align: left; background-color: rgb(168, 85, 160); color: #ffffff; font-weight: bold;">Required</th><th style="padding: 8px 16px; hyphens: none; text-align: left; background-color: rgb(168, 85, 160); color: #ffffff; font-weight: bold;">Purpose</th></tr></thead><tbody><tr><td style="padding: 8px 16px; hyphens: none;">Fusion Reactor Controller</td><td style="padding: 8px 16px; hyphens: none;">✔</td><td style="padding: 8px 16px; hyphens: none;">Controls the multiblock and displays reactor information.</td></tr><tr style="background-color: rgba(168, 85, 160, 0.04);"><td style="padding: 8px 16px; hyphens: none;">Fusion Reactor Frame</td><td style="padding: 8px 16px; hyphens: none;">✔</td><td style="padding: 8px 16px; hyphens: none;">Forms the reactor casing.</td></tr><tr><td style="padding: 8px 16px; hyphens: none;">Fusion Reactor Port</td><td style="padding: 8px 16px; hyphens: none;">✔</td><td style="padding: 8px 16px; hyphens: none;">Transfers fluids, gases and energy.</td></tr><tr style="background-color: rgba(168, 85, 160, 0.04);"><td style="padding: 8px 16px; hyphens: none;">Laser Focus Matrix</td><td style="padding: 8px 16px; hyphens: none;">✔</td><td style="padding: 8px 16px; hyphens: none;">Required for laser ignition.</td></tr><tr><td style="padding: 8px 16px; hyphens: none;">Fusion Reactor Logic Adapter</td><td style="padding: 8px 16px; hyphens: none;">Optional</td><td style="padding: 8px 16px; hyphens: none;">Provides automation and redstone control.</td></tr></tbody></table>

</div>## Building the Reactor

Construct the multiblock structure exactly as shown in JEI. The interior of the reactor must remain completely hollow for the structure to form correctly.

Once construction is complete, right-click the **Fusion Reactor Controller**.

<div id="bkmrk-information-if-the-m"><table style="border-collapse: collapse !important; width: 100%; border-left: 4px solid #a855a0; border-top: none; border-right: none; border-bottom: none; background-color: rgba(168, 85, 160, 0.08);"><tbody><tr><td style="padding: 8px 16px; hyphens: none;">**Information**

If the multiblock has been assembled correctly, the controller will display **Structure Formed**. If it reports **Structure Incomplete**, verify that:

- Every required Fusion Reactor Frame has been placed.
- The interior is completely hollow.
- A Laser Focus Matrix has been installed.
- At least one Fusion Reactor Port is present.

</td></tr></tbody></table>

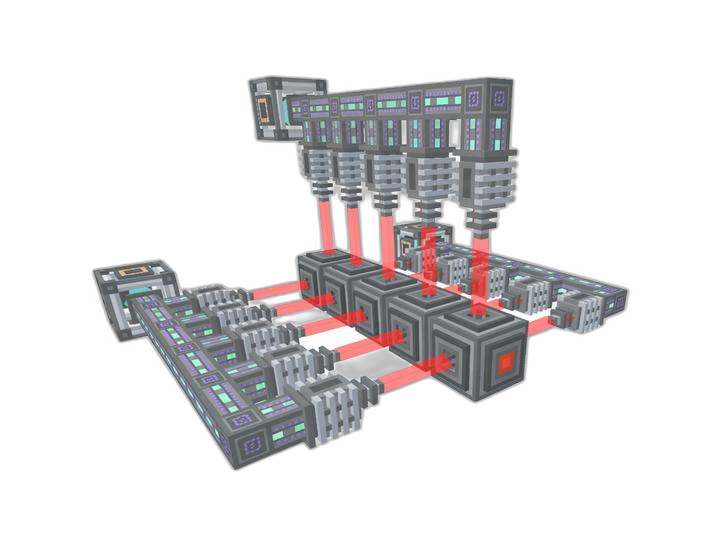
</div>[![Fusion_Reactor.png](https://siriusmc-bookstack.s3.amazonaws.com/uploads/images/gallery/2026-07/scaled-1680-/q7ZA9is19IILSabN-fusion-reactor.png)](https://siriusmc-bookstack.s3.amazonaws.com/uploads/images/gallery/2026-07/q7ZA9is19IILSabN-fusion-reactor.png)

## Reactor Controller

The Reactor Controller provides access to all reactor information and settings. Right-click the Controller to open its interface.

### Main Screen

The Main Screen displays the overall status of the Fusion Reactor.

<div id="bkmrk-structure-status-cha">- Structure status
- Charged Hohlraum slot
- Access to the Heat, Fuel and Statistics tabs

</div>The text displayed at the top of the interface indicates whether the reactor structure is correctly assembled.

<div id="bkmrk-important-the-main-s"><table style="border-collapse: collapse !important; width: 100%; border-left: 4px solid #a855a0; border-top: none; border-right: none; border-bottom: none; background-color: rgba(168, 85, 160, 0.08);"><tbody><tr><td style="padding: 8px 16px; hyphens: none;">**Important**

The Main Screen contains a single inventory slot. A **Charged Hohlraum** must be inserted into this slot before a laser can ignite the Fusion Reactor.

</td></tr></tbody></table>

</div>[![ReactorGUI1.png](https://siriusmc-bookstack.s3.amazonaws.com/uploads/images/gallery/2026-07/scaled-1680-/eYwvPBSURgUCMVuX-reactorgui1.png)](https://siriusmc-bookstack.s3.amazonaws.com/uploads/images/gallery/2026-07/eYwvPBSURgUCMVuX-reactorgui1.png)

### Heat Tab

The Heat tab displays the reactor's operating temperatures and internal storage.

<div id="bkmrk-indicator-descriptio"><table style="border-collapse: collapse !important; width: 100%;"><thead><tr><th style="padding: 8px 16px; hyphens: none; text-align: left; background-color: rgb(168, 85, 160); color: #ffffff; font-weight: bold;">Indicator</th><th style="padding: 8px 16px; hyphens: none; text-align: left; background-color: rgb(168, 85, 160); color: #ffffff; font-weight: bold;">Description</th></tr></thead><tbody><tr><td style="padding: 8px 16px; hyphens: none;">Plasma Temperature</td><td style="padding: 8px 16px; hyphens: none;">Current plasma temperature inside the reactor.</td></tr><tr style="background-color: rgba(168, 85, 160, 0.04);"><td style="padding: 8px 16px; hyphens: none;">Case Temperature</td><td style="padding: 8px 16px; hyphens: none;">Temperature of the reactor casing.</td></tr><tr><td style="padding: 8px 16px; hyphens: none;">Internal Energy</td><td style="padding: 8px 16px; hyphens: none;">Current FE stored within the reactor.</td></tr><tr style="background-color: rgba(168, 85, 160, 0.04);"><td style="padding: 8px 16px; hyphens: none;">Water</td><td style="padding: 8px 16px; hyphens: none;">Amount of water stored for cooling.</td></tr><tr><td style="padding: 8px 16px; hyphens: none;">Steam</td><td style="padding: 8px 16px; hyphens: none;">Steam currently stored inside the reactor.</td></tr></tbody></table>

</div>[![ReactorGUI2.png](https://siriusmc-bookstack.s3.amazonaws.com/uploads/images/gallery/2026-07/scaled-1680-/2KlvHAqpMPLZCRIX-reactorgui2.png)](https://siriusmc-bookstack.s3.amazonaws.com/uploads/images/gallery/2026-07/2KlvHAqpMPLZCRIX-reactorgui2.png)

### Fuel Tab

The Fuel tab displays the reactor's fuel supply and current Injection Rate.

<div id="bkmrk-tank-contents-left-d"><table style="border-collapse: collapse !important; width: 100%;"><thead><tr><th style="padding: 8px 16px; hyphens: none; text-align: left; background-color: rgb(168, 85, 160); color: #ffffff; font-weight: bold;">Tank</th><th style="padding: 8px 16px; hyphens: none; text-align: left; background-color: rgb(168, 85, 160); color: #ffffff; font-weight: bold;">Contents</th></tr></thead><tbody><tr><td style="padding: 8px 16px; hyphens: none;">Left</td><td style="padding: 8px 16px; hyphens: none;">Deuterium</td></tr><tr style="background-color: rgba(168, 85, 160, 0.04);"><td style="padding: 8px 16px; hyphens: none;">Centre</td><td style="padding: 8px 16px; hyphens: none;">D-T Fuel</td></tr><tr><td style="padding: 8px 16px; hyphens: none;">Right</td><td style="padding: 8px 16px; hyphens: none;">Tritium</td></tr></tbody></table>

</div>The reactor consumes Deuterium and Tritium at a rate equal to **half of the current Injection Rate per tick**.

[![ReactorGUI3.png](https://siriusmc-bookstack.s3.amazonaws.com/uploads/images/gallery/2026-07/scaled-1680-/8wc7HjkESd9TgvRA-reactorgui3.png)](https://siriusmc-bookstack.s3.amazonaws.com/uploads/images/gallery/2026-07/8wc7HjkESd9TgvRA-reactorgui3.png)

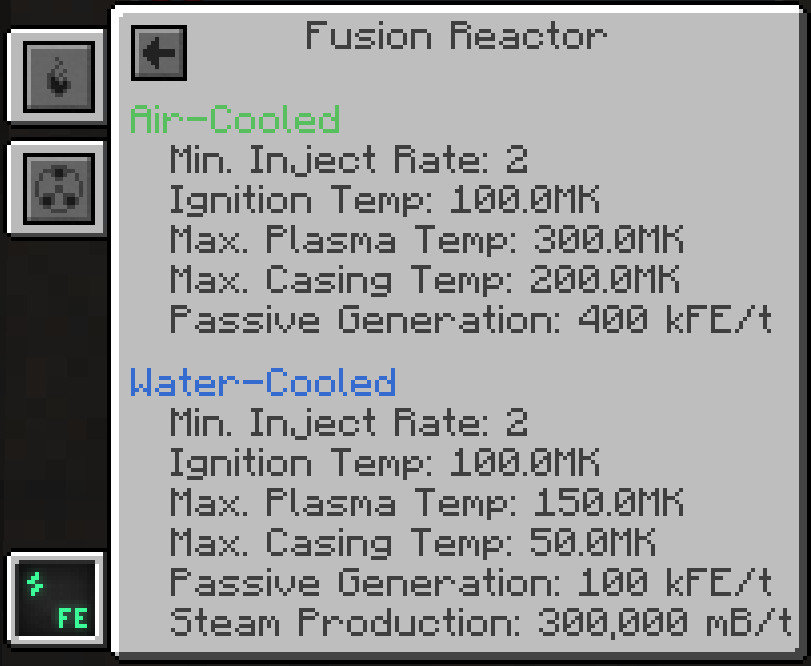
### Statistics Tab

The Statistics tab displays technical information about the reactor.

<div id="bkmrk-current-injection-ra">- Current Injection Rate
- Maximum Plasma Temperature
- Passive FE Generation
- Steam Production

</div>This information is useful when monitoring reactor performance and tuning power output.

[![ReactorGUI4.png](https://siriusmc-bookstack.s3.amazonaws.com/uploads/images/gallery/2026-07/scaled-1680-/qrUzI1cRi5R9SvnB-reactorgui4.png)](https://siriusmc-bookstack.s3.amazonaws.com/uploads/images/gallery/2026-07/qrUzI1cRi5R9SvnB-reactorgui4.png)
## Producing D-T Fuel

The Fusion Reactor requires **D-T Fuel** to sustain the fusion reaction. D-T Fuel is produced by combining **Deuterium** and **Tritium** in a Chemical Infuser.

Both gases are produced from Water using Mekanism's gas processing machines.

<div id="bkmrk-information-producin"><table style="border-collapse: collapse !important; width: 100%; border-left: 4px solid #a855a0; border-top: none; border-right: none; border-bottom: none; background-color: rgba(168, 85, 160, 0.08);"><tbody><tr><td style="padding: 8px 16px; hyphens: none;">**Information**

Producing Tritium can take significantly longer than Deuterium due to the Solar Neutron Activator only operating during the daytime. Consider building multiple Solar Neutron Activators to increase production.

</td></tr></tbody></table>

</div>### Producing Tritium

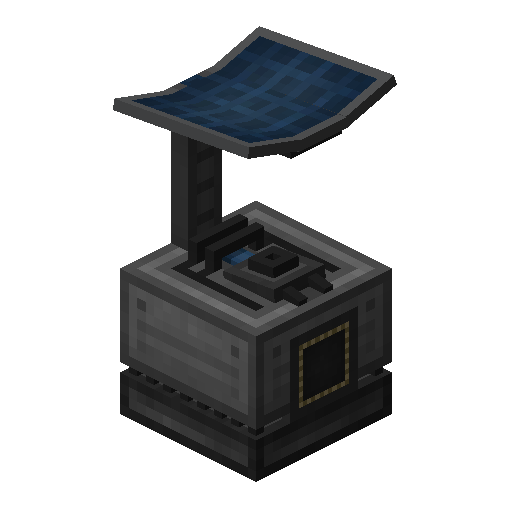
Tritium is produced by converting Hydrogen inside a Solar Neutron Activator.

#### Step 1 - Produce Hydrogen

Supply Water to an **Electrolytic Separator**.

The machine separates Water into:

<div id="bkmrk-hydrogen-oxygen">- Hydrogen
- Oxygen

</div>Only the Hydrogen output is required for Tritium production.

#### Step 2 - Convert Hydrogen into Tritium

Pipe the Hydrogen into a **Solar Neutron Activator**.

The Solar Neutron Activator requires:

<div id="bkmrk-direct-access-to-the">- Direct access to the sky.
- Daylight.

</div>The Hydrogen will gradually be converted into **Tritium**.

[![Solar_Neutron_Activator.png](https://siriusmc-bookstack.s3.amazonaws.com/uploads/images/gallery/2026-07/scaled-1680-/cEw5DULMuY1qec8v-solar-neutron-activator.png)](https://siriusmc-bookstack.s3.amazonaws.com/uploads/images/gallery/2026-07/cEw5DULMuY1qec8v-solar-neutron-activator.png)
### Producing Deuterium

Deuterium is produced by condensing Hydrogen into its liquid form.

#### Step 1 - Produce Hydrogen

Supply Water to an **Electrolytic Separator**.

Collect the Hydrogen output.

#### Step 2 - Condense the Hydrogen

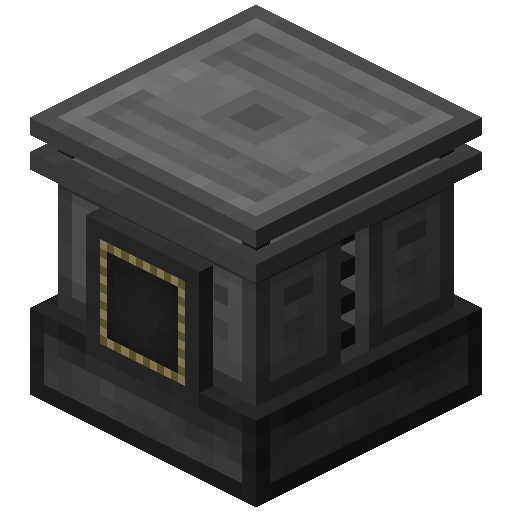
Pipe the Hydrogen into a **Rotary Condensentrator**.

Set the Rotary Condensentrator to **Condensentrating Mode**.

The Hydrogen will be converted into **Deuterium**.

[![Rotary_Condensentrator.png](https://siriusmc-bookstack.s3.amazonaws.com/uploads/images/gallery/2026-07/scaled-1680-/GlD138uCIqZcAEqm-rotary-condensentrator.png)](https://siriusmc-bookstack.s3.amazonaws.com/uploads/images/gallery/2026-07/GlD138uCIqZcAEqm-rotary-condensentrator.png)
### Producing D-T Fuel

Once both gases have been produced, they can be combined into D-T Fuel.

<div id="bkmrk-input-machine-output"><table style="border-collapse: collapse !important; width: 100%;"><thead><tr><th style="padding: 8px 16px; hyphens: none; text-align: left; background-color: rgb(168, 85, 160); color: #ffffff; font-weight: bold;">Input</th><th style="padding: 8px 16px; hyphens: none; text-align: left; background-color: rgb(168, 85, 160); color: #ffffff; font-weight: bold;">Machine</th><th style="padding: 8px 16px; hyphens: none; text-align: left; background-color: rgb(168, 85, 160); color: #ffffff; font-weight: bold;">Output</th></tr></thead><tbody><tr><td style="padding: 8px 16px; hyphens: none;">Deuterium + Tritium</td><td style="padding: 8px 16px; hyphens: none;">Chemical Infuser</td><td style="padding: 8px 16px; hyphens: none;">D-T Fuel</td></tr></tbody></table>

</div>Insert both gases into the Chemical Infuser and it will continuously produce **D-T Fuel**.

## Charging a Hohlraum

The **Hohlraum** is a critical item used to ignite the Fusion Reactor.

Without a **Charged Hohlraum**, the Fusion Reactor cannot be started using lasers.

### Charging the Hohlraum

To charge a Hohlraum:

<div id="bkmrk-produce-at-least-10-">1. Produce at least **10 mB** of D-T Fuel inside a Chemical Infuser.
2. Insert an empty **Hohlraum** into the centre slot of the Chemical Infuser.
3. The Hohlraum will absorb the fuel and become a **Charged Hohlraum**.
4. Remove the Charged Hohlraum and insert it into the inventory slot of the **Fusion Reactor Controller**.

<table style="border-collapse: collapse !important; width: 100%; border-left: 4px solid #a855a0; border-top: none; border-right: none; border-bottom: none; background-color: rgba(168, 85, 160, 0.08);"><tbody><tr><td style="padding: 8px 16px; hyphens: none;">**Important**

A Charged Hohlraum is consumed when the Fusion Reactor is successfully ignited. If the reactor shuts down in the future, another Charged Hohlraum will be required to restart it.

</td></tr></tbody></table>

</div>[![Hohlraum.png](https://siriusmc-bookstack.s3.amazonaws.com/uploads/images/gallery/2026-07/scaled-1680-/mzPVTF4SoJwXL4Mu-hohlraum.png)](https://siriusmc-bookstack.s3.amazonaws.com/uploads/images/gallery/2026-07/mzPVTF4SoJwXL4Mu-hohlraum.png)

## Preparing for Ignition

Before attempting to start the Fusion Reactor, verify that all of the following requirements have been met.

<div id="bkmrk-requirement-status-f"><table style="border-collapse: collapse !important; width: 100%;"><thead><tr><th style="padding: 8px 16px; hyphens: none; text-align: left; background-color: rgb(168, 85, 160); color: #ffffff; font-weight: bold;">Requirement</th><th style="padding: 8px 16px; hyphens: none; text-align: left; background-color: rgb(168, 85, 160); color: #ffffff; font-weight: bold;">Status</th></tr></thead><tbody><tr><td style="padding: 8px 16px; hyphens: none;">Fusion Reactor Structure Formed</td><td style="padding: 8px 16px; hyphens: none;">Required</td></tr><tr style="background-color: rgba(168, 85, 160, 0.04);"><td style="padding: 8px 16px; hyphens: none;">Laser Focus Matrix Installed</td><td style="padding: 8px 16px; hyphens: none;">Required</td></tr><tr><td style="padding: 8px 16px; hyphens: none;">Charged Hohlraum Installed</td><td style="padding: 8px 16px; hyphens: none;">Required</td></tr><tr style="background-color: rgba(168, 85, 160, 0.04);"><td style="padding: 8px 16px; hyphens: none;">D-T Fuel Available</td><td style="padding: 8px 16px; hyphens: none;">Required</td></tr><tr><td style="padding: 8px 16px; hyphens: none;">Laser Amplifier or Heat Source</td><td style="padding: 8px 16px; hyphens: none;">Required</td></tr></tbody></table>

<table style="border-collapse: collapse !important; width: 100%; border-left: 4px solid #a855a0; border-top: none; border-right: none; border-bottom: none; background-color: rgba(168, 85, 160, 0.08);"><tbody><tr><td style="padding: 8px 16px; hyphens: none;">**Tip**

Keep one or more Charged Hohlraums stored nearby. If the reactor is shut down for maintenance or runs out of fuel, you'll be able to restart it immediately without waiting for another Hohlraum to charge.

</td></tr></tbody></table>

</div>## Starting the Fusion Reaction

Unlike most Mekanism generators, the Fusion Reactor does not start automatically. Before the fusion reaction can begin, the reactor's plasma must reach **100 MK (100 Million Kelvin)** while a **Charged Hohlraum** is installed inside the Reactor Controller.

Once ignited, the Charged Hohlraum is consumed and the reactor will begin generating power while continuously consuming D-T Fuel.

### Method 1 - Laser Ignition (Recommended)

Laser ignition is the fastest and most commonly used method of starting a Fusion Reactor.

#### Requirements

<div id="bkmrk-requirement-minimum-"><table style="border-collapse: collapse !important; width: 100%;"><thead><tr><th style="padding: 8px 16px; hyphens: none; text-align: left; background-color: rgb(168, 85, 160); color: #ffffff; font-weight: bold;">Requirement</th><th style="padding: 8px 16px; hyphens: none; text-align: left; background-color: rgb(168, 85, 160); color: #ffffff; font-weight: bold;">Minimum</th></tr></thead><tbody><tr><td style="padding: 8px 16px; hyphens: none;">Charged Hohlraum</td><td style="padding: 8px 16px; hyphens: none;">1</td></tr><tr style="background-color: rgba(168, 85, 160, 0.04);"><td style="padding: 8px 16px; hyphens: none;">Laser Amplifier Energy</td><td style="padding: 8px 16px; hyphens: none;">1 GFE</td></tr><tr><td style="padding: 8px 16px; hyphens: none;">Laser Focus Matrix</td><td style="padding: 8px 16px; hyphens: none;">Installed</td></tr></tbody></table>

</div>#### Ignition Steps

<div id="bkmrk-insert-a-charged-hoh">1. Insert a Charged Hohlraum into the Reactor Controller.
2. Charge a Laser Amplifier until it contains at least **1 GFE**.
3. Aim one or more Lasers into the Laser Amplifier.
4. Set the Laser Amplifier Redstone Mode to **Normal**.
5. Trigger the amplifier with a Button or Redstone signal.
6. The stored laser energy will fire into the Laser Focus Matrix and instantly ignite the reactor.

</div>[![output.png](https://siriusmc-bookstack.s3.amazonaws.com/uploads/images/gallery/2026-07/scaled-1680-/dJ7IAKPScwHXd66f-output.png)](https://siriusmc-bookstack.s3.amazonaws.com/uploads/images/gallery/2026-07/dJ7IAKPScwHXd66f-output.png)

<div id="bkmrk-tip-leave-the-laser-"><div style="clear: both;">  
</div><table style="border-collapse: collapse !important; width: 100%; border-left: 4px solid #a855a0; border-top: none; border-right: none; border-bottom: none; background-color: rgba(168, 85, 160, 0.08);"><tbody><tr><td style="padding: 8px 16px; hyphens: none;">**Tip**

Leave the Laser Amplifier connected after ignition. Keeping it charged allows the reactor to be restarted immediately if it ever shuts down.

</td></tr></tbody></table>

</div>## Power Generation Modes

The Fusion Reactor supports two operating modes.

<div id="bkmrk-mode-output-recommen"><table style="border-collapse: collapse !important; width: 100%;"><thead><tr><th style="padding: 8px 16px; hyphens: none; text-align: left; background-color: rgb(168, 85, 160); color: #ffffff; font-weight: bold;">Mode</th><th style="padding: 8px 16px; hyphens: none; text-align: left; background-color: rgb(168, 85, 160); color: #ffffff; font-weight: bold;">Output</th><th style="padding: 8px 16px; hyphens: none; text-align: left; background-color: rgb(168, 85, 160); color: #ffffff; font-weight: bold;">Recommended For</th></tr></thead><tbody><tr><td style="padding: 8px 16px; hyphens: none;">Passive Mode</td><td style="padding: 8px 16px; hyphens: none;">FE</td><td style="padding: 8px 16px; hyphens: none;">Simple power generation</td></tr><tr style="background-color: rgba(168, 85, 160, 0.04);"><td style="padding: 8px 16px; hyphens: none;">Water-Cooled Mode</td><td style="padding: 8px 16px; hyphens: none;">Steam</td><td style="padding: 8px 16px; hyphens: none;">Industrial Turbine setups</td></tr></tbody></table>

</div>### Passive Mode

Passive Mode produces FE directly from the reactor.

<div id="bkmrk-simple-to-set-up.-no">- Simple to set up.
- No Steam management required.
- Ideal for smaller installations.

</div>### Water-Cooled Mode

Supplying Water to the reactor enables Water-Cooled Mode.

The reactor converts Water into Steam, which can then be sent into an **Industrial Turbine**.

This configuration produces considerably more usable power than Passive Mode and is recommended for most late-game bases.

## Maintaining the Reactor

Once ignited, the Fusion Reactor will continue operating as long as it has a continuous supply of fuel.

### Fuel Production

<div id="bkmrk-keep-electrolytic-se">- Keep Electrolytic Separators supplied with Water.
- Ensure Solar Neutron Activators have direct access to the sky.
- Keep Rotary Condensentrators and Chemical Infusers powered.
- Maintain a reserve of D-T Fuel inside Chemical Tanks.

</div>### Injection Rate

The Injection Rate determines how much fuel is consumed every tick.

<div id="bkmrk-higher-injection-rat"><table style="border-collapse: collapse !important; width: 100%;"><thead><tr><th style="padding: 8px 16px; hyphens: none; text-align: left; background-color: rgb(168, 85, 160); color: #ffffff; font-weight: bold;">Higher Injection Rate</th><th style="padding: 8px 16px; hyphens: none; text-align: left; background-color: rgb(168, 85, 160); color: #ffffff; font-weight: bold;">Effect</th></tr></thead><tbody><tr><td style="padding: 8px 16px; hyphens: none;">Fuel Consumption</td><td style="padding: 8px 16px; hyphens: none;">Increases</td></tr><tr style="background-color: rgba(168, 85, 160, 0.04);"><td style="padding: 8px 16px; hyphens: none;">Power Output</td><td style="padding: 8px 16px; hyphens: none;">Increases</td></tr><tr><td style="padding: 8px 16px; hyphens: none;">Steam Production</td><td style="padding: 8px 16px; hyphens: none;">Increases</td></tr></tbody></table>

<table style="border-collapse: collapse !important; width: 100%; border-left: 4px solid #a855a0; border-top: none; border-right: none; border-bottom: none; background-color: rgba(168, 85, 160, 0.08);"><tbody><tr><td style="padding: 8px 16px; hyphens: none;">**Information**

Only increase the Injection Rate once your Deuterium and Tritium production can continuously supply the reactor. Running out of fuel will cause the reactor to shut down.

</td></tr></tbody></table>

</div>## Troubleshooting

<div id="bkmrk-problem-possible-cau"><table style="border-collapse: collapse !important; width: 100%;"><thead><tr><th style="padding: 8px 16px; hyphens: none; text-align: left; background-color: rgb(168, 85, 160); color: #ffffff; font-weight: bold;">Problem</th><th style="padding: 8px 16px; hyphens: none; text-align: left; background-color: rgb(168, 85, 160); color: #ffffff; font-weight: bold;">Possible Cause</th><th style="padding: 8px 16px; hyphens: none; text-align: left; background-color: rgb(168, 85, 160); color: #ffffff; font-weight: bold;">Solution</th></tr></thead><tbody><tr><td style="padding: 8px 16px; hyphens: none;">Structure Incomplete</td><td style="padding: 8px 16px; hyphens: none;">Missing or incorrectly placed blocks.</td><td style="padding: 8px 16px; hyphens: none;">Verify the multiblock matches the JEI structure.</td></tr><tr style="background-color: rgba(168, 85, 160, 0.04);"><td style="padding: 8px 16px; hyphens: none;">Reactor Will Not Ignite</td><td style="padding: 8px 16px; hyphens: none;">Missing Charged Hohlraum or insufficient laser energy.</td><td style="padding: 8px 16px; hyphens: none;">Install a Charged Hohlraum and fire at least 1 GFE into the Laser Focus Matrix.</td></tr><tr><td style="padding: 8px 16px; hyphens: none;">No Tritium Production</td><td style="padding: 8px 16px; hyphens: none;">Solar Neutron Activator blocked or operating at night.</td><td style="padding: 8px 16px; hyphens: none;">Provide direct sky access or wait until daytime.</td></tr><tr style="background-color: rgba(168, 85, 160, 0.04);"><td style="padding: 8px 16px; hyphens: none;">Reactor Stops Running</td><td style="padding: 8px 16px; hyphens: none;">Fuel production has stopped.</td><td style="padding: 8px 16px; hyphens: none;">Restore Deuterium and Tritium production.</td></tr><tr><td style="padding: 8px 16px; hyphens: none;">Low Power Output</td><td style="padding: 8px 16px; hyphens: none;">Low Injection Rate.</td><td style="padding: 8px 16px; hyphens: none;">Increase the Injection Rate once fuel production is sufficient.</td></tr></tbody></table>

<table style="border-collapse: collapse !important; width: 100%; border-left: 4px solid #a855a0; border-top: none; border-right: none; border-bottom: none; background-color: rgba(168, 85, 160, 0.08);"><tbody><tr><td style="padding: 8px 16px; hyphens: none;">**Tip**

For the highest possible power output, pair the Fusion Reactor with a correctly sized Industrial Turbine and maintain a steady supply of D-T Fuel. This setup provides one of the most efficient long-term power solutions available in ATM10.

</td></tr></tbody></table>

</div>

# Introduction | ATM10

<table border="1" id="bkmrk-" style="border-collapse: collapse; width: 100%; background-color: #332941; border: hidden;"><tbody><tr><td style="text-align: center; padding: 0; height: 200px; overflow: hidden; vertical-align: middle;">![ATM10](https://siriusmc-bookstack.s3.amazonaws.com/uploads/images/gallery/2026-03/gYU14Co83VJMULpr-atm10-nbg.png)</td></tr><tr><td style="padding: 10px 16px; text-align: center; background-color: #2e2040; hyphens: none;"><span style="font-family: monospace; font-size: 1em; color: #e0b8e0; letter-spacing: 0.05em; background: rgba(168,85,160,0.2); border: 1.5px solid rgba(168,85,160,0.4); border-radius: 4px; padding: 5px 14px; display: inline-block;">atm10.siriusmc.net</span> <span style="font-size: 0.75em; color: rgba(200,160,200,0.55); display: block; margin-top: 6px; letter-spacing: 0.04em;">Version · 7.1</span></td></tr></tbody></table>

<table border="0" id="bkmrk-all-the-mods-10-%28atm" style="border-collapse: collapse !important; width: 100%; border-left: 4px solid #a855a0; border-top: none; border-right: none; border-bottom: none; background-color: rgba(168, 85, 160, 0.08);"><tbody><tr><td style="padding: 8px 16px; overflow: visible; hyphens: none;">All The Mods 10 (ATM10) is a massive Minecraft modpack featuring 470+ mods and a comprehensive quest system to guide your progression. Designed for long-term gameplay, ATM10 includes a built-in endgame goal in the form of the ATM Star, a powerful craftable item that requires mastery of many of the pack's mods to complete. Whether you enjoy technology, magic, exploration, or a mix of everything, ATM10 has a path for you.

</td></tr></tbody></table>

## Key Features

### Technology and Magic

ATM10 covers both technical and magical play styles in depth. On the tech side, mods like Mekanism, Applied Energistics 2, Thermal Expansion, and Create provide deep automation, power generation, and storage systems. On the magic side, Botania, Blood Magic, Ars Nouveau, and Mahou Tsukai offer entirely different progression paths. Both sides of the pack are fully fleshed out and can be pursued independently or combined for more powerful setups.

### Exploration and Dimensions

ATM10 expands the world significantly with new biomes, structures, and dimensions to explore. The Mining World provides a dedicated resource dimension that resets weekly, keeping the Overworld pristine for long-term builds. Additional dimensions such as the Twilight Forest, The Other, the Undergarden, the Bumblezone, and the Deeper Dark each offer unique environments, mobs, and loot.

### The ATM Star

The ATM Star is the endgame goal of ATM10. Crafting it requires progressing deeply into many of the pack's mods and obtaining some of the most difficult materials in the game. It is a long-term challenge that gives the entire playthrough direction and purpose, with creative-tier rewards for those who complete it.

If you'd like to see an interactive ATM Star guide, see our [SiriusMC ATM Star Guide](https://wiki.siriusmc.net/books/modpack-guides-and-tutorials/page/siriusmcs-atm-star-guide-atm10).

## Beginner Tips and Tricks

### Vein Miner (Ultimine)

ATM10 includes the Ultimine mod, commonly referred to as Vein Miner. It allows you to mine multiple blocks of the same type at once, making early resource gathering significantly faster. It also supports mining large 3x3 tunnels or staircases, which is useful for reaching lower Y levels where better materials are found.

### Finding Biomes and Structures

Two compasses make navigation in ATM10 much easier. Nature's Compass lets you search for any biome in the game and points you toward it with a distance readout. Explorer's Compass works the same way but for locating generated structures. Both are cheap to craft and should be made early.

### Early Power Generation

Mekanism wind generators are one of the best early power sources in ATM10. They require no fuel and generate energy passively as long as they are placed. The higher you build them, the more power they produce, so always place them as high as possible. They are an accessible and reliable way to power your early machines before you have the resources for more advanced generation methods.

## Getting Started

[![ATM10 Quest Book](https://siriusmc-bookstack.s3.amazonaws.com/uploads/images/gallery/2025-10/scaled-1680-/8EjfyEQiS6gOxA6X-image.png)](https://siriusmc-bookstack.s3.amazonaws.com/uploads/images/gallery/2025-10/8EjfyEQiS6gOxA6X-image.png)
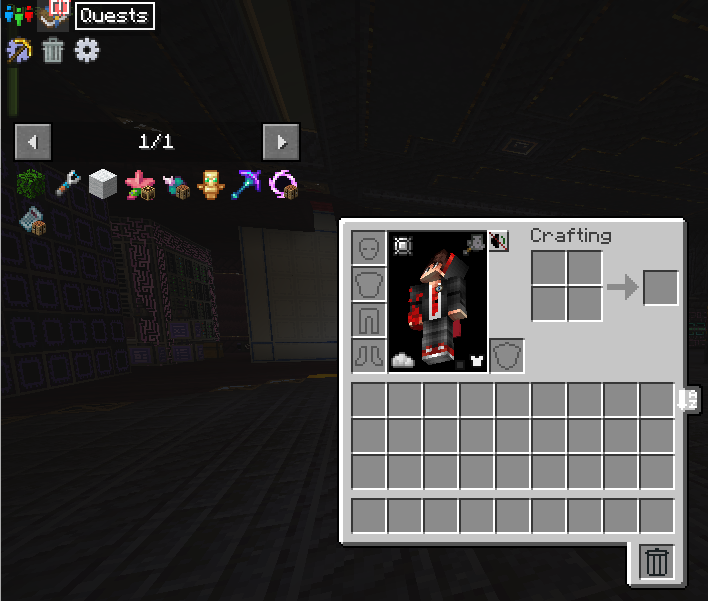
ATM10 can feel overwhelming at first. With hundreds of mods included, knowing where to begin isn't always obvious. The best starting point is the quest book, found in the top-left corner of your inventory screen. It walks you through the pack step by step, introduces the different mods in a structured way, and rewards you for completing each quest to give you a helpful early boost. Following the quest book is the approach we recommend to all new players on SiriusMC.

<table border="1" id="bkmrk-play-style-where-to-" style="border-collapse: collapse; width: 100%; border-style: hidden; hyphens: none;"><tbody><tr style="background-color: #a855a0;"><td style="padding: 6px 10px; overflow: visible; hyphens: none; vertical-align: middle;">**Play style**</td><td style="padding: 6px 10px; overflow: visible; hyphens: none; vertical-align: middle;">**Where to Start**</td></tr><tr><td style="padding: 6px 10px; overflow: visible; hyphens: none; vertical-align: middle;">Technology</td><td style="padding: 6px 10px; overflow: visible; hyphens: none; vertical-align: middle;">Start with Mekanism for early power generation and ore processing, then move into Applied Energistics 2 for storage and autocrafting as your base grows.</td></tr><tr style="background-color: rgba(168, 85, 160, 0.04);"><td style="padding: 6px 10px; overflow: visible; hyphens: none; vertical-align: middle;">Magic</td><td style="padding: 6px 10px; overflow: visible; hyphens: none; vertical-align: middle;">Begin with Ars Nouveau or Botania for accessible early magic progression, then branch into Blood Magic or Mahou Tsukai for more complex and powerful systems.</td></tr><tr><td style="padding: 6px 10px; overflow: visible; hyphens: none; vertical-align: middle;">Exploration</td><td style="padding: 6px 10px; overflow: visible; hyphens: none; vertical-align: middle;">Head into the Twilight Forest early for structured dungeon progression, then work toward the Mining World and other dimensions for unique resources later in the game.</td></tr><tr style="background-color: rgba(168, 85, 160, 0.04);"><td style="padding: 6px 10px; overflow: visible; hyphens: none; vertical-align: middle;">Endgame</td><td style="padding: 6px 10px; overflow: visible; hyphens: none; vertical-align: middle;">Work toward crafting the ATM Star. This requires deep progression across many of the pack's mods and is the ultimate long-term challenge ATM10 has to offer.</td></tr></tbody></table>

To install ATM10 and learn more about banned items, scheduled restarts, and dimension resets, visit the [ATM10 Server Card](https://wiki.siriusmc.net/link/115#bkmrk-allthemods-10-%28atm10).

<p class="callout info">It is recommended to allocate between 8GB and 10GB of RAM for ATM10.</p>

<p class="callout info">SiriusMC bans certain items to protect server performance, the in-game economy, and claimed player bases. Use **/banneditems** in-game to see the full list of banned items on the server, or expand the Banned Items list below.</p>

<details id="bkmrk-banned-items-%E2%96%BC-item-" style="margin-bottom: 10px;"><summary style="background: #fff; border: 2px solid #f90101; border-radius: 10px; padding: 12px 16px; cursor: pointer; list-style: none; display: flex; align-items: center; gap: 10px; font-family: sans-serif;"><span style="flex: 1;">Banned Items</span> <span style="color: #f90101; font-size: 13px; font-weight: bold;">▼</span></summary>

<div style="background: #fff; border: 2px solid #f90101; border-top: none; border-radius: 0 0 10px 10px; padding: 14px 16px;"><div style="display: grid; grid-template-columns: repeat(2,1fr); gap: 7px;"><div style="background: #f5f0ff; border-left: 3px solid #7c3aed; border-radius: 6px; padding: 7px 9px; font-size: 11px; color: #3d2d5a;">Item-based chunk loaders</div><div style="background: #f5f0ff; border-left: 3px solid #7c3aed; border-radius: 6px; padding: 7px 9px; font-size: 11px; color: #3d2d5a;">All tick speed up items</div><div style="background: #f5f0ff; border-left: 3px solid #7c3aed; border-radius: 6px; padding: 7px 9px; font-size: 11px; color: #3d2d5a;">Ender drives</div><div style="background: #f5f0ff; border-left: 3px solid #7c3aed; border-radius: 6px; padding: 7px 9px; font-size: 11px; color: #3d2d5a;">Paradox machine</div><div style="background: #f5f0ff; border-left: 3px solid #7c3aed; border-radius: 6px; padding: 7px 9px; font-size: 11px; color: #3d2d5a;">Explosives</div><div style="background: #f5f0ff; border-left: 3px solid #7c3aed; border-radius: 6px; padding: 7px 9px; font-size: 11px; color: #3d2d5a;">Various Mahou Tsukai staffs</div><div style="background: #f5f0ff; border-left: 3px solid #7c3aed; border-radius: 6px; padding: 7px 9px; font-size: 11px; color: #3d2d5a;">Time/weather manipulation items</div></div></div></details><div id="bkmrk--2" style="margin: 48px 0; text-align: center;">---

</div><table border="0" id="bkmrk-ready-to-play%3F-open-" style="border-collapse: collapse; width: 100%; background: rgba(168,85,160,0.06); border: 1px solid rgba(168,85,160,0.25); border-radius: 6px;"><tbody><tr><td style="padding: 20px 16px; text-align: center; hyphens: none;">Ready to Play?

Open Minecraft, select Multiplayer, and add a new server with the address below.

<span style="display: inline-block; font-family: monospace; font-size: 1.1em; color: #4a1f4a; background: rgba(168,85,160,0.1); border: 1.5px solid rgba(168,85,160,0.45); border-radius: 5px; padding: 8px 22px; letter-spacing: 0.05em;">atm10.siriusmc.net</span>

[Installation guide](https://wiki.siriusmc.net/link/115#bkmrk-installing-a-modpack-1) [Server rules](https://wiki.siriusmc.net/books/the-siriusmc-networks/page/server-rules-siriusmc) [Join Discord](https://discord.gg/siriusmc)

</td></tr></tbody></table>

<table border="1" id="bkmrk-guide-automation-gui" style="border-collapse: collapse; width: 100%; border-style: hidden;"><tbody><tr><td style="padding: 14px 16px; overflow: visible; vertical-align: top; border: 1px solid rgba(168,85,160,0.15);">Guide

[AllTheModium Ores Guide](https://wiki.siriusmc.net/books/modpack-guides-and-tutorials/page/allthemodium-ores-guide-atm10)

ATM10 features a tier progression system of unique ores beyond Netherite. This guide shows you where to find them, and how to use them.

</td><td style="padding: 14px 16px; overflow: visible; vertical-align: top; border: 1px solid rgba(168,85,160,0.15);">Guide

[SiriusMC's ATM Star Guide](https://wiki.siriusmc.net/books/modpack-guides-and-tutorials/page/siriusmcs-atm-star-guide-atm10)

SiriusMC's guide to obtaining the ATM star.

</td><td style="padding: 14px 16px; overflow: visible; vertical-align: top; border: 1px solid rgba(168,85,160,0.15);">Guide

[Mekanism Fission Reactor](https://wiki.siriusmc.net/books/modpack-guides-and-tutorials/page/mekanism-fission-reactor-atm10)

Learn how to build, fuel, and safely maintain a Nuclear Fission Reactor on ATM10.

</td></tr></tbody></table>

# AllTheModium Ores Guide | ATM10

<table border="1" id="bkmrk-" style="border-collapse: collapse; width: 100%; background-color: #332941; border: hidden;"><tbody><tr><td style="text-align: center; padding: 0; height: 200px; overflow: hidden; vertical-align: middle;">[![ATM10](https://siriusmc-bookstack.s3.amazonaws.com/uploads/images/gallery/2026-03/gYU14Co83VJMULpr-atm10-nbg.png)](https://siriusmc-bookstack.s3.amazonaws.com/uploads/images/gallery/2025-12/FGn9brRa8TYnWgFW-embedded-image-0wiqwwh7.png)</td></tr><tr><td style="padding: 10px 16px; text-align: center; background-color: #2e2040; hyphens: none;"><span style="font-family: monospace; font-size: 1em; color: #e0b8e0; letter-spacing: 0.05em; background: rgba(168,85,160,0.2); border: 1.5px solid rgba(168,85,160,0.4); border-radius: 4px; padding: 5px 14px; display: inline-block;">atm10.siriusmc.net</span> <span style="font-size: 0.75em; color: rgba(200,160,200,0.55); display: block; margin-top: 6px; letter-spacing: 0.04em;">Version · 7.0</span></td></tr></tbody></table>

<table border="0" id="bkmrk-atm10-features-a-tie" style="border-collapse: collapse !important; width: 100%; border-left: 4px solid #a855a0; border-top: none; border-right: none; border-bottom: none; background-color: rgba(168, 85, 160, 0.08);"><tbody><tr><td style="padding: 8px 16px; overflow: visible;">ATM10 features a tier progression system of unique ores beyond Netherite, each found in different dimensions and requiring increasingly powerful tools to mine. The progression order is:

**Netherite (Vanilla) ➜ AllTheModium ➜ Vibranium ➜ Unobtainium**

</td></tr></tbody></table>

## AllTheModium

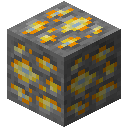
[![AllTheModium ore](https://siriusmc-bookstack.s3.amazonaws.com/uploads/images/gallery/2025-12/scaled-1680-/Fs5zMQXXBkISQk8y-embedded-image-2erfpvmr.png)](https://siriusmc-bookstack.s3.amazonaws.com/uploads/images/gallery/2025-12/Fs5zMQXXBkISQk8y-embedded-image-2erfpvmr.png)

AllTheModium ore can be found in the [Deep Dark](https://minecraft.fandom.com/wiki/Deep_Dark) biome in the Overworld, or in the Mining dimension added by [Aroma1997's Dimensional World](https://www.curseforge.com/minecraft/mc-mods/aroma1997s-dimensional-world). In the Deep Dark, look on the walls and roof of caverns or within [Ancient Cities](https://minecraft.wiki/w/Ancient_City). In the Mining dimension, focus on the [Deepslate layer](https://minecraft.fandom.com/wiki/Deepslate).

<table border="0" id="bkmrk-%E2%93%98-requires-netherite" style="border-collapse: collapse !important; width: 100%; border-left: 4px solid #a855a0; border-top: none; border-right: none; border-bottom: none; background-color: rgba(168, 85, 160, 0.08);"><tbody><tr><td style="padding: 8px 16px; overflow: visible;">ⓘ Requires [Netherite](https://minecraft.fandom.com/wiki/Netherite) quality tools or better to mine.

ⓘ Found in the [Deep Dark](https://minecraft.fandom.com/wiki/Deep_Dark) biome in the Overworld.

ⓘ Found in the Mining dimension at the [Deepslate layer](https://minecraft.fandom.com/wiki/Deepslate).

</td></tr></tbody></table>

### Finding the AllTheModium Smithing Template

Use a [Brush](https://minecraft.fandom.com/wiki/Brush) on [Suspicious Clay](https://minecraft.fandom.com/wiki/Suspicious_Block) blocks inside [Ancient Cities](https://minecraft.wiki/w/Ancient_City). Suspicious Clay looks similar to regular clay but has a slightly different texture.

[![Suspicious Clay](https://siriusmc-bookstack.s3.amazonaws.com/uploads/images/gallery/2026-03/scaled-1680-/XuaSkIAqJcm1WBJv-suspicious-clay.png)](https://siriusmc-bookstack.s3.amazonaws.com/uploads/images/gallery/2026-03/XuaSkIAqJcm1WBJv-suspicious-clay.png)

### Smithing Upgrade

<table border="1" id="bkmrk-slot-item-template-a" style="border-collapse: collapse; width: 100%; border-style: hidden;"><tbody><tr style="background-color: #a855a0;"><td style="padding: 6px 10px; overflow: visible;">**Slot**</td><td style="padding: 6px 10px; overflow: visible;">**Item**</td></tr><tr><td style="padding: 6px 10px; overflow: visible;">Template</td><td style="padding: 6px 10px; overflow: visible;">AllTheModium Smithing Template</td></tr><tr style="background-color: rgba(168, 85, 160, 0.04);"><td style="padding: 6px 10px; overflow: visible;">Gear</td><td style="padding: 6px 10px; overflow: visible;">Netherite tool or armour piece</td></tr><tr><td style="padding: 6px 10px; overflow: visible;">Material</td><td style="padding: 6px 10px; overflow: visible;">AllTheModium Ingot</td></tr></tbody></table>

![AllTheModium smithing recipe](https://siriusmc-bookstack.s3.amazonaws.com/uploads/images/gallery/2026-03/kXd4LZRZPGG6a2Na-image.png)

### Duplicating the Template

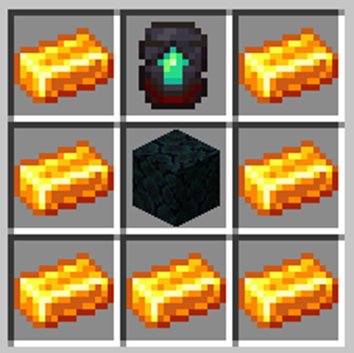
<table border="1" id="bkmrk-ingredient-amount-al" style="border-collapse: collapse; width: 100%; border-style: hidden;"><tbody><tr style="background-color: #a855a0;"><td style="padding: 6px 10px; overflow: visible;">**Ingredient**</td><td style="padding: 6px 10px; overflow: visible;">**Amount**</td></tr><tr><td style="padding: 6px 10px; overflow: visible;">AllTheModium Smithing Template</td><td style="padding: 6px 10px; overflow: visible;">1</td></tr><tr style="background-color: rgba(168, 85, 160, 0.04);"><td style="padding: 6px 10px; overflow: visible;">Netherite Ingot</td><td style="padding: 6px 10px; overflow: visible;">7</td></tr><tr><td style="padding: 6px 10px; overflow: visible;">Deepslate</td><td style="padding: 6px 10px; overflow: visible;">1</td></tr></tbody></table>

![AllTheModium template duplication recipe](https://siriusmc-bookstack.s3.amazonaws.com/uploads/images/gallery/2026-03/f9IcaU5udGCNImvF-image.png)

## Vibranium

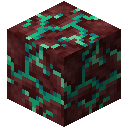
[![Vibranium ore](https://siriusmc-bookstack.s3.amazonaws.com/uploads/images/gallery/2025-12/scaled-1680-/CZ5wYVKAHCpyfFMV-embedded-image-ld04ur6d.png)](https://siriusmc-bookstack.s3.amazonaws.com/uploads/images/gallery/2025-12/CZ5wYVKAHCpyfFMV-embedded-image-ld04ur6d.png)

Vibranium ore can only be found in the [Crimson Forest](https://minecraft.fandom.com/wiki/Crimson_Forest) and [Warped Forest](https://minecraft.fandom.com/wiki/Warped_Forest) biomes of the Nether. The Crimson Forest is characterised by red fungi and hoglins, while the Warped Forest is teal-coloured and generally safer to explore. Vibranium spawns at high Y altitudes; look near the Nether ceiling rather than the floor.

<table border="0" id="bkmrk-%E2%93%98-requires-allthemod" style="border-collapse: collapse !important; width: 100%; border-left: 4px solid #a855a0; border-top: none; border-right: none; border-bottom: none; background-color: rgba(168, 85, 160, 0.08);"><tbody><tr><td style="padding: 8px 16px; overflow: visible;">ⓘ Requires AllTheModium quality tools or better to mine.

ⓘ Found in the [Crimson Forest](https://minecraft.fandom.com/wiki/Crimson_Forest) and [Warped Forest](https://minecraft.fandom.com/wiki/Warped_Forest) biomes of the Nether.

ⓘ Spawns at high Y altitudes, normally near the ceiling.

</td></tr></tbody></table>

### Finding the Vibranium Smithing Template

Use a Brush on [Suspicious Soul Sand](https://minecraft.fandom.com/wiki/Suspicious_Block) inside [Bastion Remnants](https://minecraft.fandom.com/wiki/Bastion_Remnant) in the Nether. Bastions are large blackstone fortress structures home to Piglins and Piglin Brutes. Bring gold armour to avoid aggravating the Piglins. Suspicious Soul Sand can be found on the floors and in treasure rooms.

[![Suspicious Soul Sand](https://siriusmc-bookstack.s3.amazonaws.com/uploads/images/gallery/2026-03/scaled-1680-/o0Ob8sQFVspn3RCs-suspicious-soul-sand.png)](https://siriusmc-bookstack.s3.amazonaws.com/uploads/images/gallery/2026-03/o0Ob8sQFVspn3RCs-suspicious-soul-sand.png)

### Smithing Upgrade

<table border="1" id="bkmrk-slot-item-template-v" style="border-collapse: collapse; width: 100%; border-style: hidden;"><tbody><tr style="background-color: #a855a0;"><td style="padding: 6px 10px; overflow: visible;">**Slot**</td><td style="padding: 6px 10px; overflow: visible;">**Item**</td></tr><tr><td style="padding: 6px 10px; overflow: visible;">Template</td><td style="padding: 6px 10px; overflow: visible;">Vibranium Smithing Template</td></tr><tr style="background-color: rgba(168, 85, 160, 0.04);"><td style="padding: 6px 10px; overflow: visible;">Gear</td><td style="padding: 6px 10px; overflow: visible;">AllTheModium tool or armour piece</td></tr><tr><td style="padding: 6px 10px; overflow: visible;">Material</td><td style="padding: 6px 10px; overflow: visible;">Vibranium Ingot</td></tr></tbody></table>

![Vibranium smithing recipe](https://siriusmc-bookstack.s3.amazonaws.com/uploads/images/gallery/2026-03/SErUyZaRVpfXiMLS-image.png)

### Duplicating the Template

<table border="1" id="bkmrk-ingredient-amount-vi" style="border-collapse: collapse; width: 100%; border-style: hidden;"><tbody><tr style="background-color: #a855a0;"><td style="padding: 6px 10px; overflow: visible;">**Ingredient**</td><td style="padding: 6px 10px; overflow: visible;">**Amount**</td></tr><tr><td style="padding: 6px 10px; overflow: visible;">Vibranium Smithing Template</td><td style="padding: 6px 10px; overflow: visible;">1</td></tr><tr style="background-color: rgba(168, 85, 160, 0.04);"><td style="padding: 6px 10px; overflow: visible;">AllTheModium Ingot</td><td style="padding: 6px 10px; overflow: visible;">7</td></tr><tr><td style="padding: 6px 10px; overflow: visible;">Ancient Stone</td><td style="padding: 6px 10px; overflow: visible;">1</td></tr></tbody></table>

![Vibranium template duplication recipe](https://siriusmc-bookstack.s3.amazonaws.com/uploads/images/gallery/2026-03/P2nPpg7QQ7IrtafD-image.png)

## Unobtainium

[![Unobtainium ore](https://siriusmc-bookstack.s3.amazonaws.com/uploads/images/gallery/2025-12/scaled-1680-/5PB4PMjcwcgcmWzx-embedded-image-tldvy4e7.png)](https://siriusmc-bookstack.s3.amazonaws.com/uploads/images/gallery/2025-12/5PB4PMjcwcgcmWzx-embedded-image-tldvy4e7.png)

Unobtainium ore can only be found in the [End Highlands](https://minecraft.fandom.com/wiki/The_End_(biome)#End_highlands), the outer islands of The End dimension. To reach the outer islands, travel through the End Gateway portal that appears after defeating the Ender Dragon, or fly away from the main island. The Highlands biome is identifiable by its elevated terrain and chorus plants. Unobtainium spawns within the island's crust at any Y level, so you can find it by searching on the surface.

<table border="0" id="bkmrk-%E2%93%98-requires-vibranium" style="border-collapse: collapse !important; width: 100%; border-left: 4px solid #a855a0; border-top: none; border-right: none; border-bottom: none; background-color: rgba(168, 85, 160, 0.08);"><tbody><tr><td style="padding: 8px 16px; overflow: visible;">ⓘ Requires Vibranium quality tools or better to mine.

ⓘ Found in the [Highlands biome](https://minecraft.fandom.com/wiki/The_End_(biome)#End_highlights) within [The End](https://minecraft.fandom.com/wiki/The_End).

ⓘ Spawns within the island's crust at any Y level.

</td></tr></tbody></table>

### Finding the Unobtainium Smithing Template

Loot chests within the **Library of Dungeons**, large underground dungeon structures found in The Other dimension. Explore thoroughly as chests can be spread across multiple rooms within the structure.

### Smithing Upgrade

<table border="1" id="bkmrk-slot-item-template-u" style="border-collapse: collapse; width: 100%; border-style: hidden;"><tbody><tr style="background-color: #a855a0;"><td style="padding: 6px 10px; overflow: visible;">**Slot**</td><td style="padding: 6px 10px; overflow: visible;">**Item**</td></tr><tr><td style="padding: 6px 10px; overflow: visible;">Template</td><td style="padding: 6px 10px; overflow: visible;">Unobtainium Smithing Template</td></tr><tr style="background-color: rgba(168, 85, 160, 0.04);"><td style="padding: 6px 10px; overflow: visible;">Gear</td><td style="padding: 6px 10px; overflow: visible;">Vibranium tool or armour piece</td></tr><tr><td style="padding: 6px 10px; overflow: visible;">Material</td><td style="padding: 6px 10px; overflow: visible;">Unobtainium Ingot</td></tr></tbody></table>

![Unobtainium smithing recipe](https://siriusmc-bookstack.s3.amazonaws.com/uploads/images/gallery/2026-03/J5mQbiq4Dgs8v3yY-image.png)

### Duplicating the Template

<table border="1" id="bkmrk-ingredient-amount-un" style="border-collapse: collapse; width: 100%; border-style: hidden;"><tbody><tr style="background-color: #a855a0;"><td style="padding: 6px 10px; overflow: visible;">**Ingredient**</td><td style="padding: 6px 10px; overflow: visible;">**Amount**</td></tr><tr><td style="padding: 6px 10px; overflow: visible;">Unobtainium Smithing Template</td><td style="padding: 6px 10px; overflow: visible;">1</td></tr><tr style="background-color: rgba(168, 85, 160, 0.04);"><td style="padding: 6px 10px; overflow: visible;">Vibranium Ingot</td><td style="padding: 6px 10px; overflow: visible;">7</td></tr><tr><td style="padding: 6px 10px; overflow: visible;">End Stone</td><td style="padding: 6px 10px; overflow: visible;">1</td></tr></tbody></table>

![Unobtainium template duplication recipe](https://siriusmc-bookstack.s3.amazonaws.com/uploads/images/gallery/2026-03/HjwqWgIQecXrivHj-image.png)

## Other Methods of Obtaining These Ores

**Method A: Laser Drills**  
Using [Laser Drills](https://ftb.fandom.com/wiki/Laser_Drill_(Industrial_Foregoing)) and [Laser Bases](https://ftb.fandom.com/wiki/Laser_Base) from [Industrial Foregoing](https://ftb.fandom.com/wiki/Industrial_Foregoing) with the correct [Laser Lens](https://ftb.fandom.com/wiki/Laser_Lens_(Industrial_Foregoing)) in the correct biomes can generate the respective ore for that biome.

**Method B: Mystical Agriculture**  
Seeds from [Mystical Agriculture](https://ftb.fandom.com/wiki/Mystical_Agriculture) can produce [Essence](https://ftb.fandom.com/wiki/Category:Mystical_Agriculture) of these ores, which can then be converted into ingots.

**Method C: Productive Bees**  
Bees from the [Productive Bees](https://www.curseforge.com/minecraft/mc-mods/productivebees) mod can produce combs of these ores, which can be converted into ingots using a centrifuge.

<table border="1" id="bkmrk-guide-automation-gui" style="border-collapse: collapse; width: 100%; border-style: hidden;"><tbody><tr><td style="padding: 14px 16px; overflow: visible; vertical-align: top; border: 1px solid rgba(168,85,160,0.15);">Guide

[SiriusMC's ATM Star Guide](https://wiki.siriusmc.net/books/modpack-guides-and-tutorials/page/siriusmcs-atm-star-guide-atm10)

SiriusMC's guide to obtaining the ATM star.

</td><td style="padding: 14px 16px; overflow: visible; vertical-align: top; border: 1px solid rgba(168,85,160,0.15);">Guide

[Mekanism Fission Reactor](https://wiki.siriusmc.net/books/modpack-guides-and-tutorials/page/mekanism-fission-reactor-atm10)

A helpful guide on creating a fission reactor from the mod Mekanism.

</td><td style="padding: 14px 16px; overflow: visible; vertical-align: top; border: 1px solid rgba(168,85,160,0.15);">Introduction

[Introduction](https://wiki.siriusmc.net/books/modpack-guides-and-tutorials/page/introduction-atm10)

An introduction into ATM10, including how to get started and what mods are featured.

</td></tr></tbody></table>

# SiriusMC's ATM Star Guide | ATM10

<table border="0" id="bkmrk-this-guide-covers-th" style="border-collapse: collapse !important; width: 100%; border-left: 4px solid #a855a0; border-top: none; border-right: none; border-bottom: none; background-color: rgba(168, 85, 160, 0.08);"><tbody><tr><td style="padding: 8px 16px; overflow: visible; hyphens: none;">This guide covers the complete ATM Star recipe for All the Mods 10 (ATM10). The ATM Star is the endgame item crafted at the Runic Star Altar, requiring 8 unique components and 3 ATM Alloys sourced from dozens of mods. Use the interactive guide below to see every ingredient for each component.

</td></tr></tbody></table>

<div id="bkmrk-atm-star-crafting-gu" style="background: #f4f1fb; border-radius: 16px; padding: 24px; max-width: 900px; font-family: sans-serif;"><div style="text-align: center; margin-bottom: 24px;"><div style="font-size: 40px; margin-bottom: 6px;">[![ATMSTAR.png](https://siriusmc-bookstack.s3.amazonaws.com/uploads/images/gallery/2026-03/scaled-1680-/dfyUBZnv30kXCTwg-atmstar.png)](https://siriusmc-bookstack.s3.amazonaws.com/uploads/images/gallery/2026-03/dfyUBZnv30kXCTwg-atmstar.png)</div><div style="font-size: 22px; font-weight: bold; color: #2d1f4a; margin-bottom: 4px;">ATM Star Crafting Guide</div><div style="font-size: 13px; color: #7c5cbf;">All the Mods 10 — Crafted at the Runic Star Altar</div><div style="font-size: 11px; color: #a89cc8; margin-top: 4px;">Expand each component below to see its ingredients by clicking on the card</div></div><details style="margin-bottom: 10px;"><summary style="background: #fff; border: 2px solid #7c3aed; border-radius: 10px; padding: 12px 16px; cursor: pointer; list-style: none; display: flex; align-items: center; gap: 10px; font-family: sans-serif;">![](https://siriusmc-bookstack.s3.amazonaws.com/uploads/images/gallery/2026-03/d7LbVIa5S3cGItvT-dragon-soul.png) <span style="flex: 1;">Dragon Soul</span> <span style="color: #7c3aed; font-size: 13px; font-weight: bold;">▼</span></summary>

<div style="background: #fff; border: 2px solid #7c3aed; border-top: none; border-radius: 0 0 10px 10px; padding: 14px 16px;"><div style="display: grid; grid-template-columns: repeat(2,1fr); gap: 7px;"><div style="background: #f5f0ff; border-left: 3px solid #7c3aed; border-radius: 6px; padding: 7px 9px; font-size: 11px; color: #3d2d5a;">Apothic Enchanting · Infused Breath</div><div style="background: #f5f0ff; border-left: 3px solid #7c3aed; border-radius: 6px; padding: 7px 9px; font-size: 11px; color: #3d2d5a;">Occultism · Soul Gem</div><div style="background: #f5f0ff; border-left: 3px solid #7c3aed; border-radius: 6px; padding: 7px 9px; font-size: 11px; color: #3d2d5a;">Occultism · Familiar Dragon Spawn Egg</div><div style="background: #f5f0ff; border-left: 3px solid #7c3aed; border-radius: 6px; padding: 7px 9px; font-size: 11px; color: #3d2d5a;">Productive Trees · Socotra Dragon Sapling</div><div style="background: #f5f0ff; border-left: 3px solid #7c3aed; border-radius: 6px; padding: 7px 9px; font-size: 11px; color: #3d2d5a;">Hostile Networks · Ender Dragon Data Model</div><div style="background: #f5f0ff; border-left: 3px solid #7c3aed; border-radius: 6px; padding: 7px 9px; font-size: 11px; color: #3d2d5a;">Allthemodium · Piglich Heart Block</div><div style="background: #f5f0ff; border-left: 3px solid #7c3aed; border-radius: 6px; padding: 7px 9px; font-size: 11px; color: #3d2d5a;">Productive Bees · Soul Lava Bee Spawn Egg</div><div style="background: #f5f0ff; border-left: 3px solid #7c3aed; border-radius: 6px; padding: 7px 9px; font-size: 11px; color: #3d2d5a;">Cataclysm · Abyssal Sacrifice</div><div style="background: #f5f0ff; border-left: 3px solid #7c3aed; border-radius: 6px; padding: 7px 9px; font-size: 11px; color: #3d2d5a;">Eternal Starlight · Chain of Souls</div></div></div></details><details style="margin-bottom: 10px;"><summary style="background: #fff; border: 2px solid #7c3aed; border-radius: 10px; padding: 12px 16px; cursor: pointer; list-style: none; display: flex; align-items: center; gap: 10px; font-family: sans-serif;">![](https://siriusmc-bookstack.s3.amazonaws.com/uploads/images/gallery/2026-03/rLEEEK0ElTuNFZCy-improbable-probability-device.png) <span style="flex: 1;">Improbable Probability Device</span> <span style="color: #7c3aed; font-size: 13px; font-weight: bold;">▼</span></summary>

<div style="background: #fff; border: 2px solid #0891b2; border-top: none; border-radius: 0 0 10px 10px; padding: 14px 16px;"><div style="display: grid; grid-template-columns: repeat(2,1fr); gap: 7px;"><div style="background: #f0faff; border-left: 3px solid #0891b2; border-radius: 6px; padding: 7px 9px; font-size: 11px; color: #3d2d5a;">Mekanism · Antimatter Pellet</div><div style="background: #f0faff; border-left: 3px solid #0891b2; border-radius: 6px; padding: 7px 9px; font-size: 11px; color: #3d2d5a;">AE2 · Singularity</div><div style="background: #f0faff; border-left: 3px solid #0891b2; border-radius: 6px; padding: 7px 9px; font-size: 11px; color: #3d2d5a;">Megacells · 256m Portable Item Cell</div><div style="background: #f0faff; border-left: 3px solid #0891b2; border-radius: 6px; padding: 7px 9px; font-size: 11px; color: #3d2d5a;">Pneumaticcraft · Aerial Interface</div><div style="background: #f0faff; border-left: 3px solid #0891b2; border-radius: 6px; padding: 7px 9px; font-size: 11px; color: #3d2d5a;">Iron Furnaces · Million Furnace</div><div style="background: #f0faff; border-left: 3px solid #0891b2; border-radius: 6px; padding: 7px 9px; font-size: 11px; color: #3d2d5a;">Iron's Spellbooks · Lightning Upgrade Orb</div></div></div></details><details style="margin-bottom: 10px;"><summary style="background: #fff; border: 2px solid #7c3aed; border-radius: 10px; padding: 12px 16px; cursor: pointer; list-style: none; display: flex; align-items: center; gap: 10px; font-family: sans-serif;">![](https://siriusmc-bookstack.s3.amazonaws.com/uploads/images/gallery/2026-03/v0BVLDPnMTSxS7eb-dimensional-seed.png) <span style="flex: 1;">Dimensional Seed</span> <span style="color: #7c3aed; font-size: 13px; font-weight: bold;">▼</span></summary>

<div style="background: #fff; border: 2px solid #059669; border-top: none; border-radius: 0 0 10px 10px; padding: 14px 16px;"><div style="display: grid; grid-template-columns: repeat(2,1fr); gap: 7px; margin-bottom: 12px;"><div style="background: #f0fdf4; border-left: 3px solid #059669; border-radius: 6px; padding: 7px 9px; font-size: 11px; color: #3d2d5a;">Allthecompressed · Netherrack x6</div><div style="background: #f0fdf4; border-left: 3px solid #059669; border-radius: 6px; padding: 7px 9px; font-size: 11px; color: #3d2d5a;">Allthecompressed · Dirt x6</div><div style="background: #f0fdf4; border-left: 3px solid #059669; border-radius: 6px; padding: 7px 9px; font-size: 11px; color: #3d2d5a;">Allthecompressed · Obsidian x5</div><div style="background: #f0fdf4; border-left: 3px solid #059669; border-radius: 6px; padding: 7px 9px; font-size: 11px; color: #3d2d5a;">Miniature Exit</div><div style="background: #f0fdf4; border-left: 3px solid #059669; border-radius: 6px; padding: 7px 9px; font-size: 11px; color: #3d2d5a;">Miniature Nether</div><div style="background: #f0fdf4; border-left: 3px solid #059669; border-radius: 6px; padding: 7px 9px; font-size: 11px; color: #3d2d5a;">Miniature End</div><div style="background: #f0fdf4; border-left: 3px solid #059669; border-radius: 6px; padding: 7px 9px; font-size: 11px; color: #3d2d5a;">Allthecompressed · End Stone x5</div><div style="background: #f0fdf4; border-left: 3px solid #059669; border-radius: 6px; padding: 7px 9px; font-size: 11px; color: #3d2d5a;">Allthecompressed · Emerald Block x4</div><div style="background: #f0fdf4; border-left: 3px solid #059669; border-radius: 6px; padding: 7px 9px; font-size: 11px; color: #3d2d5a;">Allthecompressed · Diamond Block x4</div></div><div style="font-size: 11px; font-weight: bold; color: #059669; margin-bottom: 8px;">Sub-components: Miniature Portals</div><div style="display: flex; flex-direction: column; gap: 7px;"><div style="background: #f0fdf4; border: 1px solid #059669; border-radius: 8px; padding: 9px;"><div style="font-size: 10px; font-weight: bold; color: #2d1f4a; margin-bottom: 5px;">![](https://siriusmc-bookstack.s3.amazonaws.com/uploads/images/gallery/2026-03/j6I1QSZc3XFPKci2-minature-nether.png)Miniature Nether</div><div style="font-size: 10px; color: #4a3a6a;">→ Obsidian</div><div style="font-size: 10px; color: #4a3a6a;">→ Nether Star</div><div style="font-size: 10px; color: #4a3a6a;">→ Hellshelf of Masterful Sight</div><div style="font-size: 10px; color: #4a3a6a;">→ Wither Skeleton Skull</div><div style="font-size: 10px; color: #4a3a6a;">→ Warped Nylium</div></div><div style="background: #f0fdf4; border: 1px solid #059669; border-radius: 8px; padding: 9px;"><div style="font-size: 10px; font-weight: bold; color: #2d1f4a; margin-bottom: 5px;">![](https://siriusmc-bookstack.s3.amazonaws.com/uploads/images/gallery/2026-03/SnazngytLbQjBUDb-minature-end.png)Miniature End</div><div style="font-size: 10px; color: #4a3a6a;">→ Apothic Enchanting Endshelf</div><div style="font-size: 10px; color: #4a3a6a;">→ Ender Eye</div><div style="font-size: 10px; color: #4a3a6a;">→ Apothic Enchanting Draconic Endshelf</div></div><div style="background: #f0fdf4; border: 1px solid #059669; border-radius: 8px; padding: 9px;"><div style="font-size: 10px; font-weight: bold; color: #2d1f4a; margin-bottom: 5px;">![](https://siriusmc-bookstack.s3.amazonaws.com/uploads/images/gallery/2026-03/qUtoM3hq6SUK4NeE-minature-exit.png)Miniature Exit</div><div style="font-size: 10px; color: #4a3a6a;">→ Dragon Egg</div><div style="font-size: 10px; color: #4a3a6a;">→ Apothic Enchanting Infused Breath</div><div style="font-size: 10px; color: #4a3a6a;">→ Soul Touched Sculkshelf</div><div style="font-size: 10px; color: #4a3a6a;">→ End Crystal</div></div></div></div></details><details style="margin-bottom: 10px;"><summary style="background: #fff; border: 2px solid #7c3aed; border-radius: 10px; padding: 12px 16px; cursor: pointer; list-style: none; display: flex; align-items: center; gap: 10px; font-family: sans-serif;">![](https://siriusmc-bookstack.s3.amazonaws.com/uploads/images/gallery/2026-03/vSejCngiarMl4ItS-withers-compass.png) <span style="flex: 1;">Wither's Compass</span> <span style="color: #7c3aed; font-size: 13px; font-weight: bold;">▼</span></summary>

<div style="background: #fff; border: 2px solid #dc2626; border-top: none; border-radius: 0 0 10px 10px; padding: 14px 16px;"><div style="display: grid; grid-template-columns: repeat(2,1fr); gap: 7px;"><div style="background: #fff5f5; border-left: 3px solid #dc2626; border-radius: 6px; padding: 7px 9px; font-size: 11px; color: #3d2d5a;">Productive Bees · Withered Configurable Comb</div><div style="background: #fff5f5; border-left: 3px solid #dc2626; border-radius: 6px; padding: 7px 9px; font-size: 11px; color: #3d2d5a;">Industrial Foregoing · Wither Builder</div><div style="background: #fff5f5; border-left: 3px solid #dc2626; border-radius: 6px; padding: 7px 9px; font-size: 11px; color: #3d2d5a;">Deeper Darker · Heart of the Deep</div><div style="background: #fff5f5; border-left: 3px solid #dc2626; border-radius: 6px; padding: 7px 9px; font-size: 11px; color: #3d2d5a;">Generator Galore · Netherstar Generator x64</div><div style="background: #fff5f5; border-left: 3px solid #dc2626; border-radius: 6px; padding: 7px 9px; font-size: 11px; color: #3d2d5a;">Iron's Spellbooks · Wither Skull Scroll</div><div style="background: #fff5f5; border-left: 3px solid #dc2626; border-radius: 6px; padding: 7px 9px; font-size: 11px; color: #3d2d5a;">Mystical Agriculture · Witherproof Bricks</div><div style="background: #fff5f5; border-left: 3px solid #dc2626; border-radius: 6px; padding: 7px 9px; font-size: 11px; color: #3d2d5a;">Tipped Arrow (Wither Potion)</div><div style="background: #fff5f5; border-left: 3px solid #dc2626; border-radius: 6px; padding: 7px 9px; font-size: 11px; color: #3d2d5a;">Ars Nouveau · Wither Glyph</div><div style="background: #fff5f5; border-left: 3px solid #dc2626; border-radius: 6px; padding: 7px 9px; font-size: 11px; color: #3d2d5a;">Mystical Agradditions · Nether Star Crux</div></div></div></details><details style="margin-bottom: 10px;"><summary style="background: #fff; border: 2px solid #7c3aed; border-radius: 10px; padding: 12px 16px; cursor: pointer; list-style: none; display: flex; align-items: center; gap: 10px; font-family: sans-serif;">![](https://siriusmc-bookstack.s3.amazonaws.com/uploads/images/gallery/2026-03/oRDsQzIiT8RE2Q7n-philosophers-fuel.png) <span style="flex: 1;">Philosopher's Fuel</span> <span style="color: #7c3aed; font-size: 13px; font-weight: bold;">▼</span></summary>

<div style="background: #fff; border: 2px solid #d97706; border-top: none; border-radius: 0 0 10px 10px; padding: 14px 16px;"><div style="display: grid; grid-template-columns: repeat(2,1fr); gap: 7px;"><div style="background: #fffbf0; border-left: 3px solid #d97706; border-radius: 6px; padding: 7px 9px; font-size: 11px; color: #3d2d5a;">Generator Galore · Ender Generator</div><div style="background: #fffbf0; border-left: 3px solid #d97706; border-radius: 6px; padding: 7px 9px; font-size: 11px; color: #3d2d5a;">Iron Furnaces · Rainbow Coal</div><div style="background: #fffbf0; border-left: 3px solid #d97706; border-radius: 6px; padding: 7px 9px; font-size: 11px; color: #3d2d5a;">Big Reactors · Insanite Block</div><div style="background: #fffbf0; border-left: 3px solid #d97706; border-radius: 6px; padding: 7px 9px; font-size: 11px; color: #3d2d5a;">Modern Industrialization · Uranium Fuel Rod Quad</div><div style="background: #fffbf0; border-left: 3px solid #d97706; border-radius: 6px; padding: 7px 9px; font-size: 11px; color: #3d2d5a;">Mystical Agradditions · Insanium Coal Block</div><div style="background: #fffbf0; border-left: 3px solid #d97706; border-radius: 6px; padding: 7px 9px; font-size: 11px; color: #3d2d5a;">Forbidden Arcanus · Smelter Prism</div><div style="background: #fffbf0; border-left: 3px solid #d97706; border-radius: 6px; padding: 7px 9px; font-size: 11px; color: #3d2d5a;">Mystical Agriculture · Awakened Supremium Ingot Block</div><div style="background: #fffbf0; border-left: 3px solid #d97706; border-radius: 6px; padding: 7px 9px; font-size: 11px; color: #3d2d5a;">Generator Galore · Magmatic Generator x64</div><div style="background: #fffbf0; border-left: 3px solid #d97706; border-radius: 6px; padding: 7px 9px; font-size: 11px; color: #3d2d5a;">Evil Craft · Dark Tank + JDT Refined T4 Fluid Source</div></div></div></details><details style="margin-bottom: 10px;"><summary style="background: #fff; border: 2px solid #7c3aed; border-radius: 10px; padding: 12px 16px; cursor: pointer; list-style: none; display: flex; align-items: center; gap: 10px; font-family: sans-serif;">![](https://siriusmc-bookstack.s3.amazonaws.com/uploads/images/gallery/2026-03/uhrkEXGRNOfwKwxO-nexius-emitter.png) <span style="flex: 1;">Nexium Emitter</span> <span style="color: #7c3aed; font-size: 13px; font-weight: bold;">▼</span></summary>

<div style="background: #fff; border: 2px solid #2563eb; border-top: none; border-radius: 0 0 10px 10px; padding: 14px 16px;"><div style="display: grid; grid-template-columns: repeat(2,1fr); gap: 7px;"><div style="background: #eff6ff; border-left: 3px solid #2563eb; border-radius: 6px; padding: 7px 9px; font-size: 11px; color: #3d2d5a;">Powah · Nitro Player Transmitter</div><div style="background: #eff6ff; border-left: 3px solid #2563eb; border-radius: 6px; padding: 7px 9px; font-size: 11px; color: #3d2d5a;">AE2 · Wireless Universal Terminal</div><div style="background: #eff6ff; border-left: 3px solid #2563eb; border-radius: 6px; padding: 7px 9px; font-size: 11px; color: #3d2d5a;">Mekanism · Gravitational Modulating Unit Module</div><div style="background: #eff6ff; border-left: 3px solid #2563eb; border-radius: 6px; padding: 7px 9px; font-size: 11px; color: #3d2d5a;">Modern Industrialization · Large Advanced Motor</div><div style="background: #eff6ff; border-left: 3px solid #2563eb; border-radius: 6px; padding: 7px 9px; font-size: 11px; color: #3d2d5a;">Immersive Engineering · Tesla Coil</div><div style="background: #eff6ff; border-left: 3px solid #2563eb; border-radius: 6px; padding: 7px 9px; font-size: 11px; color: #3d2d5a;">Advanced AE · Quantum Multi Threader</div><div style="background: #eff6ff; border-left: 3px solid #2563eb; border-radius: 6px; padding: 7px 9px; font-size: 11px; color: #3d2d5a;">AE · Infinity Booster Infinity Card</div></div></div></details><details style="margin-bottom: 10px;"><summary style="background: #fff; border: 2px solid #7c3aed; border-radius: 10px; padding: 12px 16px; cursor: pointer; list-style: none; display: flex; align-items: center; gap: 10px; font-family: sans-serif;">![](https://siriusmc-bookstack.s3.amazonaws.com/uploads/images/gallery/2026-03/fvf8oJGPBnoxZgj9-oblivion-shard.png) <span style="flex: 1;">Oblivion Shard</span> <span style="color: #7c3aed; font-size: 13px; font-weight: bold;">▼</span></summary>

<div style="background: #fff; border: 2px solid #be123c; border-top: none; border-radius: 0 0 10px 10px; padding: 14px 16px;"><div style="display: grid; grid-template-columns: repeat(2,1fr); gap: 7px;"><div style="background: #fff1f2; border-left: 3px solid #be123c; border-radius: 6px; padding: 7px 9px; font-size: 11px; color: #3d2d5a;">Forbidden Arcanus · Eternal Stella</div><div style="background: #fff1f2; border-left: 3px solid #be123c; border-radius: 6px; padding: 7px 9px; font-size: 11px; color: #3d2d5a;">Evil Craft · Mace of Destruction (with Blood)</div><div style="background: #fff1f2; border-left: 3px solid #be123c; border-radius: 6px; padding: 7px 9px; font-size: 11px; color: #3d2d5a;">Evil Craft · Piercing Vengeance Focus</div><div style="background: #fff1f2; border-left: 3px solid #be123c; border-radius: 6px; padding: 7px 9px; font-size: 11px; color: #3d2d5a;">Steve's Carts · Galgadorian Drill</div><div style="background: #fff1f2; border-left: 3px solid #be123c; border-radius: 6px; padding: 7px 9px; font-size: 11px; color: #3d2d5a;">Cataclysm · Meat Shredder</div><div style="background: #fff1f2; border-left: 3px solid #be123c; border-radius: 6px; padding: 7px 9px; font-size: 11px; color: #3d2d5a;">Twilight Forest · Snow Queen Trophy</div><div style="background: #fff1f2; border-left: 3px solid #be123c; border-radius: 6px; padding: 7px 9px; font-size: 11px; color: #3d2d5a;">Cataclysm · Void Forge</div></div></div></details><details style="margin-bottom: 16px;"><summary style="background: #fff; border: 2px solid #7c3aed; border-radius: 10px; padding: 12px 16px; cursor: pointer; list-style: none; display: flex; align-items: center; gap: 10px; font-family: sans-serif;">![](https://siriusmc-bookstack.s3.amazonaws.com/uploads/images/gallery/2026-03/0TSLXuzyDjqzRobH-pulsating-black-hole.png) <span style="flex: 1;">Pulsating Black Hole</span> <span style="color: #7c3aed; font-size: 13px; font-weight: bold;">▼</span></summary>

<div style="background: #fff; border: 2px solid #6d28d9; border-top: none; border-radius: 0 0 10px 10px; padding: 14px 16px;"><div style="display: grid; grid-template-columns: repeat(2,1fr); gap: 7px;"><div style="background: #f5f3ff; border-left: 3px solid #6d28d9; border-radius: 6px; padding: 7px 9px; font-size: 11px; color: #3d2d5a;">Iron's Spellbooks · Fire Upgrade Orb</div><div style="background: #f5f3ff; border-left: 3px solid #6d28d9; border-radius: 6px; padding: 7px 9px; font-size: 11px; color: #3d2d5a;">AE2 · Quantum Ring</div><div style="background: #f5f3ff; border-left: 3px solid #6d28d9; border-radius: 6px; padding: 7px 9px; font-size: 11px; color: #3d2d5a;">Pneumaticcraft · Micromissiles</div><div style="background: #f5f3ff; border-left: 3px solid #6d28d9; border-radius: 6px; padding: 7px 9px; font-size: 11px; color: #3d2d5a;">Just Dire Things · Paradox Machine</div><div style="background: #f5f3ff; border-left: 3px solid #6d28d9; border-radius: 6px; padding: 7px 9px; font-size: 11px; color: #3d2d5a;">Pocket Storage · PSU 4</div><div style="background: #f5f3ff; border-left: 3px solid #6d28d9; border-radius: 6px; padding: 7px 9px; font-size: 11px; color: #3d2d5a;">Occultism · Stable Wormhole</div><div style="background: #f5f3ff; border-left: 3px solid #6d28d9; border-radius: 6px; padding: 7px 9px; font-size: 11px; color: #3d2d5a;">Roots Classic · Crystal Staff</div><div style="background: #f5f3ff; border-left: 3px solid #6d28d9; border-radius: 6px; padding: 7px 9px; font-size: 11px; color: #3d2d5a;">Industrial Foregoing · Mycelial Explosive</div><div style="background: #f5f3ff; border-left: 3px solid #6d28d9; border-radius: 6px; padding: 7px 9px; font-size: 11px; color: #3d2d5a;">Evil Craft · Lightning Bomb</div></div></div></details><div style="display: flex; flex-direction: column; align-items: center; margin: 4px 0 12px;"><div style="width: 2px; height: 28px; background: #a78bfa;">  
</div><div style="width: 0; height: 0; border-left: 7px solid transparent; border-right: 7px solid transparent; border-top: 11px solid #a78bfa;">  
</div></div><div style="background: #f0ebff; border: 2px solid #7c3aed; border-radius: 12px; padding: 16px; margin-bottom: 12px;"><div style="font-size: 15px; font-weight: bold; color: #2d1f4a; margin-bottom: 12px;">ATM Alloys — Required for the Star</div><div style="display: grid; grid-template-columns: 1fr; gap: 10px;"><div style="background: #fff; border: 2px solid #8b5cf6; border-radius: 10px; padding: 12px;">![](https://siriusmc-bookstack.s3.amazonaws.com/uploads/images/gallery/2026-03/TH74TCnnb2C0agGf-vibranium-allthemodium-alloy-ingot.png)<div style="font-weight: bold; color: #2d1f4a; font-size: 11px; margin-bottom: 3px;">Vibranium-Allthemodium Alloy</div><div style="font-size: 10px; color: #8b5cf6; margin-bottom: 7px;">via Powah Energizing Orb</div><div style="font-size: 10px; color: #4a3a6a; margin-bottom: 2px;">• Allthemodium Ingot</div><div style="font-size: 10px; color: #4a3a6a; margin-bottom: 2px;">• Vibranium Ingot</div><div style="font-size: 10px; color: #4a3a6a; margin-bottom: 2px;">• Piglich Heart x2</div><div style="font-size: 10px; color: #4a3a6a; margin-bottom: 7px;">• Compressed Nitro Crystal Block</div><div style="font-size: 10px; background: #f5f0ff; color: #8b5cf6; border-radius: 6px; padding: 4px 8px; font-weight: bold;">![](https://siriusmc-bookstack.s3.amazonaws.com/uploads/images/gallery/2026-03/NTRN3GsSOp6IgQgd-thermo-gen.png) 1,000,000,000 FE required</div></div><div style="background: #fff; border: 2px solid #0891b2; border-radius: 10px; padding: 12px;">![](https://siriusmc-bookstack.s3.amazonaws.com/uploads/images/gallery/2026-03/hNbPedYbU339uI29-unobtainium-allthemodium-alloy-ingot.png)<div style="font-weight: bold; color: #2d1f4a; font-size: 11px; margin-bottom: 3px;">Unobtainium-Allthemodium Alloy</div><div style="font-size: 10px; color: #0891b2; margin-bottom: 7px;">via Ars Nouveau Enchanting Apparatus</div><div style="font-size: 10px; color: #4a3a6a; margin-bottom: 2px;">• Allthemodium Ingot</div><div style="font-size: 10px; color: #4a3a6a; margin-bottom: 2px;">• Unobtainium Ingot</div><div style="font-size: 10px; color: #4a3a6a; margin-bottom: 2px;">• Piglich Heart x2</div><div style="font-size: 10px; color: #4a3a6a; margin-bottom: 7px;">• Air / Earth / Fire / Water Essence</div><div style="font-size: 10px; background: #f0faff; color: #0891b2; border-radius: 6px; padding: 4px 8px; font-weight: bold;">![](https://siriusmc-bookstack.s3.amazonaws.com/uploads/images/gallery/2026-03/Z2QCyec5gqR9NhnH-ars-tattered-tome.png) 10,000 Source required</div></div><div style="background: #fff; border: 2px solid #059669; border-radius: 10px; padding: 12px;">![](https://siriusmc-bookstack.s3.amazonaws.com/uploads/images/gallery/2026-03/hNK8yCtZhA5ZKM1d-unobtainium-vibranium-alloy-ingot.png)<div style="font-weight: bold; color: #2d1f4a; font-size: 11px; margin-bottom: 3px;">Unobtainium-Vibranium Alloy</div><div style="font-size: 10px; color: #059669; margin-bottom: 7px;">via Industrial Foregoing Dissolution Chamber</div><div style="font-size: 10px; color: #4a3a6a; margin-bottom: 2px;">• Vibranium Ingot</div><div style="font-size: 10px; color: #4a3a6a; margin-bottom: 2px;">• Unobtainium Ingot</div><div style="font-size: 10px; color: #4a3a6a; margin-bottom: 2px;">• Pink Slime x4</div><div style="font-size: 10px; color: #4a3a6a; margin-bottom: 7px;">• Piglich Heart x2</div><div style="font-size: 10px; background: #f0fdf4; color: #059669; border-radius: 6px; padding: 4px 8px; font-weight: bold;">![](https://siriusmc-bookstack.s3.amazonaws.com/uploads/images/gallery/2026-03/QD28c3LthBBU75aN-soul-lava-bucket.png) 100mb Soul Lava required</div></div></div></div><div style="display: flex; flex-direction: column; align-items: center; margin: 4px 0 12px;"><div style="width: 2px; height: 28px; background: linear-gradient(to bottom,#a78bfa,#ffd700);">  
</div><div style="width: 0; height: 0; border-left: 7px solid transparent; border-right: 7px solid transparent; border-top: 11px solid #ffd700;">  
</div></div><div style="background: linear-gradient(135deg,#2d1f4a,#4a2d8a); border: 3px solid #ffd700; border-radius: 16px; padding: 22px; text-align: center; box-shadow: 0 4px 24px rgba(255,215,0,0.2);"><div style="margin-bottom: 6px;">[![ATMSTAR.png](https://siriusmc-bookstack.s3.amazonaws.com/uploads/images/gallery/2026-03/scaled-1680-/dfyUBZnv30kXCTwg-atmstar.png)](https://siriusmc-bookstack.s3.amazonaws.com/uploads/images/gallery/2026-03/dfyUBZnv30kXCTwg-atmstar.png)</div><div style="color: #ffd700; font-size: 20px; font-weight: bold; margin-bottom: 5px;">ATM Star</div><div style="color: #c4b0e8; font-size: 12px; margin-bottom: 10px;">Crafted at the **Runic Star Altar**</div><div style="display: flex; justify-content: center; gap: 8px; flex-wrap: wrap;"><span style="font-size: 10px; background: rgba(255,215,0,0.15); color: #ffd700; border-radius: 20px; padding: 3px 10px; border: 1px solid rgba(255,215,0,0.4);">8 Unique Components</span> <span style="font-size: 10px; background: rgba(255,215,0,0.15); color: #ffd700; border-radius: 20px; padding: 3px 10px; border: 1px solid rgba(255,215,0,0.4);">3 ATM Alloys</span> <span style="font-size: 10px; background: rgba(255,215,0,0.15); color: #ffd700; border-radius: 20px; padding: 3px 10px; border: 1px solid rgba(255,215,0,0.4);">Multiple Dimensions</span> <span style="font-size: 10px; background: rgba(255,215,0,0.15); color: #ffd700; border-radius: 20px; padding: 3px 10px; border: 1px solid rgba(255,215,0,0.4);">Dozens of Mods</span></div></div></div><table border="1" id="bkmrk-guide-automation-gui" style="border-collapse: collapse; width: 100%; border-style: hidden;"><tbody><tr><td style="padding: 14px 16px; overflow: visible; vertical-align: top; border: 1px solid rgba(168,85,160,0.15);">Guide

[AllTheModium Ores Guide](https://wiki.siriusmc.net/books/modpack-guides-and-tutorials/page/allthemodium-ores-guide-atm10)

ATM10 features a tier progression system of unique ores beyond Netherite. This guide shows you where to find them, and how to use them.

</td><td style="padding: 14px 16px; overflow: visible; vertical-align: top; border: 1px solid rgba(168,85,160,0.15);">Guide

[Mekanism Fission Reactor](https://wiki.siriusmc.net/books/modpack-guides-and-tutorials/page/mekanism-fission-reactor-atm10)

A helpful guide on creating a fission reactor from the mod Mekanism.

</td><td style="padding: 14px 16px; overflow: visible; vertical-align: top; border: 1px solid rgba(168,85,160,0.15);">Introduction

[Introduction](https://wiki.siriusmc.net/books/modpack-guides-and-tutorials/page/introduction-atm10)

An introduction into ATM10, including how to get started and what mods are featured.

</td></tr></tbody></table>

# Mekanism Fission Reactor | ATM10

<table border="0" id="bkmrk-the-fission-reactor-" style="border-collapse: collapse !important; width: 100%; border-left: 4px solid #a855a0; border-top: none; border-right: none; border-bottom: none; background-color: rgba(168, 85, 160, 0.08);"><tbody><tr><td style="padding: 8px 16px; overflow: visible; hyphens: none;">The Fission Reactor is a multiblock structure, in the Mekanism mod, used to generate large amounts of power by burning nuclear fuel. It produces heat which converts water into steam for power generation, and generates nuclear waste as a by-product.

</td></tr></tbody></table>

## Requirements

### Reactor Components

- Fission Reactor Casing
- Fission Reactor Port
- Fission Fuel Assembly
- Control Rod Assembly
- Reactor Glass (optional)

### Supporting Systems

#### Coolant Supply

A constant water source is required. Options include:

- Sink (recommended)
- Mechanical Pipes (the longer the pipes, the more water is available to pump into the multiblock)
- Eternal Water Block (EvilCraft)

#### Fuel Production

Fission Fuel must be produced through a chemical chain:

Uranium → Uranium Hexafluoride → Fission Fuel

Required machines:

- Chemical Oxidizer
- Chemical Infuser
- Isotopic Centrifuge

#### Waste Handling

- Pressurized Tubes
- Radioactive Waste Barrel (temporary storage)

## Structure

### Construction Steps

#### 1. Build the Outer Casing

To begin, construct a **5×5×5 hollow cube** using Fission Reactor Casing. 5x5x5 is the smallest a Fission Reactor can be.

#### 2. Install Internal Components

Inside the structure:

- Place **Fission Fuel Assemblies** vertically
- Place **Control Rod Assemblies** directly on top of each fuel assembly

#### 3. Add Ports

Install the following ports on the reactor casing:

- Fuel Input Port
- Coolant Input Port
- Steam Output Port
- Waste Output Port

Additional ports can be added as needed.

#### 4. Optional: Reactor Glass

Replace casing blocks with Reactor Glass for visibility into the reactor interior. The corners of the reactor must be casing blocks to allow for the multiblock to take shape.

## Setup

### Connections

Connect each port on the reactor casing to its corresponding system using Mechanical Pipes or Pressurized Tubes as appropriate.

<table border="1" id="bkmrk-port-connection-cool" style="border-collapse: collapse; width: 100%; border-style: hidden; hyphens: none;"><tbody><tr style="background-color: #a855a0;"><td style="padding: 6px 10px; overflow: visible; hyphens: none; vertical-align: middle;">**Port**</td><td style="padding: 6px 10px; overflow: visible; hyphens: none; vertical-align: middle;">**Connection**</td></tr><tr><td style="padding: 6px 10px; overflow: visible; hyphens: none; vertical-align: middle;">Coolant Input Port</td><td style="padding: 6px 10px; overflow: visible; hyphens: none; vertical-align: middle;">Connect to your water supply. Ensure constant flow at all times.</td></tr><tr style="background-color: rgba(168, 85, 160, 0.04);"><td style="padding: 6px 10px; overflow: visible; hyphens: none; vertical-align: middle;">Fuel Input Port</td><td style="padding: 6px 10px; overflow: visible; hyphens: none; vertical-align: middle;">Pipe Fission Fuel in from your fuel production chain.</td></tr><tr><td style="padding: 6px 10px; overflow: visible; hyphens: none; vertical-align: middle;">Steam Output Port</td><td style="padding: 6px 10px; overflow: visible; hyphens: none; vertical-align: middle;">Extract steam and route it to an Industrial Turbine for power generation.</td></tr><tr style="background-color: rgba(168, 85, 160, 0.04);"><td style="padding: 6px 10px; overflow: visible; hyphens: none; vertical-align: middle;">Waste Output Port</td><td style="padding: 6px 10px; overflow: visible; hyphens: none; vertical-align: middle;">Extract nuclear waste continuously. Store in Radioactive Waste Barrels or process further.</td></tr></tbody></table>

### Activation

1. Enable the reactor.
2. Confirm water is flowing.
3. Confirm waste output is connected.

### Power Increase

Gradually increase the burn rate. Increasing it too fast can cause the reactor to explode.

### Recommended Operating Range

- Temperature: below 800 K
- Burn Rate: 0.5–2.0 mB/t (early setup)

## Power Generation

### Industrial Turbine (Recommended)

- Converts steam into energy efficiently
- Required for optimal performance

Without a turbine, most generated energy is wasted.

## Safety

### Meltdown Causes

- Insufficient coolant
- Excessive burn rate
- Waste backup
- Blocked output systems

### Safety Guidelines

- Maintain constant water supply
- Ensure waste is continuously removed
- Increase burn rate gradually
- Monitor reactor temperature

## Scaling

### Increase Output

- Increase burn rate slowly
- Add more fuel assemblies
- Expand reactor size (e.g. 7×7×7 or larger)

## Common Mistakes

- Activating reactor at high burn rate
- Failing to supply enough coolant
- Ignoring waste management
- Not using a turbine

## Recommended Starter Setup

- 5×5×5 reactor
- 4–6 fuel assemblies
- Burn rate ~1.0 mB/t
- Connected industrial turbine
- Infinite water source

<table border="1" id="bkmrk-guide-automation-gui" style="border-collapse: collapse; width: 100%; border-style: hidden;"><tbody><tr><td style="padding: 14px 16px; overflow: visible; vertical-align: top; border: 1px solid rgba(168,85,160,0.15);">Guide

[AllTheModium Ores Guide](https://wiki.siriusmc.net/books/modpack-guides-and-tutorials/page/allthemodium-ores-guide-atm10)

ATM10 features a tier progression system of unique ores beyond Netherite. This guide shows you where to find them, and how to use them.

</td><td style="padding: 14px 16px; overflow: visible; vertical-align: top; border: 1px solid rgba(168,85,160,0.15);">Guide

[SiriusMC's ATM Star Guide](https://wiki.siriusmc.net/books/modpack-guides-and-tutorials/page/siriusmcs-atm-star-guide-atm10)

SiriusMC's guide to obtaining the ATM star.

</td><td style="padding: 14px 16px; overflow: visible; vertical-align: top; border: 1px solid rgba(168,85,160,0.15);">Introduction

[Introduction](https://wiki.siriusmc.net/books/modpack-guides-and-tutorials/page/introduction-atm10)

An introduction into ATM10, including how to get started and what mods are featured.

</td></tr></tbody></table>

# Mystical Agriculture - Magical Soil | ATM10

<div id="bkmrk-magical-soil-is-a-cr"><table border="0" style="border-collapse: collapse !important; width: 100%; border-left: 4px solid #a855a0; border-top: none; border-right: none; border-bottom: none; background-color: rgba(168, 85, 160, 0.08);"><tbody><tr><td style="padding: 8px 16px; overflow: visible; hyphens: none;">Magical Soil is a crux-type block added by KubeJS to assist players with growing crops from Mystical Agriculture. It removes the need to match farmland tiers to crop tiers, letting almost every Mystical Agriculture crop grow from a single farmland type, making it the ideal foundation for large scale essence farms.

</td></tr></tbody></table>

</div>## Overview

Magical Soil is not itself a farmland block, but instead is used the same way the other cruxes from Mystical Agriculture are, by placing it beneath a farmland block. Once a seed is planted on the farmland above the Magical Soil, it will grow regardless of the crop's tier. Meaning players could then plant and grow Uraninite Seeds (tier 5) on Inferium Farmland (tier 1) and even regular dirt.

It supports almost every crop in Mystical Agriculture, and works with both manual and automated farms. However, Magical Soil is a late game block as it requires Insanium Farmland for crafting, and does not replace the need for cruxes with tier 6 seeds.

## Crop Compatibility

When placed beneath any tier farmland, or regular dirt farmland, Magical Soil will allow almost all Mystical Agriculture crops to grow, except for Tier 6 crops.

### Tier 6 Crux Limitation

Tier 6 seeds each require a specific crux block to be placed directly beneath the farmland in order to grow. Since Magical Soil must occupy that same position beneath the farmland, it cannot be combined with a Tier 6 crux. This means Tier 6 seeds cannot be grown on Magical Soil, and still require their matching crux and farmland setup instead.

#### Tier 6 Seeds and Their Cruxes

<table border="1" id="bkmrk-tier-6-seed-required" style="width: 100%; border-collapse: collapse;"><thead><tr><th style="padding: 10px; text-align: left; background-color: rgb(168, 85, 160); color: #ffffff; font-weight: bold;">Tier 6 Seed</th><th style="padding: 10px; text-align: left; background-color: rgb(168, 85, 160); color: #ffffff; font-weight: bold;">Required Crux</th></tr></thead><tbody><tr><td style="padding: 10px; hyphens: none;">Nitro Crystal Seeds</td><td style="padding: 10px; hyphens: none;">Nitro Crystal Crux</td></tr><tr style="background-color: rgba(168, 85, 160, 0.04);"><td style="padding: 10px; hyphens: none;">Awakened Draconium Seeds</td><td style="padding: 10px; hyphens: none;">Awakened Draconium Crux</td></tr><tr><td style="padding: 10px; hyphens: none;">Dragon Egg Seeds</td><td style="padding: 10px; hyphens: none;">Dragon Egg Crux</td></tr><tr style="background-color: rgba(168, 85, 160, 0.04);"><td style="padding: 10px; hyphens: none;">Nether Star Seeds</td><td style="padding: 10px; hyphens: none;">Nether Star Crux</td></tr></tbody></table>

## Crafting Magical Soil

Magical Soil can be crafted using either a **Crafting Table** or the **Infusion Altar** from Mystical Agriculture. The recipes are highly different, but both require high tier materials.

### Crafting Table Recipe
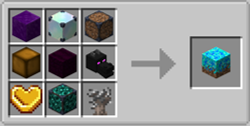
![Magical Farmland CT.png](https://siriusmc-bookstack.s3.amazonaws.com/uploads/images/gallery/2026-07/scaled-1680-/ee54wFgiGi3RnUSZ-magical-farmland-ct.png)To craft Magical Soil in a Crafting Table you will need:

- 1x Insanium Block
- 1x Nether Star Block 2x
- 1x Dirt 3x
- 1x Awakened Supremium Growth Accelerator
- 1x Insanium Farmland
- 1x Dragon Head
- 1x Piglich Heart
- 1x Ender Pearl Block 3x
- 1x Moonlight Magic Crepe Myrtle Sapling

*<span style="color: rgb(149, 165, 166);">Note: some ingredient names include a number as part of the item name itself (for example, Nether Star Block 2x, Dirt 3x). This refers to a compressed or dense variant of that block, not a quantity to craft.</span>*

<div id="bkmrk-" style="clear: both;">  
</div>### Infusion Altar Recipe

![Magical Farmland IA.png](https://siriusmc-bookstack.s3.amazonaws.com/uploads/images/gallery/2026-07/HcAA0ZZlwNx8wkwl-magical-farmland-ia.png)To craft Magical Soil in an Infusion Altar you will need:

- 4x Dragon Scale
- 4x Insanium Block
- 1x Insanium Farmland

<div id="bkmrk--1" style="clear: both;">  
</div><table border="1" id="bkmrk-guide-automation-gui" style="border-collapse: collapse; width: 100%; border-style: hidden;"><tbody><tr><td style="padding: 14px 16px; overflow: visible; vertical-align: top; border: 1px solid rgba(168,85,160,0.15);">Guide

[Mekanism Fission Reactor](https://wiki.siriusmc.net/books/modpack-guides-and-tutorials/page/mekanism-fission-reactor-atm10)

Learn how to build, fuel, and safely maintain a Nuclear Fission Reactor on ATM10.

</td><td style="padding: 14px 16px; overflow: visible; vertical-align: top; border: 1px solid rgba(168,85,160,0.15);">Guide

[SiriusMC's ATM Star Guide](https://wiki.siriusmc.net/books/modpack-guides-and-tutorials/page/siriusmcs-atm-star-guide-atm10)

SiriusMC's guide to obtaining the ATM star.

</td><td style="padding: 14px 16px; overflow: visible; vertical-align: top; border: 1px solid rgba(168,85,160,0.15);">Guide

[AllTheModium Ores Guide](https://wiki.siriusmc.net/books/modpack-guides-and-tutorials/page/allthemodium-ores-guide-atm10)

ATM10 features a tier progression system of unique ores beyond Netherite. This guide shows you where to find them, and how to use them.

</td></tr></tbody></table>