# Modpack Guides and Tutorials
Guides, tips, and tutorials for every modpack hosted on SiriusMC. From RLCraft survival to ATM10 endgame progression.
# Tekkit 2
Guides and tutorials for Tekkit 2!
# Introduction | Tekkit 2
|  |
| tekkit.siriusmc.net Version · 1.2.6 |
| Tekkit 2 is a casual kitchen sink modpack on Minecraft 1.12.2, available on the Technic Launcher. It draws inspiration from Tekkit Classic and Tekkit Legends, with IndustrialCraft Classic, ProjectE, BuildCraft, Logistics Pipes, and ProjectRed at the core of its progression. Unlike Tekkit Legends, several features have been adjusted, including nerfs to ProjectE to create a more complex and rewarding gameplay experience. Galacticraft is also included, adding space exploration as an entirely new avenue of progression.
|
## Getting Started
Tekkit 2 is a kitchen sink pack, covering technology, magic, farming, exploration and more. You have no quest book, so progression is largely up to you. One of the most effective early goals is to get into ProjectE and craft a Transmutation Table, then build an EMC farm to begin producing a wide variety of items automatically.
Due to ProjectE nerfs, far fewer items have EMC values than in Tekkit Legends, meaning more automated crafting is required. For autocrafting, ProjectRed Pipes and Logistics Pipes are both strong choices, and which to use comes down to personal preference. Connecting an autocrafting setup to your EMC farm allows you to produce items that don't have EMC values themselves by crafting them from items that do, giving you an effectively unlimited supply.
### Your First Resources
Like most Minecraft mod packs the first thing you need to do is gather supplies. In Tekkit 2, this is similar to vanilla Minecraft, gathering resources such as wood, cobblestone, coal, copper and iron ore.
Once you have the vanilla basics down you can then start to gather materials for the mod IndustrialCraft2 (IC2). Whilst you're exploring and gathering resources, you may have noticed darker trees with small orange areas on them, these are rubber trees and are crucial for advancing. To get rubber you'll need a treetap, crafted with 5x wooden planks, which you can right-click on orange parts of rubber trees to yield sticky resin. This resin can be smelted in a furnace to obtain rubber. With this rubber you can make copper cables, using 6x rubber and 3x copper ingots.
#### Doubling Your Resources
Now that you have some fundamental resources, you can begin doubling your resources. There are two ways to do this, either without, or with power.
##### Doubling Without Power
The first type of macerator is the **Stone Macerator**, which is powered like a furnace, needing a fuel source to macerate the ore.
##### Doubling With Power
A regular **Macerator** needs power to operate. To obtain power you will need to craft a **Generator**, this can be done with 1x RE-Battery, 3x Refined Iron Ingots, and 1x Iron Furnace. Generators produce Energy Units (EU) when they are given a fuel source, such as coal or wooden logs.
With the copper cables previously created, you can attach the generator and macerator together, allowing the macerator to become powered and start working.
## Transmutation
Transmutation is the art of transforming low value items into more high value items. In early game this is done via the **Philosopher's Stone**, crafted using 4x Glowstone, 4x Redstone, and 1x Diamond. Not only can the Philosopher's Stone be used in crafting recipes, but it can be used as a tool to transmute blocks in the world into their counterparts, for example dirt can be turned into sand, stone into cobblestone and vice versa, wooden logs into different types of wood, as well as leaves into different types of leaves, and a whole lot more. You can change the range of the Philosopher's Stone using the "V" key, to change the radius to either 3x3, 5x5, 7x7 or 9x9, or you can press "Shift + V" to reduce the size. Additionally, you can also press "G" to change the shape to either panel mode, cube mode, or line mode.
## Later Game
Later in the game, Tekkit 2 opens up into a wide range of mods offering very different play styles. The three main areas of late-game content are ComputerCraft, Galacticraft, and Forestry.
We also offer a guide on [Pipe Optimisation](https://wiki.siriusmc.net/books/modpack-guides-and-tutorials/page/optimising-pipe-usage-tekkit-2).
### ComputerCraft
ComputerCraft allows players to build automated systems using the [Lua](https://en.wikipedia.org/wiki/Lua_(programming_language)) programming language. Computers and turtles can be programmed to interact with the world, move items, mine blocks, control redstone, and much more. A manual for Lua 5.4 covering basic syntax and modules can be found [here](https://www.lua.org/manual/5.4/). ComputerCraft also adds its own modules for interacting directly with in-game mechanics such as inventory management and peripheral devices.
### Galacticraft
Galacticraft adds space exploration to the game, including several new dimensions: the Moon, Mars, Venus, the Asteroid Belt, and player-built Space Stations. To reach these destinations, you'll need to construct and launch a rocket. Rockets come in three tiers, with higher tiers required to reach more distant planets. Each dimension offers unique resources, challenges, and structures to explore.
### Forestry
Forestry is centred around the breeding and genetic manipulation of three core organism types: bees, trees, and butterflies. Each naturally occurring species carries a set of genes, and breeding different species together produces new hybrids with unique traits and outputs. Mastering bee breeding in particular is a deep and rewarding progression path that can produce a wide range of materials.
Binnie's Mods, included as an addon for Forestry, adds flowers as a fourth organism type, introduces new species across all categories, provides tools for direct genetic modification, and adds a brewing system producing both alcoholic and non-alcoholic beverages.
## Server Rules
Tekkit 2 has a number of server-specific rules in addition to the [general server rules](https://wiki.siriusmc.net/books/information/page/server-rules). These exist primarily due to the presence of ProjectE, which can make the economy difficult to balance without additional restrictions.
| **Rule** | **Details** |
| No gifting of items | Giving items to other players for free is not permitted. |
| Minimum prices | Items must not be sold below the minimum price set by the server. Use **/price** in-game to check the minimum price of any held item. |
To install Tekkit 2 and learn more about banned items, scheduled restarts, and dimension resets, visit the [Tekkit 2 Server Card](https://wiki.siriusmc.net/link/115#bkmrk-tekkit-2).
It is recommended to allocate between 3GB and 5GB of RAM for Tekkit 2.
SiriusMC bans certain items to protect server performance, the in-game economy, and claimed player bases. Use **/banneditems** in-game to see the full list of banned items on the server, or expand the Banned Items list below.
Banned Items ▼
IC2 explosives
Item-based chunk loaders
RainMaker
Nuke
Nova Cataclysm
Nova Catalyst (placement only)
Dynamite
---
| Ready to Play?
Open Minecraft, select Multiplayer, and add a new server with the address below.
tekkit.siriusmc.net
[Installation guide](https://wiki.siriusmc.net/link/115#bkmrk-installing-a-modpack-1) [Server rules](https://wiki.siriusmc.net/books/the-siriusmc-networks/page/server-rules-siriusmc) [Join Discord](https://discord.gg/siriusmc)
|
| Guide
[Optimising Pipe Usage](https://wiki.siriusmc.net/books/modpack-guides-and-tutorials/page/optimising-pipe-usage-tekkit-2)
Learn how to optimise your ProjectRed pipes.
| Guide
[Industrial Craft - Power Production](https://wiki.siriusmc.net/books/modpack-guides-and-tutorials/page/industrial-craft-power-production-tekkit-2)
An introduction into IC2 power generation and power transfer.
| Guide
[ProjectE - EMC Guide](https://wiki.siriusmc.net/books/modpack-guides-and-tutorials/page/projecte-emc-guide-tekkit-2)
An introduction into EMC generation from ProjectE.
|
# Optimising Pipe Usage | Tekkit 2
| Tekkit 2 offers many different pipes and solutions to route items. This page covers the most commonly used pipes and some information on how to use them effectively.
|
## ProjectRed Transportation
Transportation is a module of ProjectRed that adds [pipes](https://projectredwiki.com/wiki/Pipe) and [chips](https://projectredwiki.com/wiki/Chip) to the game, enabling automated item routing between inventories and machines.
Item Transport pipes can only pass items along to another connected pipe. They will **NOT** connect to inventories. At any junction with more than one possible direction, items will travel in a randomly selected direction.
### Pipe Connections
All ProjectRed pipes will connect to each other. This means it is important to be deliberate about how your pipes are laid out, as unintended connections can cause items to loop endlessly through your network rather than reaching their destination.
Connections between pipes can be blocked using multipart blocks such as covers, which sit on the face of a pipe and prevent it from connecting to adjacent pipes. This is the most effective way to prevent looping in a ProjectRed pipe network.
**Without covers (negative):**
[](https://siriusmc-bookstack.s3.eu-west-1.amazonaws.com/uploads/images/gallery/2024-05/Bwk90hPiRnkSu02N-good.png)
**With covers (positive):**
[](https://siriusmc-bookstack.s3.eu-west-1.amazonaws.com/uploads/images/gallery/2024-05/qNy7oN5QevIJd1vK-bad.png)
The images below show how all ProjectRed pipes connect to one another by default, and how covers placed on pipe faces break those connections to prevent unwanted routing paths.
[](https://siriusmc-bookstack.s3.eu-west-1.amazonaws.com/uploads/images/gallery/2024-05/vACRc0NQO20339X9-image.png)
[](https://siriusmc-bookstack.s3.eu-west-1.amazonaws.com/uploads/images/gallery/2024-05/44UhJXStJyN2bdRc-image.png)
## Logistic Pipes
Logistic Pipes is a powerful item transport and routing system with significantly more control than ProjectRed pipes. It can handle both items and fluids, and supports autocrafting, machine automation, stock keeping, and remote item ordering from storage.
While Logistic Pipes has a steeper learning curve than ProjectRed pipes, the advantages are considerable. They are better for server performance, offer faster and more responsive item routing, and give you precise control over how items move through your system. For a full breakdown of every pipe type, module, chassis, and block, visit the [Logistics Pipes wiki](https://technicpack.fandom.com/wiki/Logistics_Pipes).
### Autocrafting and Requester Setup
[](https://siriusmc-bookstack.s3.eu-west-1.amazonaws.com/uploads/images/gallery/2024-05/vZiqqb1sqSR32FA4-2024-05-02-03-53-38.png)
One of the most powerful features of Logistic Pipes is the ability to automate crafting through a request-based system. A requester pipe can be configured to request specific items, which are then crafted on demand by connected autocrafting setups. This allows for highly efficient factories where items are only produced when needed, rather than constantly running.
### Supplier and Provider Modules
[](https://siriusmc-bookstack.s3.eu-west-1.amazonaws.com/uploads/images/gallery/2024-05/zfF3nnWYGcU5s7vd-image.png)
Supplier and provider modules allow items to be moved around in a request-based manner, meaning items are only sent when a request is received rather than being pushed constantly. This gives you precise control over item flow and prevents networks from becoming overwhelmed. The image above shows a simple EMC generator setup using supplier and provider modules to move items around efficiently.
### Default Route and Void Chest
[](https://siriusmc-bookstack.s3.eu-west-1.amazonaws.com/uploads/images/gallery/2024-05/MnQQuLd9spxIe05w-image.png)
It is strongly recommended to always set a **default route** pointing to a **void chest** in any Logistic Pipes network. Without a default route, items that cannot reach their intended destination will spill out into the world, which can cause lag and clutter. A void chest set as the default route acts as a safety net, silently deleting any items that have nowhere else to go.
Logistic Pipes offer a huge amount of flexibility for automating and routing items throughout your factory. Take the time to learn their systems and you will find them one of the most valuable tools in Tekkit 2.
| Introduction
[Introduction](https://wiki.siriusmc.net/books/modpack-guides-and-tutorials/page/introduction-tekkit-2)
An introduction into Tekkit 2, including how to get started and what mods are featured.
| Guide
[ProjectE - EMC Guide](https://wiki.siriusmc.net/books/modpack-guides-and-tutorials/page/projecte-emc-guide-tekkit-2)
An introduction into EMC generation from ProjectE.
| Guide
[Industrial Craft - Power Production](https://wiki.siriusmc.net/books/modpack-guides-and-tutorials/page/industrial-craft-power-production-tekkit-2)
An introduction into IC2 power generation and power transfer.
|
# Industrial Craft - Power Production | Tekkit 2
| IndustrialCraft 2 (IC2) uses its own energy system called EU (Energy Units). Understanding how EU tiers, generators, storage, and cables interact is essential for building a reliable power network. This guide does not go over generators that produce steam instead of EU. |
## Understanding EU and Voltage Tiers
IC2 power is measured in EU per tick (EU/t). Every machine and storage block belongs to a voltage tier, which defines the maximum size of EU packet it can safely receive.
The tiers are as follows:
Tier 1: Low Voltage (LV) | Max EU: 32
Tier 2: Medium Voltage (MV) | Max EU: 128
Tier 3: High Voltage (HV) | Max EU: 512
## Generators
EU is produced by generators. The right generator for your current stage determines how fast your machines run and how quickly you can expand. Below is a summary of all main generator types available in Tekkit 2 on SiriusMC, organised by progression stage.
### Early Game
#### Basic Generator
**Output:** 10 EU/t | **Tier:** LV
The starting point for any IC2 setup. Burns coal, charcoal, wood, and most other furnace fuels. Charcoal is the most practical early fuel, yielding 4,000 EU per piece. The Generator outputs 10 EU/t as a single packet, which is well within the LV limit, so it is safe to connect directly to Copper Cable and basic machines.
#### Slag Generator
**Output:** 12.5 EU/t | **Tier:** LV
The Slag Generator is an upgrade to the basic Generator that produces 25% more power. Additionally, the Slag Generator collects scrap randomly every 4-12 seconds, however if the generator is fuelled using the scrap it will not produce any scrap as a byproduct.
#### Wind Mill
**Output:** Variable (up to 32 EU/t in peak conditions) | **Tier:** LV
Wind mills produce EU based on altitude, weather, and surrounding open space. They require a clear 5-block radius in all horizontal directions and perform best at Y=126 or above. Output increases with weather, for an optimised wind mill that produces 32 EU/t you would need stormy weather at an altitude of 126. They are a niche early option for players who have built up high, but are generally superseded by Geothermals, due to the wind mill's sporadic nature.
### Mid-Game
#### Geothermal Generator
**Output:** 20 EU/t | **Tier:** LV
Burns lava, producing 10,000 EU per bucket at a rate of 20 EU/t. This makes it twice as efficient per tick as a basic Generator and a reliable mid-game workhorse. Pair with a pump pulling from a Nether lava lake and pipe the lava in via BuildCraft fluid pipes for a fully automated, high-yield supply. A bank of Geothermal Generators feeding into a Multi-Functional Energy storage (MFE) covers most mid-game machine needs comfortably.
#### Thermal Generator
**Output:** 25 EU/t | **Tier:** LV
The Thermal Generator is the upgraded version of the Geothermal Generator. It produces 25 EU/t instead of 20 EU/t, and also gives off a small amount of passive energy from the environment throughout the day-night cycle. Using lava as a fuel source, the Thermal Generator can produce 31,250 EU per bucket at a rate of 25 EU/t.
#### Water Mill
**Output:** 4 EU/t | **Tier:** LV
**Output:** 32 EU/t | **Tier:** MV
**Output:** 250 EU/t | **Tier:** HV
When submerged in water and connected via cables to a machine or Batbox, it will produce EU continuously with no fuel cost. For maximum passive output, ensure all sides within the search area of the water mill are fully flooded. The search area differs depending on the tier of water mill: for LV water mills the search area is 3x3x3, for MV and HV water mills the search area is 5x5x5.
Alternatively, water buckets or water cells can be piped in directly for higher active output, at the cost of consuming the water as fuel. Higher tiers produce significantly more power and have a larger water search area, but are considerably more expensive to craft and run.
#### Solar Panel
**Output:** 8 EU/t | **Tier:** LV
**Output:** 64 EU/t | **Tier:** MV
**Output:** 512 EU/t | **Tier:** HV
Produces power during daylight with no fuel cost. Individual Solar Panels are only useful for charging tools or supplementing small setups. They are most valuable when combined into Solar Arrays. Note that Solar Panels require a clear, unobstructed view of the sky and produce nothing at night or during rain.
#### Solar Turbine
**Output:** 10 EU/t | **Tier:** LV
The Solar Turbine is a cheaper upgrade from the Solar Panel. It combines heat from the sun and water into steam, which is converted into energy. The Solar Turbine slowly heats up and cools down throughout the day-night cycle, increasing by 1% every 6 seconds during the day, and decreasing by 0.5% every 6 seconds at night.
### Late Game
#### Nuclear Reactor
**Output:** 0 - 2048 EU/t (configuration dependent) | **Tier:** LV - HV
The most powerful EU source in IC2, and the most dangerous. A nuclear reactor's output depends entirely on how it is configured with Uranium Cells, Coolant Cells, and Heat Exchangers. An improperly configured reactor will overheat and explode. Before building a large scale nuclear reactor, you can check the design using a Reactor Planner. This will show statistics from a live simulation, such as EU/t produced, core heat, melting heat, heat effect chance, and much more. You can change what statistics you are looking at using the different tabs along the left side of the planner.
For most players, a well-tuned smaller scale reactor combined with an MFSU provides enough EU to run any late-game setup.
### Situational and Environmental
#### Wave Generator
**Output:** 0 - 144 EU/t | **Tier:** LV - HV
The Wave Generator is a long-range single direction water generator that checks up to 50 blocks in one direction for water. The more water it detects, the more EU/t it produces, up to a maximum of 144 EU/t. Power production only begins once there are at least 4 solid water blocks in front of the generator. Output is sporadic and will vary between 0 and 144 EU/t.
#### Ocean Generator
**Output:** 0 - 100 EU/t | **Tier:** LV - HV
The Ocean Generator scans a much larger area of water than the Wave Generator (31x31x31) and produces more EU/t the more water it detects, up to a maximum of 100 EU/t. Power production requires at least a 31x31x31 body of water to the sides and above the generator. Output will vary depending on how obstructed the water within the search area is.
## EU Storage
Energy storage blocks act as batteries and buffers between generators and machines. They accept power from multiple sources simultaneously and re-emit it at a fixed output voltage. The output voltage of an energy storage block is fixed at its tier regardless of how it was charged, so connecting LV Tier machines directly to an MFE or MFSU output will destroy them.
| Block | Capacity | Max Input / Output |
|---|
| BatBox | 40,000 EU | 32 EU/packet |
| MFE | 600,000 EU | 128 EU/packet |
| MFSU | 10,000,000 EU | 512 EU/packet |
Energy storage blocks output from the face marked with a dot, which faces the player when placed. All other faces are inputs. Use a Wrench to reorient the output face.
Energy storage blocks also reset cable loss calculations, making them useful as mid-line repeaters when running power over long distances.
## Cables and Energy Loss
All IC2 cables lose EU over distance. Loss is calculated per EU packet, not per EU/t total. This means higher voltage is always more efficient over long distances: one 128 EU packet on Gold Cable loses less than four 32 EU packets covering the same run on Copper Cable.
In the table below the Mean Packet Loss is calculated through the loss of one EV packet (2048 EU) that travelled through the cable split into as many packets as needed.
For example: if a cable has a max packet of 32 EU, it will need to move 64 packets to meet the 2048 EU threshold, and each one of those 64 packets will result in small amounts of EU loss, which adds up significantly over time, unlike cables that have a max packet of 512 EU, where only 4 packets are moved to get to the 2048 EU threshold, resulting in less loss.
| Cable | Max Packet (EU) | Mean Packet Loss (EU) |
|---|
| Ultra-Low-Current Cable | 5 | 10.24 |
| Copper Cable / Uninsulated Copper Cable | 32 / 32 | 12.80 / 19.20 |
| Gold Cable / Insulated Gold Cable / 2xIns. Gold Cable | 128 / 128 / 128 | 8.00 / 7.20 / 6.40 |
| Bronze Cable / Insulated Bronze Cable / 2xIns. Bronze Cable | 128 / 128 / 128 | 11.20 / 10.40 / 9.60 |
| Glass Fibre Cable | 512 | 0.1 |
Glass Fibre Cable is the most efficient cable available and loses only 1 EU per 40 blocks per packet, making it the best choice for any run longer than a few blocks. It is expensive, requiring diamonds, but it is the correct long-term solution for a serious power network. Use Copper Cable for the final short hops from a transformer or storage block to nearby machines for efficiency!
## Transformers
Transformers step voltage up or down between tiers. They are essential any time you want to distribute power from a high-tier storage block to low-tier machines without destroying them. There are three types: LV Transformer (steps between LV and MV), MV Transformer (steps between MV and HV), and HV Transformer (steps between HV and EV).
By default, a transformer steps voltage down from its higher-tier input face to a lower-tier output. Applying a Redstone signal reverses this, stepping voltage up. The faces are marked: the single dot face is the high-voltage side, and the three-dot face is the low-voltage side.
A practical example: an MFSU outputs 512 EU/t (HV). Running this into an MV Transformer steps it down to 128 EU/t. Running that into an LV Transformer steps it further down to 32 EU/t, which is safe for Copper Cable and LV tier machines.
| Guide
[Optimising Pipe Usage](https://wiki.siriusmc.net/books/modpack-guides-and-tutorials/page/optimising-pipe-usage-tekkit-2)
Learn how to optimise your ProjectRed pipes.
| Introduction
[Introduction](https://wiki.siriusmc.net/books/modpack-guides-and-tutorials/page/introduction-tekkit-2)
An introduction into Tekkit 2, including how to get started and what mods are featured.
| Guide
[ProjectE - EMC Guide](https://wiki.siriusmc.net/books/modpack-guides-and-tutorials/page/projecte-emc-guide-tekkit-2)
An introduction into EMC generation from ProjectE.
|
# ProjectE - EMC Guide | Tekkit 2
| ProjectE is a mod that allows players to convert several items into energy, and use that energy to create different items. This guide covers how EMC works, how to generate it, and how to scale your setup from early game to late game. |
## What is EMC?
EMC stands for Energy-Matter Covalence and is the core system of ProjectE, representing the value of several items in game. Almost every item has an EMC value, and items can be freely converted into EMC and then back into other items of less than or equivalent value.
Common items like cobblestone have a low EMC value of 1, while rare items like diamonds have a high EMC value of 8,192. This means you could theoretically convert 8,192 pieces of cobblestone into a single diamond, or break a diamond back down into 8,192 cobblestone worth of EMC.
Items that are crafted have an EMC value equal to the sum of their ingredients, meaning nothing is ever wasted. Any item with an EMC value can be broken down, and its value redirected into something more useful.
## Core Items
### Transmutation Table
The Transmutation Table is your primary interface with EMC. It acts as a battery for stored EMC, a library of item recipes you have learned, and a fabricator that lets you spend EMC to produce any item you have previously learned. Before the table can create an item, it must first learn it. This is done by placing an item with an EMC value into the flames slot in the GUI, which destroys the item, records its recipe, and adds its EMC value to the table's storage.
Learned items and EMC balance are tied to your player character, not the physical table. When you learn an item at one table, it is learned across all Transmutation Tables you use.
### Klein Stars
Klein Stars are portable EMC storage items used to carry EMC with you outside the Transmutation Table. They come in multiple tiers, with each tier holding four times as much EMC as the previous one. They can be charged inside the Transmutation Table and then carried in your inventory, allowing you to spend EMC anywhere.
### Philosopher's Stone
The Philosopher's Stone is one of the first crafting goals in ProjectE and is required to craft most other ProjectE items. It also has in-hand functionality, allowing you to transmute blocks in the world directly, such as turning cobblestone into stone, and dirt into sand.
## Generating EMC
### Early Game | Burning Items and Energy Collectors
The simplest way to generate EMC is to burn items directly in the Transmutation Table by placing them in the flames slot. Everything you mine, loot, or farm has an EMC value. Coal, cobblestone, mob drops, excess tools, and any other items you no longer need can all be fed into the table to build up your balance. This method is slow but costs nothing to set up and is how most players get started.
It is worth learning high-value items before burning them. Once you burn an item and learn it, you can reproduce it from EMC later, so burn duplicates rather than your only copy of something.
Energy Collectors are passive EMC generators that produce EMC from light. They are the foundation of any serious EMC farm and come in three tiers, each producing significantly more EMC per second than the last.
| Tier | EMC per Second (max light) | Internal Buffer |
|---|
| Energy Collector MK1 | 4 EMC/s | 10,000 EMC |
| Energy Collector MK2 | 16 EMC/s | 50,000 EMC |
| Energy Collector MK3 | 40 EMC/s | 100,000 EMC |
Output scales directly with light level, from 1/16 efficiency in near-darkness up to full efficiency at light level 15. To ensure full output at all times including underground or at night, place a Glowstone block directly above the collector, this provides a constant light level of 15 and requires no power.
### Mid-Game | Energy Condensers and Anti-matter Relays
The Energy Condenser looks like a chest but converts any items placed or piped into it into EMC, then uses that stored EMC to produce a single target item of your choice. Set the target by placing the desired item in the top-left slot of the condenser's GUI. This makes it extremely useful for converting low-value bulk output, such as dirt and gravel from a quarry, into something more valuable automatically.
Anti-matter Relays connect Energy Collectors to an Energy Condenser across a distance. If a Collector is placed adjacent to a Relay, and that Relay is connected to a Condenser, EMC will flow from the Collector through the Relay to the Condenser without the Collector and Condenser needing to touch. Relays also come in three tiers, with higher tiers able to transfer and bonus more EMC.
### Late Game | The Power Flower
A Power Flower is the standard large-scale passive EMC farm. It consists of multiple Energy Collectors arranged around Anti-matter Relays, all feeding into a central Energy Condenser. The structure gets its name from the flower-like shape it forms when viewed from above.
A full-sized, maximally efficient Power Flower uses 17 Energy Collector MK3s, 5 Anti-matter Relay MK3s, and 1 Energy Condenser. You do not need to build the full structure immediately. Start with a single Collector adjacent to a Condenser, set a target item such as Alchemical Coal, and let it run. Expand by adding more Collectors and Relays as you accumulate enough EMC to afford the upgrades. Three full Power Flowers running simultaneously provides enough passive EMC generation to support most late-game crafting needs.
Energy Condensers will only show that they are taking in EMC once an item has been placed in the top left of their GUI.
## Late Game Progression
### Dark Matter
Dark Matter in ProjectE consists of Aeternalis Fuel, which is created through the use of the Philosopher's Stone in the following chain:
Coal → Alchemical Coal → Mobius Fuel → Aeternalis Fuel
Creating Dark Matter is required for MK2 upgrades to Collectors and Relays. It has an EMC value of 139,264, which is equivalent to 17 diamonds worth of EMC.
### Red Matter
Red Matter in ProjectE consists of Aeternalis Fuel and Dark Matter. Creating Red Matter is required for MK3 upgrades to Collectors and Relays. It has an EMC value of 466,944, equivalent to roughly 57 diamonds worth of EMC.
| Guide
[Optimising Pipe Usage](https://wiki.siriusmc.net/books/modpack-guides-and-tutorials/page/optimising-pipe-usage-tekkit-2)
Learn how to optimise your ProjectRed pipes.
| Introduction
[Introduction](https://wiki.siriusmc.net/books/modpack-guides-and-tutorials/page/introduction-tekkit-2)
An introduction into Tekkit 2, including how to get started and what mods are featured.
| Guide
[Industrial Craft - Power Production](https://wiki.siriusmc.net/books/modpack-guides-and-tutorials/page/industrial-craft-power-production-tekkit-2)
An introduction into IC2 power generation and power transfer.
|
# Tekkit SMP
Guides and tutorials for Tekkit SMP!
# Introduction | Tekkit SMP
|  |
| tekkitsmp.siriusmc.net Version · 1.0.5 |
| Tekkit SMP is the modpack that was originally meant to be. Designed as an upgraded continuation of Tekkit 2 and a spiritual successor to the classic Technic Pack SSP from the earliest days of Technic, it brings together the full technical mod line up from Tekkit 2 alongside the magical mods that were dropped in the original transition: primarily Thaumcraft, Mystcraft, and Mo' Creatures.
Tekkit SMP expands further with carefully selected Thaumcraft and Mystcraft addons, Mo' Creatures Extended, Re-Crystallized Wing, and Electro-Magic Tools, an addon bridging IndustrialCraft and Thaumcraft that lets you combine the worlds of technology and magic into powerful hybrid systems.
|
## Getting Started
Tekkit SMP has no quest book, so there is no single path to follow. The best approach is to gather resources, claim your base, and explore the pack at your own pace.
### Your First Resources
Like most Minecraft mod packs the first thing you need to do is gather supplies. In Tekkit SMP, this is similar to vanilla Minecraft, gathering resources such as wood, cobblestone, coal, copper and iron ore.
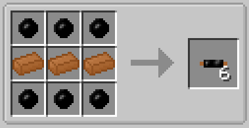
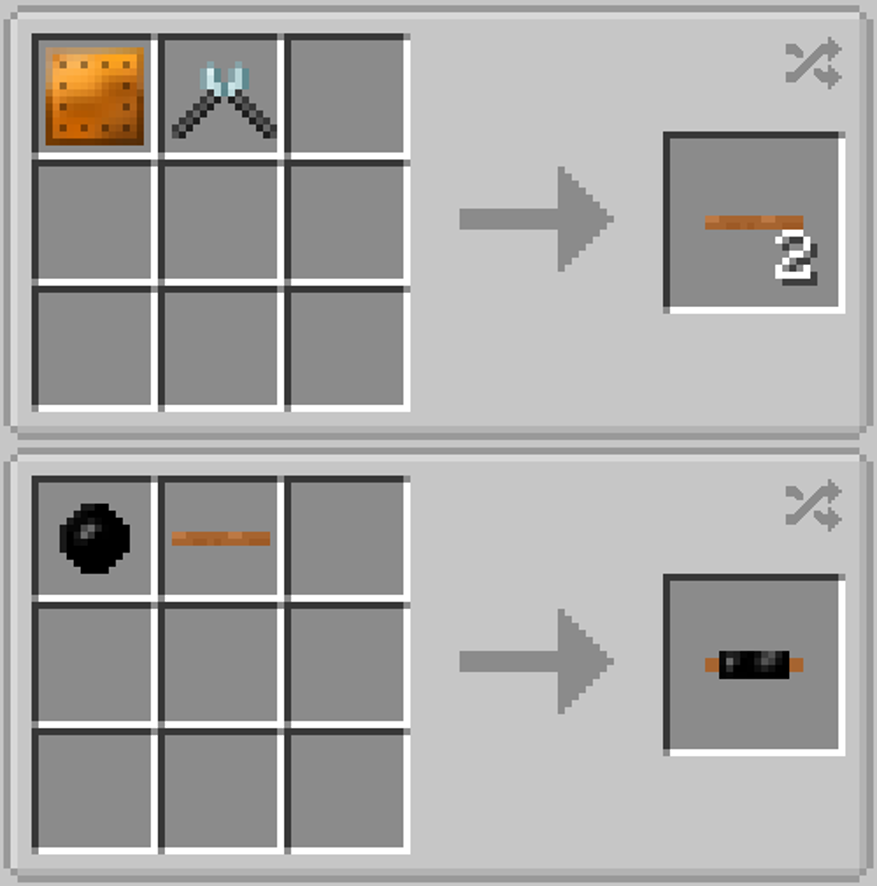
Once you have the vanilla basics down you can then start to gather materials for the mod IndustrialCraft2 (IC2). Whilst you're exploring and gathering resources, you may have noticed darker trees with small orange areas on them, these are rubber trees and are crucial for advancing. To get rubber you'll need a treetap, crafted with 5x wooden planks, which you can right-click on orange parts of rubber trees to yield sticky resin. This resin can be smelted in a furnace to obtain rubber. With this rubber you can make copper cables, using 6x rubber and 3x copper ingots.
#### Doubling Your Resources
Now that you have some fundamental resources, you can begin doubling your resources. There are two ways to do this, either without, or with power.
##### Doubling Without Power
The first type of macerator is the **Stone Macerator**, which is powered like a furnace, needing a fuel source to macerate the ore.
##### Doubling With Power
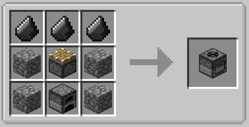
A regular **Macerator** needs power to operate. To obtain power you will need to craft a **Generator**, this can be done with 1x RE-Battery, 3x Refined Iron Ingots, and 1x Iron Furnace. Generators produce Energy Units (EU) when they are given a fuel source, such as coal or wooden logs.
With the copper cables previously created, you can attach the generator and macerator together, allowing the macerator to become powered and start working.
## Transmutation
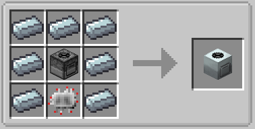
Transmutation is the art of transforming low value items into more high value items. In early game this is done via the **Philosopher's Stone**, crafted using 4x Glowstone, 4x Redstone, and 1x Diamond. Not only can the Philosopher's Stone be used in crafting recipes, but it can be used as a tool to transmute blocks in the world into their counterparts, for example dirt can be turned into sand, stone into cobblestone and vice versa, wooden logs into different types of wood, as well as leaves into different types of leaves, and a whole lot more. You can change the range of the Philosopher's Stone using the "V" key, to change the radius to either 3x3, 5x5, 7x7 or 9x9, or you can press "Shift + V" to reduce the size. Additionally, you can also press "G" to change the shape to either panel mode, cube mode, or line mode.
---
If you're not new to Tekkit SMP, here are a few good starting points depending on your preferred play style:
| **Play style** | **Where to Start** |
| Technology | Start with BuildCraft to get basic automation going, then move into IndustrialCraft for power generation and processing. ProjectE is a strong mid-game target once you have autocrafting set up. |
| Magic | Begin with Thaumcraft by crafting a Thaumonomicon and scanning items around the world to unlock research. Once you have a solid foundation, Electro-Magic Tools bridges Thaumcraft into the technical side of the pack. |
| Exploration | Explore the overworld and take advantage of the expanded mob variety from Mo' Creatures. Mystcraft lets you write and travel to custom dimensions for unique resources and experiences. |
| Relaxed / Nature | Forestry offers a deep and rewarding progression path through bee and tree breeding that doesn't require automation or combat to enjoy. |
### Technology and Magic
Tekkit SMP merges technical mods like IndustrialCraft, BuildCraft, and ProjectE with magic-based mods like Thaumcraft and Mystcraft. Rather than choosing one path, players can draw from both, combining powerful machinery with arcane research to create systems and contraptions that neither side could achieve alone. Electro-Magic Tools is the centrepiece of this integration, offering tools and machines that require both IC2 power and Thaumcraft research to use.
### Automation and Industry
Players can automate complex tasks including mining, smelting, and item transport using BuildCraft, Logistics Pipes, and ProjectRed. Machinery can be powered through multiple energy systems and upgraded for greater efficiency. Combined with ProjectE and IndustrialCraft, a well-built automation setup can produce almost anything the pack has to offer with minimal manual input.
### Exploration and Creatures
Mo' Creatures and Mo' Creatures Extended add a wide variety of new mobs to the overworld, including horses, sharks, birds, insects, and many more. Mystcraft adds the ability to write and travel to custom Age dimensions, each with their own unique properties and resources. Between the expanded overworld and the ability to create entirely new dimensions, there is no shortage of new places to explore.
To install Tekkit SMP and learn more about banned items, scheduled restarts, and dimension resets, visit the [Tekkit SMP Server Card](https://wiki.siriusmc.net/link/115#bkmrk-tekkit-2).
It is recommended to allocate between 3GB and 5GB of RAM for Tekkit SMP.
SiriusMC bans certain items to protect server performance, the in-game economy, and claimed player bases. Use **/banneditems** in-game to see the full list of banned items on the server, or expand the Banned Items list below.
Banned Items ▼
IC2 explosives
Item-based chunk loaders
RainMaker
Nuke
Nova Cataclysm
Nova Catalyst (placement only)
Dynamite
---
| Ready to Play?
Open Minecraft, select Multiplayer, and add a new server with the address below.
tekkitsmp.siriusmc.net
[Installation guide](https://wiki.siriusmc.net/link/115#bkmrk-installing-a-modpack-1) [Server rules](https://wiki.siriusmc.net/books/the-siriusmc-networks/page/server-rules-siriusmc) [Join Discord](https://discord.gg/siriusmc)
|
# The 1.12.2 Pack
Guides and tutorials for The 1.12.2 Pack!
# Introduction | The 1.12.2 Pack
|  |
| 1122.siriusmc.net Version · 1.6.6 |
| The 1.12.2 Pack is a large, carefully curated modpack featuring over 200 mods, optimised for high performance, stability, and a balanced multiplayer experience. Whether you want to explore dimensions, master magic, build automated tech systems, or simply enjoy the world at your own pace, the pack offers something for every type of player.
Alongside classics such as IndustrialCraft 2, BuildCraft, Logistics Pipes, Twilight Forest, Thaumcraft, Thermal Expansion, and Applied Energistics 2, the pack includes unique additions like Galacticraft, ExtraPlanets, Planet Progression, Gravitation Suite, Witchery: Resurrected, Growthcraft, ICBM, Modular Powersuits, Mystcraft, Tinkers' Construct, and AmbientSounds, alongside many carefully selected addons and backported features.
|
## Getting Started
The 1.12.2 Pack has no single path to follow, so progression is largely up to you.
### Your First Resources
Like most Minecraft mod packs the first thing you need to do is gather supplies. In The 1.12.2 Pack, this is similar to vanilla Minecraft, gathering resources such as wood, cobblestone, coal, copper and iron ore.
Once you have the vanilla basics down you can then start to gather materials for the mod IndustrialCraft2 (IC2). Whilst you're exploring and gathering resources, you may have noticed darker trees with small orange areas on them, these are rubber trees and are crucial for advancing. To get rubber you'll need a treetap, crafted with 5x wooden planks, which you can right-click on orange parts of rubber trees to yield sticky resin. This resin can be smelted in a furnace to obtain rubber. With this rubber you can make copper cables.
Unlike most mod packs that contain copper cables, you cannot directly craft them from the rubber and copper ingots you obtained, instead you must manufacture them using several different steps. Firstly, you'll need two different tools, a **Forge Hammer** and a **Cutter**. You can then use the Forge Hammer to turn copper and iron ingots into copper and iron plates, then using the iron plates you can craft a Cutter. The cutter is used to cut the copper plates into cables. However, these cables are uninsulated, and insulating them is as easy as just putting those cables and rubber into a crafting grid.
#### Doubling Your Resources
Now that you have some fundamental resources, you can begin doubling your resources. In the early stages of the game, this is done using a **Macerator**.
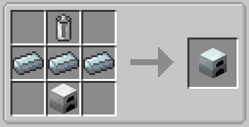
A Macerator needs power to operate. To obtain power you will need to craft a **Generator**, this can be done with 1x RE-Battery, 3x Iron Plates, and 1x Iron Furnace. Generators produce Energy Units (EU) when they are given a fuel source, such as coal or wooden logs. The Macerator is crafted using 3x Flint, 2x Cobblestone, 1x Basic Machine Casing, and 1x Electronic Circuit. With the copper cables previously created, you can attach the generator and macerator together, allowing the macerator to become powered and start working.
---
If you're not new to The 1.12.2 Pack, here are a few good starting points depending on your preferred play style:
| **Play style** | **Where to Start** |
| Technology | Start with Mekanism for power generation and ore processing, then branch into Applied Energistics 2 for storage and autocrafting as your base grows. |
| Magic | Begin with Thaumcraft by crafting a Thaumonomicon and scanning items to unlock research. Witchery: Resurrected is a strong companion mod once you have a foundation in Thaumcraft. |
| Exploration | Head into the Twilight Forest early for structured dungeon progression, then work toward Galacticraft and Planet Progression for space exploration later in the game. |
| Relaxed / Nature | Forestry and Growthcraft offer deep farming, brewing, and bee breeding progression that can be enjoyed entirely at your own pace without combat or automation. |
### Planet Progression and Space Exploration
The 1.12.2 Pack completely overhauls space exploration through the combination of Galacticraft, ExtraPlanets, and Planet Progression. Rather than simply visiting planets, players must research and unlock them through a progression system that spans multiple galaxies. Each planet offers unique resources, structures, and challenges, making space exploration a deep and rewarding late-game pursuit rather than a single destination.
### Technology and Magic
The pack covers both technical and magical play styles in depth. On the tech side, IndustrialCraft 2, Mekanism, Thermal Expansion, BuildCraft, Applied Energistics 2, and Modular Powersuits provide a rich and interconnected automation and energy system. On the magic side, Thaumcraft, Witchery: Resurrected, and Mystcraft offer entirely different progression paths rooted in research, rituals, and dimensional travel. Both sides of the pack are fully supported and complement each other well.
### Tinkers' Construct
Tinkers' Construct replaces the standard tool and weapon system with a fully modular crafting experience. Tools are built from individual parts, each made from a different material with its own properties and stats. Tinkers' Levelling allows your tools to gain experience and unlock additional modifier slots over time, making even basic tools worth investing in early. The combination provides a deep and satisfying crafting system that rewards experimentation.
### Ambience
AmbientSounds fills the Minecraft world with environmental audio, adding the sounds of insects, birds, wind, and water that respond dynamically to your surroundings. Whether you're deep in a dense forest, exploring a magical biome, or working in your base, the ambient soundscape makes the world feel noticeably more alive.
To install The 1.12.2 Pack and learn more about banned items, scheduled restarts, and dimension resets, visit the [1.12.2 Pack Server Card](https://wiki.siriusmc.net/link/115#bkmrk-the-1.12.2-pack).
It is recommended to allocate between 5GB and 8GB of RAM for The 1.12.2 Pack.
SiriusMC bans certain items to protect server performance, the in-game economy, and claimed player bases. Use **/banneditems** in-game to see the full list of banned items on the server, or expand the Banned Items list below.
Banned Items ▼
ICBM and IC2 explosives
Item-based chunk loaders
Mystcraft
Portal gun
Drill modules
RainMaker
Vacuum chest/XP vacuum
Teru-Teru-Bozum
Quantum quarry
Machine inventory manager
EFLN
---
| Ready to Play?
Open Minecraft, select Multiplayer, and add a new server with the address below.
1122.siriusmc.net
[Installation guide](https://wiki.siriusmc.net/link/115#bkmrk-installing-a-modpack-1) [Server rules](https://wiki.siriusmc.net/books/the-siriusmc-networks/page/server-rules-siriusmc) [Join Discord](https://discord.gg/siriusmc)
|
# RLCraft
Guides and tutorials for RLCraft!
# Introduction | RLCraft
|  |
| rl.siriusmc.net Version · 2.9.3 |
| RLCraft is a meticulously curated, survival-focused modpack featuring over 100 mods, fine-tuned for immersion and difficulty. It completely overhauls the standard Minecraft experience with modified crafting recipes, thirst and temperature mechanics, diverse and hostile creature encounters, and a character skill system. Every decision matters from the moment you spawn, and survival is never guaranteed.
|
## Getting Started
RLCraft has a steep learning curve. The tips below are essential for surviving your first few days, and are based on [Shivaxi's official guide](https://www.curseforge.com/minecraft/modpacks/rlcraft) on CurseForge.
### Your First Tools
1. Right-click to pick up an item you're looking at, or crouch to pick up items in a radius around you.
2. Get flint by breaking gravel. Get sticks by breaking tree leaves.
3. Hold flint and right-click on a stone surface to smash it into flint shards. Combine a stick and a flint shard to make a flint knife.
4. Use the knife to cut grass for fibre. Three fibre makes one grass string.
5. Craft a flint hatchet using a stick, grass string, and flint shard.
6. Place wood on the ground and right-click it with the hatchet to chop it into planks. Do the same with planks to get sticks.
7. Rocks are scattered on the ground. Right-click to pick them up. Craft four together in a 2x2 to make cobblestone. A stick and cobblestone makes a dagger, a good starting weapon.
### Survival Basics
- Drink water by crouching and right-clicking on a water source block with an empty hand. You can also drink from rain.
- Combat heat and cold with campfires, wool clothing, potions, ice armour, and similar items.
- Three wool makes a sleeping bag. Note that sleeping bags do not set your spawn point. Waystones set your spawn.
- Press **H** to see locational hit damage. Helmets are important. Without one, you will take headshot damage.
- At level 5, press **L** to choose your specialisation. Items list their skill requirements, so check these before assuming you can use new gear.
- String and grass string can both be crafted into wool. Birch wood can be crafted into paper.
- Exploring early and finding shelter is strongly recommended. Structures may contain useful starting items.
- If it looks like it will kill you, it probably will.
## Key Features
### Survival from the Ground Up
RLCraft throws out the standard Minecraft survival loop entirely. You cannot punch trees for wood, blocks only drop items when harvested with the correct tool, and your first priority is finding sticks and flint just to craft a basic knife. Hydration and temperature are persistent threats that require constant management. Hostile creatures are significantly more dangerous than in vanilla, and many can kill you before you have any meaningful gear. The pack rewards patience, preparation, and careful play.
### Character Progression and Skills
RLCraft adds a skill and level system that gates equipment and abilities behind progression. Items list their skill requirements directly, so an iron sword might require level 8 in the Attack skill before you can use it. At level 5 you choose a specialisation that shapes how your character develops from that point. This makes early decisions meaningful and gives long-term progression a clear direction.
### Exploration and Creature Encounters
The world of RLCraft is filled with a huge variety of hostile and passive creatures from Lycanites Mobs, Animania, and other mods. Many enemies have unique abilities and attack patterns that require different strategies to deal with. Exploration is dangerous but rewarding, with structures around the world that can provide starting items and shelter if you can reach them safely.
To install RLCraft and learn more about banned items, scheduled restarts, and dimension resets, visit the [RLCraft Server Card](https://wiki.siriusmc.net/link/115#bkmrk-rlcraft).
It is recommended to allocate between 2GB and 5GB of RAM for RLCraft.
SiriusMC bans certain items to protect server performance, the in-game economy, and claimed player bases. Use **/banneditems** in-game to see the full list of banned items on the server, or expand the Banned Items list below.
Banned Items ▼
---
| Ready to Play?
Open Minecraft, select Multiplayer, and add a new server with the address below.
rl.siriusmc.net
[Installation guide](https://wiki.siriusmc.net/link/115#bkmrk-installing-a-modpack-1) [Server rules](https://wiki.siriusmc.net/books/the-siriusmc-networks/page/server-rules-siriusmc) [Join Discord](https://discord.gg/siriusmc)
|
# All The Mods 10
Guides and tutorials for ATM10!
# Occultism Rituals | ATM10
| **Introduction**
Occultism Rituals are advanced magical structures used in ATM10 to summon spirits, automate resources, and unlock powerful progression systems. Rituals are built using chalk circles, pedestals, and spirit-based components, forming the core of Occultism automation and progression.
As players progress, rituals become increasingly complex, enabling higher-tier spirits, advanced crafting automation, and powerful late-game summoning systems.
|
- Used for spirit summoning and automation
- Enable advanced crafting and progression
- Require structured chalk-drawn circles
- Scale in complexity with progression
| Feature | Rituals |
| Spirit Summoning | ✔ |
| Automation | ✔ |
| Multi-Step Setup | ✔ |
| Progression-Based Scaling | ✔ |
- Ritual Chalk (White, Golden, Otherworld)
- Ritual Dowsing Rod
- Ritual Pedestals
- Spirit Fire
- Spirit Tablets (for advanced rituals)
| **Information**
Ritual recipes and layouts may vary between ATM10 versions. Always check JEI for the most up-to-date requirements.
|
| Tier | Purpose | Notes |
| White Chalk | Early rituals | Basic spirit summoning |
| Golden Chalk | Mid-game rituals | Unlocks stronger spirits |
| Otherworld Chalk | Late-game rituals | Required for high-tier demons |
- Place pedestals in designated positions
- Add required items to each pedestal
- Place spirit fire at the center
### Step 3: Activate Ritual
Use the Ritual Dowsing Rod on the center block to activate the ritual. If correctly built, it will begin immediately.
| **Tip**
Ritual failures are almost always caused by incorrect circle layout or missing pedestal items. Double-check setup before activation.
|
- **Foliot** - Basic automation and resource gathering
- **Djinni** - Mid-tier crafting and utility tasks
- **Afrit** - Advanced processing and fire-based automation
- **Marid** - High-tier rare automation and support functions
## Common Rituals
### Foliot Summoning
Summons basic worker spirits used for early automation tasks such as gathering resources.
### Storage Binding Ritual
Links spirits to storage systems, enabling remote access and automated item management.
### Spirit Tier Upgrade Ritual
Upgrades spirits through progression tiers (Foliot to Djinni to Afrit).
## Mid-Game Ritual Uses
- Automated crafting systems
- Ore processing and refinement
- Resource generation loops
- Storage logistics automation
## Advanced Ritual Concepts
### Demon Summoning
High-tier rituals used to bind powerful entities for automation and utility. These require rare materials and complex multi-layer circle designs.
### Multi-Pedestal Rituals
Advanced rituals that require multiple pedestals with synchronized item inputs for transformation or progression effects.
| **Warning**
Advanced rituals often fail if even one pedestal input is incorrect. Automation setups should be tested before scaling.
|
- Using incorrect chalk tier
- Misaligned ritual circles
- Missing pedestal items
- Incorrect spirit fire placement
- Activating rituals prematurely
## Pro Tips
- Build rituals in flat, chunk-loaded areas
- Pre-plan layouts before drawing chalk
- Label ritual setups for reuse
- Keep spare chalk for recovery
| **Tip**
Once optimized, rituals become one of the strongest automation tools in Occultism, especially when combined with spirit upgrades.
|
- Chalk defines structure
- Pedestals hold required items
- Spirit fire activates rituals
- Dowsing rod triggers execution
- Spirits enable automation and progression
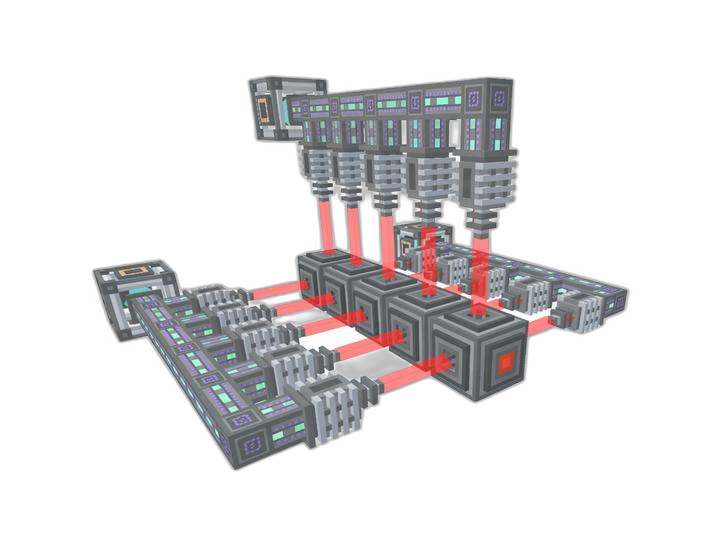
# Fusion Reactor | ATM10
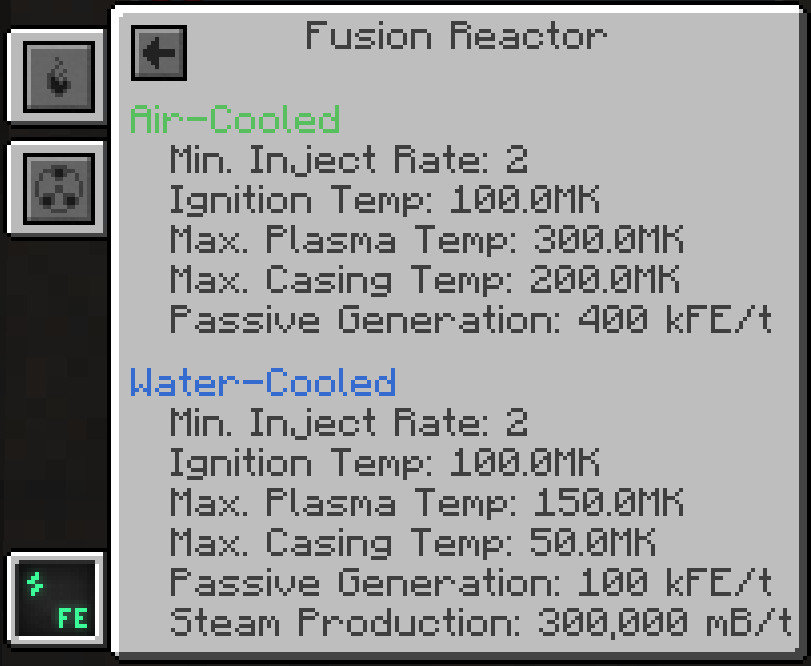
| The Fusion Reactor is Mekanism's end-game multiblock power generator capable of producing enormous amounts of energy through nuclear fusion. Unlike the Fission Reactor, the Fusion Reactor cannot melt down, making it one of the safest large-scale power generation methods available in All The Mods 10.
This guide explains how to construct the reactor, understand the Reactor Controller, produce D-T Fuel, ignite the reaction, and maintain continuous power generation.
|
- **Passive Mode** - Generates FE directly.
- **Water-Cooled Mode** - Produces Steam for an Industrial Turbine, resulting in significantly higher power output.
| Feature | Fusion Reactor |
|---|
| Meltdown Risk | None |
| Fuel Type | D-T Fuel |
| Power Output | Very High |
| Cooling Options | Passive or Water-Cooled |
| Ignition Required | Yes |
| Component | Required | Purpose |
|---|
| Fusion Reactor Controller | ✔ | Controls the multiblock and displays reactor information. |
| Fusion Reactor Frame | ✔ | Forms the reactor casing. |
| Fusion Reactor Port | ✔ | Transfers fluids, gases and energy. |
| Laser Focus Matrix | ✔ | Required for laser ignition. |
| Fusion Reactor Logic Adapter | Optional | Provides automation and redstone control. |
- Structure status
- Charged Hohlraum slot
- Access to the Heat, Fuel and Statistics tabs
The text displayed at the top of the interface indicates whether the reactor structure is correctly assembled.
| **Important**
The Main Screen contains a single inventory slot. A **Charged Hohlraum** must be inserted into this slot before a laser can ignite the Fusion Reactor.
|
| Indicator | Description |
|---|
| Plasma Temperature | Current plasma temperature inside the reactor. |
| Case Temperature | Temperature of the reactor casing. |
| Internal Energy | Current FE stored within the reactor. |
| Water | Amount of water stored for cooling. |
| Steam | Steam currently stored inside the reactor. |
| Tank | Contents |
|---|
| Left | Deuterium |
| Centre | D-T Fuel |
| Right | Tritium |
- Current Injection Rate
- Maximum Plasma Temperature
- Passive FE Generation
- Steam Production
This information is useful when monitoring reactor performance and tuning power output.
[](https://siriusmc-bookstack.s3.amazonaws.com/uploads/images/gallery/2026-07/qrUzI1cRi5R9SvnB-reactorgui4.png)
## Producing D-T Fuel
The Fusion Reactor requires **D-T Fuel** to sustain the fusion reaction. D-T Fuel is produced by combining **Deuterium** and **Tritium** in a Chemical Infuser.
Both gases are produced from Water using Mekanism's gas processing machines.
### Producing Tritium
Tritium is produced by converting Hydrogen inside a Solar Neutron Activator.
#### Step 1 - Produce Hydrogen
Supply Water to an **Electrolytic Separator**.
The machine separates Water into:
- Hydrogen
- Oxygen
Only the Hydrogen output is required for Tritium production.
#### Step 2 - Convert Hydrogen into Tritium
Pipe the Hydrogen into a **Solar Neutron Activator**.
The Solar Neutron Activator requires:
- Direct access to the sky.
- Daylight.
The Hydrogen will gradually be converted into **Tritium**.
[](https://siriusmc-bookstack.s3.amazonaws.com/uploads/images/gallery/2026-07/cEw5DULMuY1qec8v-solar-neutron-activator.png)
### Producing Deuterium
Deuterium is produced by condensing Hydrogen into its liquid form.
#### Step 1 - Produce Hydrogen
Supply Water to an **Electrolytic Separator**.
Collect the Hydrogen output.
#### Step 2 - Condense the Hydrogen
Pipe the Hydrogen into a **Rotary Condensentrator**.
Set the Rotary Condensentrator to **Condensentrating Mode**.
The Hydrogen will be converted into **Deuterium**.
[](https://siriusmc-bookstack.s3.amazonaws.com/uploads/images/gallery/2026-07/GlD138uCIqZcAEqm-rotary-condensentrator.png)
### Producing D-T Fuel
Once both gases have been produced, they can be combined into D-T Fuel.
Insert both gases into the Chemical Infuser and it will continuously produce **D-T Fuel**.
## Charging a Hohlraum
The **Hohlraum** is a critical item used to ignite the Fusion Reactor.
Without a **Charged Hohlraum**, the Fusion Reactor cannot be started using lasers.
### Charging the Hohlraum
To charge a Hohlraum:
1. Produce at least **10 mB** of D-T Fuel inside a Chemical Infuser.
2. Insert an empty **Hohlraum** into the centre slot of the Chemical Infuser.
3. The Hohlraum will absorb the fuel and become a **Charged Hohlraum**.
4. Remove the Charged Hohlraum and insert it into the inventory slot of the **Fusion Reactor Controller**.
| **Important**
A Charged Hohlraum is consumed when the Fusion Reactor is successfully ignited. If the reactor shuts down in the future, another Charged Hohlraum will be required to restart it.
|
| Requirement | Status |
|---|
| Fusion Reactor Structure Formed | Required |
| Laser Focus Matrix Installed | Required |
| Charged Hohlraum Installed | Required |
| D-T Fuel Available | Required |
| Laser Amplifier or Heat Source | Required |
| **Tip**
Keep one or more Charged Hohlraums stored nearby. If the reactor is shut down for maintenance or runs out of fuel, you'll be able to restart it immediately without waiting for another Hohlraum to charge.
|
| Requirement | Minimum |
|---|
| Charged Hohlraum | 1 |
| Laser Amplifier Energy | 1 GFE |
| Laser Focus Matrix | Installed |
1. Insert a Charged Hohlraum into the Reactor Controller.
2. Charge a Laser Amplifier until it contains at least **1 GFE**.
3. Aim one or more Lasers into the Laser Amplifier.
4. Set the Laser Amplifier Redstone Mode to **Normal**.
5. Trigger the amplifier with a Button or Redstone signal.
6. The stored laser energy will fire into the Laser Focus Matrix and instantly ignite the reactor.
[](https://siriusmc-bookstack.s3.amazonaws.com/uploads/images/gallery/2026-07/dJ7IAKPScwHXd66f-output.png)
| **Tip**
Leave the Laser Amplifier connected after ignition. Keeping it charged allows the reactor to be restarted immediately if it ever shuts down.
|
| Mode | Output | Recommended For |
|---|
| Passive Mode | FE | Simple power generation |
| Water-Cooled Mode | Steam | Industrial Turbine setups |
- Simple to set up.
- No Steam management required.
- Ideal for smaller installations.
### Water-Cooled Mode
Supplying Water to the reactor enables Water-Cooled Mode.
The reactor converts Water into Steam, which can then be sent into an **Industrial Turbine**.
This configuration produces considerably more usable power than Passive Mode and is recommended for most late-game bases.
## Maintaining the Reactor
Once ignited, the Fusion Reactor will continue operating as long as it has a continuous supply of fuel.
### Fuel Production
- Keep Electrolytic Separators supplied with Water.
- Ensure Solar Neutron Activators have direct access to the sky.
- Keep Rotary Condensentrators and Chemical Infusers powered.
- Maintain a reserve of D-T Fuel inside Chemical Tanks.
### Injection Rate
The Injection Rate determines how much fuel is consumed every tick.
| Higher Injection Rate | Effect |
|---|
| Fuel Consumption | Increases |
| Power Output | Increases |
| Steam Production | Increases |
| **Information**
Only increase the Injection Rate once your Deuterium and Tritium production can continuously supply the reactor. Running out of fuel will cause the reactor to shut down.
|
| Problem | Possible Cause | Solution |
|---|
| Structure Incomplete | Missing or incorrectly placed blocks. | Verify the multiblock matches the JEI structure. |
| Reactor Will Not Ignite | Missing Charged Hohlraum or insufficient laser energy. | Install a Charged Hohlraum and fire at least 1 GFE into the Laser Focus Matrix. |
| No Tritium Production | Solar Neutron Activator blocked or operating at night. | Provide direct sky access or wait until daytime. |
| Reactor Stops Running | Fuel production has stopped. | Restore Deuterium and Tritium production. |
| Low Power Output | Low Injection Rate. | Increase the Injection Rate once fuel production is sufficient. |
| **Tip**
For the highest possible power output, pair the Fusion Reactor with a correctly sized Industrial Turbine and maintain a steady supply of D-T Fuel. This setup provides one of the most efficient long-term power solutions available in ATM10.
|
|  |
| atm10.siriusmc.net Version · 7.1 |
| All The Mods 10 (ATM10) is a massive Minecraft modpack featuring 470+ mods and a comprehensive quest system to guide your progression. Designed for long-term gameplay, ATM10 includes a built-in endgame goal in the form of the ATM Star, a powerful craftable item that requires mastery of many of the pack's mods to complete. Whether you enjoy technology, magic, exploration, or a mix of everything, ATM10 has a path for you.
|
## Key Features
### Technology and Magic
ATM10 covers both technical and magical play styles in depth. On the tech side, mods like Mekanism, Applied Energistics 2, Thermal Expansion, and Create provide deep automation, power generation, and storage systems. On the magic side, Botania, Blood Magic, Ars Nouveau, and Mahou Tsukai offer entirely different progression paths. Both sides of the pack are fully fleshed out and can be pursued independently or combined for more powerful setups.
### Exploration and Dimensions
ATM10 expands the world significantly with new biomes, structures, and dimensions to explore. The Mining World provides a dedicated resource dimension that resets weekly, keeping the Overworld pristine for long-term builds. Additional dimensions such as the Twilight Forest, The Other, the Undergarden, the Bumblezone, and the Deeper Dark each offer unique environments, mobs, and loot.
### The ATM Star
The ATM Star is the endgame goal of ATM10. Crafting it requires progressing deeply into many of the pack's mods and obtaining some of the most difficult materials in the game. It is a long-term challenge that gives the entire playthrough direction and purpose, with creative-tier rewards for those who complete it.
If you'd like to see an interactive ATM Star guide, see our [SiriusMC ATM Star Guide](https://wiki.siriusmc.net/books/modpack-guides-and-tutorials/page/siriusmcs-atm-star-guide-atm10).
## Beginner Tips and Tricks
### Vein Miner (Ultimine)
ATM10 includes the Ultimine mod, commonly referred to as Vein Miner. It allows you to mine multiple blocks of the same type at once, making early resource gathering significantly faster. It also supports mining large 3x3 tunnels or staircases, which is useful for reaching lower Y levels where better materials are found.
### Finding Biomes and Structures
Two compasses make navigation in ATM10 much easier. Nature's Compass lets you search for any biome in the game and points you toward it with a distance readout. Explorer's Compass works the same way but for locating generated structures. Both are cheap to craft and should be made early.
### Early Power Generation
Mekanism wind generators are one of the best early power sources in ATM10. They require no fuel and generate energy passively as long as they are placed. The higher you build them, the more power they produce, so always place them as high as possible. They are an accessible and reliable way to power your early machines before you have the resources for more advanced generation methods.
## Getting Started
[](https://siriusmc-bookstack.s3.amazonaws.com/uploads/images/gallery/2025-10/8EjfyEQiS6gOxA6X-image.png)
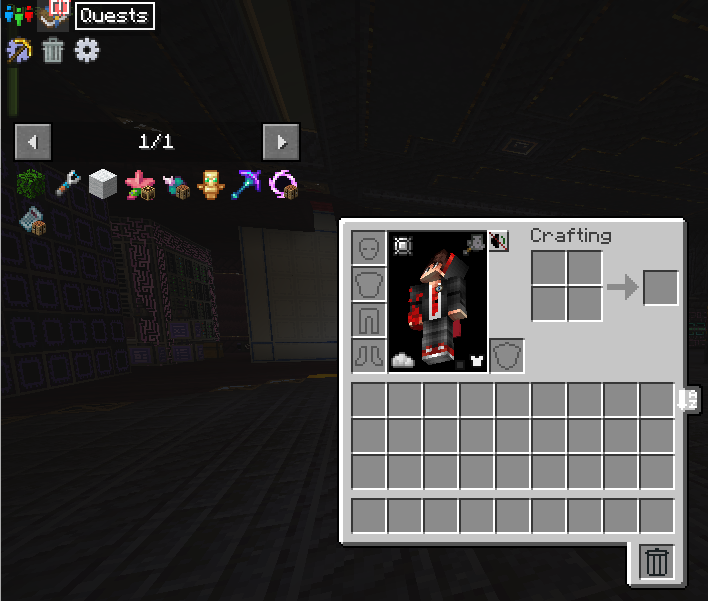
ATM10 can feel overwhelming at first. With hundreds of mods included, knowing where to begin isn't always obvious. The best starting point is the quest book, found in the top-left corner of your inventory screen. It walks you through the pack step by step, introduces the different mods in a structured way, and rewards you for completing each quest to give you a helpful early boost. Following the quest book is the approach we recommend to all new players on SiriusMC.
| **Play style** | **Where to Start** |
| Technology | Start with Mekanism for early power generation and ore processing, then move into Applied Energistics 2 for storage and autocrafting as your base grows. |
| Magic | Begin with Ars Nouveau or Botania for accessible early magic progression, then branch into Blood Magic or Mahou Tsukai for more complex and powerful systems. |
| Exploration | Head into the Twilight Forest early for structured dungeon progression, then work toward the Mining World and other dimensions for unique resources later in the game. |
| Endgame | Work toward crafting the ATM Star. This requires deep progression across many of the pack's mods and is the ultimate long-term challenge ATM10 has to offer. |
To install ATM10 and learn more about banned items, scheduled restarts, and dimension resets, visit the [ATM10 Server Card](https://wiki.siriusmc.net/link/115#bkmrk-allthemods-10-%28atm10).
It is recommended to allocate between 8GB and 10GB of RAM for ATM10.
SiriusMC bans certain items to protect server performance, the in-game economy, and claimed player bases. Use **/banneditems** in-game to see the full list of banned items on the server, or expand the Banned Items list below.
Banned Items ▼
Item-based chunk loaders
All tick speed up items
Ender drives
Paradox machine
Explosives
Various Mahou Tsukai staffs
Time/weather manipulation items
---
| Ready to Play?
Open Minecraft, select Multiplayer, and add a new server with the address below.
atm10.siriusmc.net
[Installation guide](https://wiki.siriusmc.net/link/115#bkmrk-installing-a-modpack-1) [Server rules](https://wiki.siriusmc.net/books/the-siriusmc-networks/page/server-rules-siriusmc) [Join Discord](https://discord.gg/siriusmc)
|
| Guide
[AllTheModium Ores Guide](https://wiki.siriusmc.net/books/modpack-guides-and-tutorials/page/allthemodium-ores-guide-atm10)
ATM10 features a tier progression system of unique ores beyond Netherite. This guide shows you where to find them, and how to use them.
| Guide
[SiriusMC's ATM Star Guide](https://wiki.siriusmc.net/books/modpack-guides-and-tutorials/page/siriusmcs-atm-star-guide-atm10)
SiriusMC's guide to obtaining the ATM star.
| Guide
[Mekanism Fission Reactor](https://wiki.siriusmc.net/books/modpack-guides-and-tutorials/page/mekanism-fission-reactor-atm10)
Learn how to build, fuel, and safely maintain a Nuclear Fission Reactor on ATM10.
|
# AllTheModium Ores Guide | ATM10
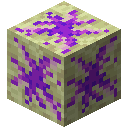
| [](https://siriusmc-bookstack.s3.amazonaws.com/uploads/images/gallery/2025-12/FGn9brRa8TYnWgFW-embedded-image-0wiqwwh7.png) |
| atm10.siriusmc.net Version · 7.0 |
| ATM10 features a tier progression system of unique ores beyond Netherite, each found in different dimensions and requiring increasingly powerful tools to mine. The progression order is:
**Netherite (Vanilla) ➜ AllTheModium ➜ Vibranium ➜ Unobtainium**
|
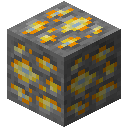
## AllTheModium
[](https://siriusmc-bookstack.s3.amazonaws.com/uploads/images/gallery/2025-12/Fs5zMQXXBkISQk8y-embedded-image-2erfpvmr.png)
AllTheModium ore can be found in the [Deep Dark](https://minecraft.fandom.com/wiki/Deep_Dark) biome in the Overworld, or in the Mining dimension added by [Aroma1997's Dimensional World](https://www.curseforge.com/minecraft/mc-mods/aroma1997s-dimensional-world). In the Deep Dark, look on the walls and roof of caverns or within [Ancient Cities](https://minecraft.wiki/w/Ancient_City). In the Mining dimension, focus on the [Deepslate layer](https://minecraft.fandom.com/wiki/Deepslate).
| ⓘ Requires [Netherite](https://minecraft.fandom.com/wiki/Netherite) quality tools or better to mine.
ⓘ Found in the [Deep Dark](https://minecraft.fandom.com/wiki/Deep_Dark) biome in the Overworld.
ⓘ Found in the Mining dimension at the [Deepslate layer](https://minecraft.fandom.com/wiki/Deepslate).
|
### Finding the AllTheModium Smithing Template
Use a [Brush](https://minecraft.fandom.com/wiki/Brush) on [Suspicious Clay](https://minecraft.fandom.com/wiki/Suspicious_Block) blocks inside [Ancient Cities](https://minecraft.wiki/w/Ancient_City). Suspicious Clay looks similar to regular clay but has a slightly different texture.
[](https://siriusmc-bookstack.s3.amazonaws.com/uploads/images/gallery/2026-03/XuaSkIAqJcm1WBJv-suspicious-clay.png)
### Smithing Upgrade
| **Slot** | **Item** |
| Template | AllTheModium Smithing Template |
| Gear | Netherite tool or armour piece |
| Material | AllTheModium Ingot |

### Duplicating the Template
| **Ingredient** | **Amount** |
| AllTheModium Smithing Template | 1 |
| Netherite Ingot | 7 |
| Deepslate | 1 |

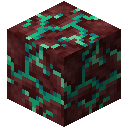
## Vibranium
[](https://siriusmc-bookstack.s3.amazonaws.com/uploads/images/gallery/2025-12/CZ5wYVKAHCpyfFMV-embedded-image-ld04ur6d.png)
Vibranium ore can only be found in the [Crimson Forest](https://minecraft.fandom.com/wiki/Crimson_Forest) and [Warped Forest](https://minecraft.fandom.com/wiki/Warped_Forest) biomes of the Nether. The Crimson Forest is characterised by red fungi and hoglins, while the Warped Forest is teal-coloured and generally safer to explore. Vibranium spawns at high Y altitudes; look near the Nether ceiling rather than the floor.
| ⓘ Requires AllTheModium quality tools or better to mine.
ⓘ Found in the [Crimson Forest](https://minecraft.fandom.com/wiki/Crimson_Forest) and [Warped Forest](https://minecraft.fandom.com/wiki/Warped_Forest) biomes of the Nether.
ⓘ Spawns at high Y altitudes, normally near the ceiling.
|
### Finding the Vibranium Smithing Template
Use a Brush on [Suspicious Soul Sand](https://minecraft.fandom.com/wiki/Suspicious_Block) inside [Bastion Remnants](https://minecraft.fandom.com/wiki/Bastion_Remnant) in the Nether. Bastions are large blackstone fortress structures home to Piglins and Piglin Brutes. Bring gold armour to avoid aggravating the Piglins. Suspicious Soul Sand can be found on the floors and in treasure rooms.
[](https://siriusmc-bookstack.s3.amazonaws.com/uploads/images/gallery/2026-03/o0Ob8sQFVspn3RCs-suspicious-soul-sand.png)
### Smithing Upgrade
| **Slot** | **Item** |
| Template | Vibranium Smithing Template |
| Gear | AllTheModium tool or armour piece |
| Material | Vibranium Ingot |

### Duplicating the Template
| **Ingredient** | **Amount** |
| Vibranium Smithing Template | 1 |
| AllTheModium Ingot | 7 |
| Ancient Stone | 1 |
## Unobtainium
[](https://siriusmc-bookstack.s3.amazonaws.com/uploads/images/gallery/2025-12/5PB4PMjcwcgcmWzx-embedded-image-tldvy4e7.png)
Unobtainium ore can only be found in the [End Highlands](https://minecraft.fandom.com/wiki/The_End_(biome)#End_highlands), the outer islands of The End dimension. To reach the outer islands, travel through the End Gateway portal that appears after defeating the Ender Dragon, or fly away from the main island. The Highlands biome is identifiable by its elevated terrain and chorus plants. Unobtainium spawns within the island's crust at any Y level, so you can find it by searching on the surface.
| ⓘ Requires Vibranium quality tools or better to mine.
ⓘ Found in the [Highlands biome](https://minecraft.fandom.com/wiki/The_End_(biome)#End_highlights) within [The End](https://minecraft.fandom.com/wiki/The_End).
ⓘ Spawns within the island's crust at any Y level.
|
### Finding the Unobtainium Smithing Template
Loot chests within the **Library of Dungeons**, large underground dungeon structures found in The Other dimension. Explore thoroughly as chests can be spread across multiple rooms within the structure.
### Smithing Upgrade
| **Slot** | **Item** |
| Template | Unobtainium Smithing Template |
| Gear | Vibranium tool or armour piece |
| Material | Unobtainium Ingot |

### Duplicating the Template
| **Ingredient** | **Amount** |
| Unobtainium Smithing Template | 1 |
| Vibranium Ingot | 7 |
| End Stone | 1 |

## Other Methods of Obtaining These Ores
**Method A: Laser Drills**
Using [Laser Drills](https://ftb.fandom.com/wiki/Laser_Drill_(Industrial_Foregoing)) and [Laser Bases](https://ftb.fandom.com/wiki/Laser_Base) from [Industrial Foregoing](https://ftb.fandom.com/wiki/Industrial_Foregoing) with the correct [Laser Lens](https://ftb.fandom.com/wiki/Laser_Lens_(Industrial_Foregoing)) in the correct biomes can generate the respective ore for that biome.
**Method B: Mystical Agriculture**
Seeds from [Mystical Agriculture](https://ftb.fandom.com/wiki/Mystical_Agriculture) can produce [Essence](https://ftb.fandom.com/wiki/Category:Mystical_Agriculture) of these ores, which can then be converted into ingots.
**Method C: Productive Bees**
Bees from the [Productive Bees](https://www.curseforge.com/minecraft/mc-mods/productivebees) mod can produce combs of these ores, which can be converted into ingots using a centrifuge.
| Guide
[SiriusMC's ATM Star Guide](https://wiki.siriusmc.net/books/modpack-guides-and-tutorials/page/siriusmcs-atm-star-guide-atm10)
SiriusMC's guide to obtaining the ATM star.
| Guide
[Mekanism Fission Reactor](https://wiki.siriusmc.net/books/modpack-guides-and-tutorials/page/mekanism-fission-reactor-atm10)
A helpful guide on creating a fission reactor from the mod Mekanism.
| Introduction
[Introduction](https://wiki.siriusmc.net/books/modpack-guides-and-tutorials/page/introduction-atm10)
An introduction into ATM10, including how to get started and what mods are featured.
|
# SiriusMC's ATM Star Guide | ATM10
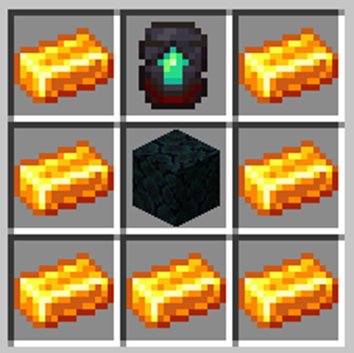
| This guide covers the complete ATM Star recipe for All the Mods 10 (ATM10). The ATM Star is the endgame item crafted at the Runic Star Altar, requiring 8 unique components and 3 ATM Alloys sourced from dozens of mods. Use the interactive guide below to see every ingredient for each component.
|
[](https://siriusmc-bookstack.s3.amazonaws.com/uploads/images/gallery/2026-03/dfyUBZnv30kXCTwg-atmstar.png)
ATM Star Crafting Guide
All the Mods 10 — Crafted at the Runic Star Altar
Expand each component below to see its ingredients by clicking on the card
 Dragon Soul ▼
Apothic Enchanting · Infused Breath
Occultism · Soul Gem
Occultism · Familiar Dragon Spawn Egg
Productive Trees · Socotra Dragon Sapling
Hostile Networks · Ender Dragon Data Model
Allthemodium · Piglich Heart Block
Productive Bees · Soul Lava Bee Spawn Egg
Cataclysm · Abyssal Sacrifice
Eternal Starlight · Chain of Souls
 Improbable Probability Device ▼
Mekanism · Antimatter Pellet
AE2 · Singularity
Megacells · 256m Portable Item Cell
Pneumaticcraft · Aerial Interface
Iron Furnaces · Million Furnace
Iron's Spellbooks · Lightning Upgrade Orb
 Dimensional Seed ▼
Allthecompressed · Netherrack x6
Allthecompressed · Dirt x6
Allthecompressed · Obsidian x5
Miniature Exit
Miniature Nether
Miniature End
Allthecompressed · End Stone x5
Allthecompressed · Emerald Block x4
Allthecompressed · Diamond Block x4
Sub-components: Miniature Portals
Miniature Nether
→ Obsidian
→ Nether Star
→ Hellshelf of Masterful Sight
→ Wither Skeleton Skull
→ Warped Nylium
Miniature End
→ Apothic Enchanting Endshelf
→ Ender Eye
→ Apothic Enchanting Draconic Endshelf
Miniature Exit
→ Dragon Egg
→ Apothic Enchanting Infused Breath
→ Soul Touched Sculkshelf
→ End Crystal
 Wither's Compass ▼
Productive Bees · Withered Configurable Comb
Industrial Foregoing · Wither Builder
Deeper Darker · Heart of the Deep
Generator Galore · Netherstar Generator x64
Iron's Spellbooks · Wither Skull Scroll
Mystical Agriculture · Witherproof Bricks
Tipped Arrow (Wither Potion)
Ars Nouveau · Wither Glyph
Mystical Agradditions · Nether Star Crux
 Philosopher's Fuel ▼
Generator Galore · Ender Generator
Iron Furnaces · Rainbow Coal
Big Reactors · Insanite Block
Modern Industrialization · Uranium Fuel Rod Quad
Mystical Agradditions · Insanium Coal Block
Forbidden Arcanus · Smelter Prism
Mystical Agriculture · Awakened Supremium Ingot Block
Generator Galore · Magmatic Generator x64
Evil Craft · Dark Tank + JDT Refined T4 Fluid Source
 Nexium Emitter ▼
Powah · Nitro Player Transmitter
AE2 · Wireless Universal Terminal
Mekanism · Gravitational Modulating Unit Module
Modern Industrialization · Large Advanced Motor
Immersive Engineering · Tesla Coil
Advanced AE · Quantum Multi Threader
AE · Infinity Booster Infinity Card
 Oblivion Shard ▼
Forbidden Arcanus · Eternal Stella
Evil Craft · Mace of Destruction (with Blood)
Evil Craft · Piercing Vengeance Focus
Steve's Carts · Galgadorian Drill
Cataclysm · Meat Shredder
Twilight Forest · Snow Queen Trophy
Cataclysm · Void Forge
 Pulsating Black Hole ▼
Iron's Spellbooks · Fire Upgrade Orb
AE2 · Quantum Ring
Pneumaticcraft · Micromissiles
Just Dire Things · Paradox Machine
Pocket Storage · PSU 4
Occultism · Stable Wormhole
Roots Classic · Crystal Staff
Industrial Foregoing · Mycelial Explosive
Evil Craft · Lightning Bomb
ATM Alloys — Required for the Star

Vibranium-Allthemodium Alloy
via Powah Energizing Orb
• Allthemodium Ingot
• Vibranium Ingot
• Piglich Heart x2
• Compressed Nitro Crystal Block
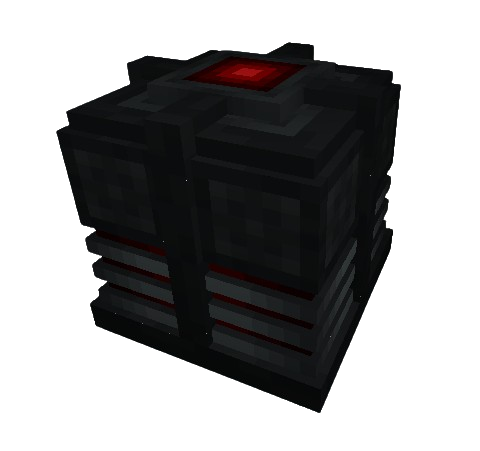 1,000,000,000 FE required

Unobtainium-Allthemodium Alloy
via Ars Nouveau Enchanting Apparatus
• Allthemodium Ingot
• Unobtainium Ingot
• Piglich Heart x2
• Air / Earth / Fire / Water Essence
 10,000 Source required

Unobtainium-Vibranium Alloy
via Industrial Foregoing Dissolution Chamber
• Vibranium Ingot
• Unobtainium Ingot
• Pink Slime x4
• Piglich Heart x2
 100mb Soul Lava required
[](https://siriusmc-bookstack.s3.amazonaws.com/uploads/images/gallery/2026-03/dfyUBZnv30kXCTwg-atmstar.png)
ATM Star
Crafted at the **Runic Star Altar**
8 Unique Components 3 ATM Alloys Multiple Dimensions Dozens of Mods
| Guide
[AllTheModium Ores Guide](https://wiki.siriusmc.net/books/modpack-guides-and-tutorials/page/allthemodium-ores-guide-atm10)
ATM10 features a tier progression system of unique ores beyond Netherite. This guide shows you where to find them, and how to use them.
| Guide
[Mekanism Fission Reactor](https://wiki.siriusmc.net/books/modpack-guides-and-tutorials/page/mekanism-fission-reactor-atm10)
A helpful guide on creating a fission reactor from the mod Mekanism.
| Introduction
[Introduction](https://wiki.siriusmc.net/books/modpack-guides-and-tutorials/page/introduction-atm10)
An introduction into ATM10, including how to get started and what mods are featured.
|
# Mekanism Fission Reactor | ATM10
| The Fission Reactor is a multiblock structure, in the Mekanism mod, used to generate large amounts of power by burning nuclear fuel. It produces heat which converts water into steam for power generation, and generates nuclear waste as a by-product.
|
## Requirements
### Reactor Components
- Fission Reactor Casing
- Fission Reactor Port
- Fission Fuel Assembly
- Control Rod Assembly
- Reactor Glass (optional)
### Supporting Systems
#### Coolant Supply
A constant water source is required. Options include:
- Sink (recommended)
- Mechanical Pipes (the longer the pipes, the more water is available to pump into the multiblock)
- Eternal Water Block (EvilCraft)
#### Fuel Production
Fission Fuel must be produced through a chemical chain:
Uranium → Uranium Hexafluoride → Fission Fuel
Required machines:
- Chemical Oxidizer
- Chemical Infuser
- Isotopic Centrifuge
#### Waste Handling
- Pressurized Tubes
- Radioactive Waste Barrel (temporary storage)
## Structure
### Construction Steps
#### 1. Build the Outer Casing
To begin, construct a **5×5×5 hollow cube** using Fission Reactor Casing. 5x5x5 is the smallest a Fission Reactor can be.
#### 2. Install Internal Components
Inside the structure:
- Place **Fission Fuel Assemblies** vertically
- Place **Control Rod Assemblies** directly on top of each fuel assembly
#### 3. Add Ports
Install the following ports on the reactor casing:
- Fuel Input Port
- Coolant Input Port
- Steam Output Port
- Waste Output Port
Additional ports can be added as needed.
#### 4. Optional: Reactor Glass
Replace casing blocks with Reactor Glass for visibility into the reactor interior. The corners of the reactor must be casing blocks to allow for the multiblock to take shape.
## Setup
### Connections
Connect each port on the reactor casing to its corresponding system using Mechanical Pipes or Pressurized Tubes as appropriate.
| **Port** | **Connection** |
| Coolant Input Port | Connect to your water supply. Ensure constant flow at all times. |
| Fuel Input Port | Pipe Fission Fuel in from your fuel production chain. |
| Steam Output Port | Extract steam and route it to an Industrial Turbine for power generation. |
| Waste Output Port | Extract nuclear waste continuously. Store in Radioactive Waste Barrels or process further. |
### Activation
1. Enable the reactor.
2. Confirm water is flowing.
3. Confirm waste output is connected.
### Power Increase
Gradually increase the burn rate. Increasing it too fast can cause the reactor to explode.
### Recommended Operating Range
- Temperature: below 800 K
- Burn Rate: 0.5–2.0 mB/t (early setup)
## Power Generation
### Industrial Turbine (Recommended)
- Converts steam into energy efficiently
- Required for optimal performance
Without a turbine, most generated energy is wasted.
## Safety
### Meltdown Causes
- Insufficient coolant
- Excessive burn rate
- Waste backup
- Blocked output systems
### Safety Guidelines
- Maintain constant water supply
- Ensure waste is continuously removed
- Increase burn rate gradually
- Monitor reactor temperature
## Scaling
### Increase Output
- Increase burn rate slowly
- Add more fuel assemblies
- Expand reactor size (e.g. 7×7×7 or larger)
## Common Mistakes
- Activating reactor at high burn rate
- Failing to supply enough coolant
- Ignoring waste management
- Not using a turbine
## Recommended Starter Setup
- 5×5×5 reactor
- 4–6 fuel assemblies
- Burn rate ~1.0 mB/t
- Connected industrial turbine
- Infinite water source
| Guide
[AllTheModium Ores Guide](https://wiki.siriusmc.net/books/modpack-guides-and-tutorials/page/allthemodium-ores-guide-atm10)
ATM10 features a tier progression system of unique ores beyond Netherite. This guide shows you where to find them, and how to use them.
| Guide
[SiriusMC's ATM Star Guide](https://wiki.siriusmc.net/books/modpack-guides-and-tutorials/page/siriusmcs-atm-star-guide-atm10)
SiriusMC's guide to obtaining the ATM star.
| Introduction
[Introduction](https://wiki.siriusmc.net/books/modpack-guides-and-tutorials/page/introduction-atm10)
An introduction into ATM10, including how to get started and what mods are featured.
|
# Mystical Agriculture - Magical Soil | ATM10
| Magical Soil is a crux-type block added by KubeJS to assist players with growing crops from Mystical Agriculture. It removes the need to match farmland tiers to crop tiers, letting almost every Mystical Agriculture crop grow from a single farmland type, making it the ideal foundation for large scale essence farms.
|
| Tier 6 Seed | Required Crux |
|---|
| Nitro Crystal Seeds | Nitro Crystal Crux |
| Awakened Draconium Seeds | Awakened Draconium Crux |
| Dragon Egg Seeds | Dragon Egg Crux |
| Nether Star Seeds | Nether Star Crux |
## Crafting Magical Soil
Magical Soil can be crafted using either a **Crafting Table** or the **Infusion Altar** from Mystical Agriculture. The recipes are highly different, but both require high tier materials.
### Crafting Table Recipe
To craft Magical Soil in a Crafting Table you will need:
- 1x Insanium Block
- 1x Nether Star Block 2x
- 1x Dirt 3x
- 1x Awakened Supremium Growth Accelerator
- 1x Insanium Farmland
- 1x Dragon Head
- 1x Piglich Heart
- 1x Ender Pearl Block 3x
- 1x Moonlight Magic Crepe Myrtle Sapling
*Note: some ingredient names include a number as part of the item name itself (for example, Nether Star Block 2x, Dirt 3x). This refers to a compressed or dense variant of that block, not a quantity to craft.*
### Infusion Altar Recipe
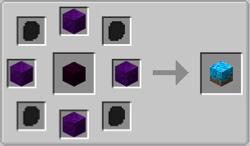To craft Magical Soil in an Infusion Altar you will need:
- 4x Dragon Scale
- 4x Insanium Block
- 1x Insanium Farmland
| Guide
[Mekanism Fission Reactor](https://wiki.siriusmc.net/books/modpack-guides-and-tutorials/page/mekanism-fission-reactor-atm10)
Learn how to build, fuel, and safely maintain a Nuclear Fission Reactor on ATM10.
| Guide
[SiriusMC's ATM Star Guide](https://wiki.siriusmc.net/books/modpack-guides-and-tutorials/page/siriusmcs-atm-star-guide-atm10)
SiriusMC's guide to obtaining the ATM star.
| Guide
[AllTheModium Ores Guide](https://wiki.siriusmc.net/books/modpack-guides-and-tutorials/page/allthemodium-ores-guide-atm10)
ATM10 features a tier progression system of unique ores beyond Netherite. This guide shows you where to find them, and how to use them.
|
# ATM 10 To The Sky
Guides and tutorials for ATM10:TTS!
# Introduction | ATM10: To The Sky
|  |
| atm10tts.siriusmc.net Version · 2.0.2 |
| All The Mods 10: To The Sky (ATM10:TTS) is a skyblock version of ATM10, featuring 300+ mods and a progression experience far beyond traditional skyblock gameplay. Start from a small island in your own dedicated dimension, then expand, automate, and explore your way through a massive modded tech and magic ecosystem. The ultimate goal is the same as ATM10: craft the ATM Star, this time starting with nothing but a small island in the sky.
|
## Getting Started

ATM10:TTS can feel overwhelming at first given how different its opening is from a standard Minecraft playthrough. The best starting point is the quest book, found in the top-left corner of your inventory screen. It walks you through the pack step by step, introduces sieving, automation, and the different mods in a structured way, and rewards you for completing each quest. Following the quest book is the approach we recommend to all new players on SiriusMC.
---
If you prefer to explore freely, here are some good starting points depending on your preferred play style:
| **Play style** | **Where to Start** |
| Technology | Set up a sieve and auto-sieving system as early as possible to generate resources passively, then move into Mekanism for power and Applied Energistics 2 for storage and autocrafting. |
| Magic | Begin with Botania or Ars Nouveau once you have a basic resource supply running. Both mods work well in a skyblock environment and don't require large amounts of world exploration to get started. |
| Building | Focus on expanding your island early and establishing a clean, organised layout. Having space for dedicated automation and storage areas will make later progression significantly easier. |
| Endgame | Work toward crafting the ATM Star. Completing it from a skyblock starting point is one of the most challenging goals in any ATM pack and is the defining long-term objective of ATM10:TTS. |
### Skyblock Progression
ATM10:TTS reimagines the ATM10 experience as a skyblock pack. Rather than exploring a generated world for resources, you start on a small island and must build your resource supply from the ground up through sieving, automation, and careful progression. The pack goes far beyond traditional skyblock, with hundreds of mods providing deep crafting, automation, and exploration options that open up as your island grows.
### Technology and Magic
ATM10:TTS includes the same broad range of tech and magic mods as ATM10. Mekanism, Applied Energistics 2, Create, and Thermal Expansion cover the automation and power side, while Botania, Ars Nouveau, and Blood Magic offer deep magic progression. Both paths are fully supported and can be combined for more powerful and efficient setups as your island scales up.
### The ATM Star
The ATM Star is the endgame goal of ATM10:TTS, just as it is in ATM10. Crafting it from a skyblock starting point is a significantly greater challenge, requiring deep automation and resource generation before the late-game materials become accessible. It is the ultimate long-term goal and gives the entire playthrough direction and purpose.
## Beginner Tips and Tricks
### Vein Miner (Ultimine)
ATM10:TTS includes the Ultimine mod, commonly referred to as Vein Miner. It allows you to mine multiple blocks of the same type at once, which is useful when breaking down structures or clearing your island. It also supports mining 3x3 areas or long 1x1 tunnels.
### Early Game Flight
Once a Wandering Trader visits your island, he will be accompanied by two llamas on leads. Take the leads from the llamas and you can craft a balloon on a stick, which grants creative flight within a limited area. This is one of the earliest flight options available in the pack and is very useful for building and expanding your island safely.
### Instant Compacting
After setting up your auto-sieving system, you can route ore chunks directly through a Sophisticated Storage chest fitted with a compacting upgrade. This gives you a no-power, instant compacting machine that removes the need for a dedicated compactor early in the game.
To install ATM10:TTS and learn more about banned items, scheduled restarts, and dimension resets, visit the [ATM10:TTS Server Card](https://wiki.siriusmc.net/link/115#bkmrk-atm10%3A-to-the-sky-%28a).
It is recommended to allocate between 6GB and 8GB of RAM for ATM10:TTS.
SiriusMC bans certain items to protect server performance, the in-game economy, and claimed player bases. Use **/banneditems** in-game to see the full list of banned items on the server, or expand the Banned Items list below.
Banned Items ▼
Item-based chunk loaders
All tick speed up items
All time/weather manipulation items
Transfer label
Paradox machine
Spawner agitator
Inventory scanner
Explosives
---
| Ready to Play?
Open Minecraft, select Multiplayer, and add a new server with the address below.
atm10tts.siriusmc.net
[Installation guide](https://wiki.siriusmc.net/link/115#bkmrk-installing-a-modpack-1) [Server rules](https://wiki.siriusmc.net/books/the-siriusmc-networks/page/server-rules-siriusmc) [Join Discord](https://discord.gg/siriusmc)
|
# Sieving Guide | ATM10:TTS
| Sieving is one of the primary ways to gather resources in ATM10: To the Sky. Using Ex Deorum sieves with different mesh tiers, you can obtain ores, seeds, and a wide variety of materials from basic blocks like dirt, gravel, and sand. This guide covers how to get started, what to expect from each mesh tier, and how to move into automation. |
## Getting Started
### Crafting a Sieve and Mesh
To begin sieving, you need to craft a Wooden Sieve. Any vanilla wood type works, as does Archwood if you have access to it. Once placed, the sieve is empty and cannot be used without a mesh installed.
Your first mesh will be a String Mesh, crafted from 9 string arranged in a full crafting grid. String can be obtained by killing spiders that spawn at night, or by harvesting Industrial Hemp Fiber from Industrial Hemp plants, the seeds for which can be found by breaking grass around your island. To install the mesh, right-click the sieve with it in your main hand.
Sieves can also be arranged in a square pattern to sieve the same block simultaneously, increasing efficiency. The valid sizes are 1x1, 3x3, and 5x5. Additionally, meshes can be enchanted to improve their performance, there are more details on this below.
### Using the Sieve
Hold a sievable block (such as dirt, gravel, or sand) and right-click the sieve to load it. Then hold right-click on the sieve to begin processing. The block will gradually disappear and items will pop out of the top. You can hold right-click to process continuously without releasing.
To remove a mesh you can shift-right-click the sieve with an empty hand.
## Improving Meshes
Meshes can be improved in two ways, through enchanting and improving their tier.
### Enchanting
Enchanting can be done using a standard Enchanting Table or Anvil. Two enchantments are relevant to sieving:
- **Fortune** - Increases the chance of receiving drops, effectively boosting resource yield per block sieved.
- **Efficiency** - Increases the speed of which the sieve processes each block.
Enchanting a mesh before automating is strongly recommended.
### Mesh Tiers
Ex Deorum has six mesh tiers. Higher tiers generally provide better drop rates and access to rarer resources. Each mesh must be crafted before it can be used, and crafting typically requires the material the mesh is named after.
| **Mesh** | **Tier** |
| String Mesh | 1 |
| Flint Mesh | 2 |
| Iron Mesh | 3 |
| Gold Mesh | 4 |
| Diamond Mesh | 5 |
| Netherite Mesh | 6 |
## What Can Be Sieved
Sievable blocks are crushed end stone, crushed netherrack, crushed blackstone, crushed deepslate, gravel, dirt, soul sand, moss block, sand, red sand, and dust.
Each block produces a different set of drops. The table below covers what each block drops, the chances, and the differences between mesh tiers.
For information on what items can be recieved when sieving, along with their quantities and percentage chance can be found [below](https://wiki.siriusmc.net/link/162#bkmrk-sieving-drop-tables).
## Automation
Once you want to automate sieving, you can use a Clicker or Advanced Clicker from JustDireThings. These act as fake players, able to right-click blocks into sieves automatically. You can pipe blocks into the clickers to control what gets sieved. Both clickers can have their click speed set in ticks. On SiriusMC, clicks are limited to once per second (20 ticks).
**Clicker** Requires no power. Clicks one block directly in front of it, so it must be placed facing the sieve.
**Advanced Clicker** Requires FE (stores 100,000 FE). Its active area can be repositioned, so it does not need to be placed directly in front of a sieve. Also supports item whitelisting and blacklisting to control what gets clicked.
---
## Sieving Drop Tables
[Crushed End Stone](https://wiki.siriusmc.net/link/162#bkmrk-block-mesh-drops-qua) | [Crushed Netherrack](https://wiki.siriusmc.net/link/162#bkmrk-block-mesh-drops-qua-1) | [Crushed Blackstone](https://wiki.siriusmc.net/link/162#bkmrk-block-mesh-drops-qua-2) | [Crushed Deepslate](https://wiki.siriusmc.net/link/162#bkmrk-block-mesh-drops-qua-3) | [Gravel](https://wiki.siriusmc.net/link/162#bkmrk-block-mesh-drops-qua-4) | [Dirt](https://wiki.siriusmc.net/link/162#bkmrk-block-mesh-drops-qua-5) | [Soul Sand](https://wiki.siriusmc.net/link/162#bkmrk-block-mesh-drops-qua-6) | [Moss](https://wiki.siriusmc.net/link/162#bkmrk-block-mesh-drops-qua-7) | [Sand](https://wiki.siriusmc.net/link/162#bkmrk-block-mesh-drops-qua-8) | [Red Sand](https://wiki.siriusmc.net/link/162#bkmrk-block-mesh-drops-qua-9) | [Dust](https://wiki.siriusmc.net/link/162#bkmrk-block-mesh-drops-qua-10)
| **Block** | **Mesh** | **Drops** | **Quantity** | **Chance %** |
| **Crushed End Stone** | String | Chorus Fruit
Ender Pearl
Chorus Flower
Eye of Ender
| 0-1
0-1
0-1
0-1 | 9
7
4
2 |
| Flint | Chorus Fruit
Ender Pearl
Chorus Flower
Eye of Ender | 0-1
0-1
0-1
0-1 | 11
7
6
3 |
| Iron | Chorus Fruit
Ender Pearl
Chorus Flower
Eye of Ender | 0-1
0-1
0-1
0-1 | 13
10
7
4 |
| Gold | Chorus Fruit
Ender Pearl
Eye of Ender
Chorus Flower | 0-1
0-1
0-1
0-1 | 12
12
7
6 |
| Diamond | Ender Pearl
Chorus Fruit
Eye of Ender
Draconium Dust
Chorus Flower | 0-1
0-1
0-1
0-1
0-1 | 15
10
9
6
4 |
| Netherite | Draconium Dust
Ender Pearl
Chorus Fruit
Eye of Ender
Sculk
Chorus Flower
Echo Shard
Sculk Shrieker | 0-2
0-1
0-1
0-1
0-1
0-1
0-1
0-1 | *Avg. Output: 0.18*
17
10
9
7.5
4
3
1 |
| **Block** | **Mesh** | **Drops** | **Quantity** | **Chance %** |
| **Crushed Netherrack** | String | Blackstone Pebble
Basalt Pebble
Nether Quartz
Gunpowder
Blaze Powder
Magma Cream
Warped Nylium Spores
Crimson Nylium Spores
| 0-3
0-3
0-1
0-1
0-1
0-1
0-1
0-1
| *Avg. Output: 1.8*
*Avg. Output: 0.9*
8
8
8
5
5
5
|
| Flint | Blackstone Pebble
Basalt Pebble
Gunpowder
Nether Quartz
Blaze Powder
Warped Nylium Spores
Crimson Nylium Spores
Magma Cream
| 0-4
0-4
0-1
0-1
0-1
0-1
0-1
0-1
| *Avg. Output: 2.0*
*Avg. Output: 1.6*
9
9
9
7
7
6
|
| Iron | Blackstone Pebble
Basalt Pebble
Nether Quartz
Gunpowder
Blaze Powder
Warped Nylium Spores
Crimson Nylium Spores
Magma Cream
| 0-4
0-4
0-1
0-1
0-1
0-1
0-1
0-1
| *Avg. Output: 2.4*
*Avg. Output: 1.8*
11
10
10
8
8
7
|
| Gold | Blackstone Pebble
Basalt Pebble
Nether Quartz
Gunpowder
Blaze Powder
Warped Nylium Spores
Crimson Nylium Spores
Magma Cream
Raw Gold
| 0-4
0-4
0-1
0-1
0-1
0-1
0-1
0-1
0-1
| *Avg. Output: 2.4*
*Avg. Output: 1.8*
13
11
11
8
8
8
3
|
| Diamond | Blackstone Pebble
Blaze Powder
Gunpowder
Nether Quartz
Magma Cream
| 0-4
0-1
0-1
0-1
0-1
| *Avg. Output: 2.4*
14
13
13
10
|
| Netherite | Blackstone Pebble
Nether Quartz
Blaze Powder
Gunpowder
Magma Cream
| 0-5
0-1
0-1
0-1
0-1
| *Avg. Output: 3.25*
15
15
13
10
|
| **Block** | **Mesh** | **Drops** | **Quantity** | **Chance %** |
| **Crushed Blackstone** | String | Blackstone Pebble
Basalt Pebble
Magma Cream
Black Dye
Gunpowder
Ancient Debris
| 0-4
0-3
0-1
0-1
0-1
0-1
| *Avg. Output: 2.4*
*Avg. Output: 1.5*
8
7
7
2
|
| Flint | Blackstone Pebble
Basalt Pebble
Magma Cream
Gunpowder
Black Dye
Ancient Debris
| 0-4
0-3
0-1
0-1
0-1
0-1
| *Avg. Output: 2.6*
*Avg. Output: 1.65*
9
9
8
3
|
| Iron | Blackstone Pebble
Basalt Pebble
Magma Cream
Gunpowder
Black Dye
Ancient Debris
| 0-5
0-4
0-1
0-1
0-1
0-1
| *Avg. Output: 3.25*
*Avg. Output: 2.2*
9
9
8
4
|
| Gold | Blackstone Pebble
Basalt Pebble
Gunpowder
Magma Cream
Black Dye
Ancient Debris
| 0-5
0-4
0-1
0-1
0-1
0-1
| *Avg. Output: 3.5*
*Avg. Output: 2.0*
10
10
6
5
|
| Diamond | Blackstone Pebble
Gunpowder
Magma Cream
Ancient Debris
Allthemodium Nugget
| 0-5
0-1
0-1
0-1
0-1
| *Avg. Output: 3.5*
11
11
6
4
|
| Netherite | Blackstone Pebble
Allthemodium Nugget
Magma Cream
Gunpowder
Ancient Debris
| 0-5
0-1
0-1
0-1
0-1
| *Avg. Output: 3.75*
15
12
11
10
|
| **Block** | **Mesh** | **Drops** | **Quantity** | **Chance %** |
| **Crushed Deepslate** | String | Iron Ore Chunk
Copper Ore Chunk
Gold Ore Chunk
Osmium Ore Chunk
Tin Ore Chunk
Silver Ore Chunk
Lead Ore Chunk
Amethyst Shard
Lapis Lazuli
Uranium Ore Chunk
Nickel Ore Chunk
Platinum Ore Chunk
| 0-1
0-1
0-1
0-1
0-1
0-1
0-1
0-1
0-1
0-1
0-1
0-1
| 12
12
8
6
5
5
5
5
4
4
4
3
|
| Flint | Calcite Pebble
Basalt Pebble
Tuff Pebble
Iron Ore Chunk
Copper Ore Chunk
Lead Ore Chunk
Gold Ore Chunk
Silver Ore Chunk
Osmium Ore Chunk
Tin Ore Chunk
Amethyst Shard
Nickel Ore Chunk
Uranium Ore Chunk
Lapis Lazuli
Platinum Ore Chunk
| 0-4
0-4
0-4
0-1
0-1
0-1
0-1
0-1
0-1
0-1
0-1
0-1
0-1
0-1
0-1
| *Avg. Output: 1.6*
*Avg. Output: 1.6*
*Avg. Output: 1.6*
13
11
8
8
8
8
7
6
6
6
5
5
|
| Iron | Iron Ore Chunk
Tin Ore Chunk
Silver Ore Chunk
Copper Ore Chunk
Osmium Ore Chunk
Lead Ore Chunk
Nickel Ore Chunk
Gold Ore Chunk
Uranium Ore Chunk
Lapis Lazuli
Platinum Ore Chunk
Amethyst Shard
| 0-1
0-1
0-1
0-1
0-1
0-1
0-1
0-1
0-1
0-1
0-1
0-1
| 15
11
10
10
10
10
9
9
8
8
6.5
6
|
| Gold | Gold Ore Chunk
Silver Ore Chunk
Iron Ore Chunk
Tin Ore Chunk
Nickel Ore Chunk
Lead Ore Chunk
Copper Ore Chunk
Osmium Ore Chunk
Platinum Ore Chunk
Amethyst Shard
Uranium Ore Chunk
Lapis Lazuli
Raw Gold
| 0-1
0-1
0-1
0-1
0-1
0-1
0-1
0-1
0-1
0-1
0-1
0-1
0-1
| 15
15
15
12
11
9
9
9
9
8
7
7
5
|
| Diamond | Iron Ore Chunk
Gold Ore Chunk
Tin Ore Chunk
Lapis Lazuli
Osmium Ore Chunk
Lead Ore Chunk
Nickel Ore Chunk
Silver Ore Chunk
Uranium Ore Chunk
Copper Ore Chunk
Platinum Ore Chunk
Amethyst Shard
| 0-1
0-1
0-1
0-1
0-1
0-1
0-1
0-1
0-1
0-1
0-1
0-1
| 18
13
13
12
12
11
11
11
10
9
7.5
7
|
| Netherite | Iron Ore Chunk
Tin Ore Chunk
Gold Ore Chunk
Nickel Ore Chunk
Osmium Ore Chunk
Lapis Lazuli
Silver Ore Chunk
Lead Ore Chunk
Uranium Ore Chunk
Amethyst Shard
Copper Ore Chunk
Platinum Ore Chunk
| 0-1
0-1
0-1
0-1
0-1
0-1
0-1
0-1
0-1
0-1
0-1
0-1
| 20
16
15
15
14
14
12
12
12
10
10
9
|
| **Block** | **Mesh** | **Drops** | **Quantity** | **Chance %** |
| **Gravel** | String | Flint
Coal
Iron Ore Chunk
Copper Ore Chunk
Tin Ore Chunk
Lead Ore Chunk
Silver Ore Chunk
Nickel Ore Chunk
Aluminum Ore Chunk
Zinc Ore Chunk
Gold Ore Chunk
Osmium Ore Chunk
Lapis Lazuli
Amethyst Shard
| 0-1
0-1
0-1
0-1
0-1
0-1
0-1
0-1
0-1
0-1
0-1
0-1
0-1
0-1
| 20
10
10
8
6
4
4
4
4
3.5
3
3
3
1
|
| Flint | Flint
Pointed Dripstone
Coal
Iron Ore Chunk
Copper Ore Chunk
Tin Ore Chunk
Nickel Ore Chunk
Silver Ore Chunk
Lead Ore Chunk
Lapis Lazuli
Aluminum Ore Chunk
Osmium Ore Chunk
Gold Ore Chunk
Zinc Ore Chunk
Amethyst Shard
| 0-1
0-1
0-1
0-1
0-1
0-1
0-1
0-1
0-1
0-1
0-1
0-1
0-1
0-1
0-1
| 25
15
12.5
12
10
7
5.5
5
5
5
5
4
4
4
1.5
|
| Iron | Flint
Coal
Iron Ore Chunk
Copper Ore Chunk
Tin Ore Chunk
Lapis Lazuli
Nickel Ore Chunk
Aluminum Ore Chunk
Lead Ore Chunk
Gold Ore Chunk
Zinc Ore Chunk
Silver Ore Chunk
Osmium Ore Chunk
Kivi
Asurine
Veridium
Amethyst Shard
Crimsite
Ochrum
Diamond
Emerald
| 0-1
0-1
0-1
0-1
0-1
0-1
0-1
0-1
0-1
0-1
0-1
0-1
0-1
0-1
0-1
0-1
0-1
0-1
0-1
0-1
0-1
| 15
15
14
12
9
8
7
6
6
6
6
5.5
4.5
4
4
4
4
4
4
1
1
|
| Gold | Coal
Iron Ore Chunk
Flint
Silver Ore Chunk
Gold Ore Chunk
Lapis Lazuli
Amethyst Shard
Tin Ore Chunk
Copper Ore Chunk
Aluminum Ore Chunk
Lead Ore Chunk
Nickel Ore Chunk
Asurine
Kivi
Veridium
Ochrum
Crimsite
Osmium Ore Chunk
Zinc Ore Chunk
Diamond
Emerald
Raw Gold
| 0-1
0-1
0-1
0-1
0-1
0-1
0-1
0-1
0-1
0-1
0-1
0-1
0-1
0-1
0-1
0-1
0-1
0-1
0-1
0-1
0-1
0-1
| 20
14
13
12
10
10
8
7
7
7
7
7
6
6
6
6
6
5
5
4
3
2
|
| Diamond | Iron Ore Chunk
Lapis Lazuli
Tin Ore Chunk
Nickel Ore Chunk
Lead Ore Chunk
Zinc Ore Chunk
Aluminum Ore Chunk
Gold Ore Chunk
Silver Ore Chunk
Crimsite
Asurine
Veridium
Osmium Ore Chunk
Kivi
Ochrum
Copper Ore Chunk
Coal
Amethyst Shard
Diamond
Flint
Emerald
| 0-1
0-1
0-1
0-1
0-1
0-1
0-1
0-1
0-1
0-1
0-1
0-1
0-1
0-1
0-1
0-1
0-1
0-1
0-1
0-1
0-1
| 15
11
11
9
9
8
8
8
8
7
7
7
7
7
7
7
6
6
6
5
4
|
| Netherite | Iron Ore Chunk
Diamond
Tin Ore Chunk
Silver Ore Chunk
Lapis Lazuli
Lead Ore Chunk
Copper Ore Chunk
Emerald
Nickel Ore Chunk
Osmium Ore Chunk
Gold Ore Chunk
Aluminum Ore Chunk
Ochrum
Kivi
Crimsite
Veridium
Asurine
Zinc Ore Chunk
Amethyst Shard
Coal
| 0-1
0-2
0-1
0-1
0-1
0-1
0-1
0-2
0-1
0-1
0-1
0-1
0-1
0-1
0-1
0-1
0-1
0-1
0-1
0-1
| 17
*Avg. Output: 0.12*
12
11
11
11
10
*Avg. Output: 0.10*
10
9
9
9
8
8
8
8
8
8
8
6
|
| **Block** | **Mesh** | **Drops** | **Quantity** | **Chance %** |
| **Dirt** | String | Stone Pebble
Flint
Wheat Seeds
Pumpkin Seeds
Beetroot Seeds
Sugar Cane
Carrot
Grass Seeds
Melon Seeds
Potato
Poisonous Potato
Bamboo
Mycelium Spores
| 0-7
0-1
0-1
0-1
0-1
0-1
0-1
0-1
0-1
0-1
0-1
0-1
0-1
| *Avg. Output: 4.2*
25
12.5
10
10
10
10
10
10
10
5
4
3
|
| Flint | Stone Pebble
Diorite Pebble
Granite Pebble
Andesite Pebble
Flint
Grass Seeds
Sugar Cane
Wheat Seeds
Potato
Carrot
Melon Seeds
Pumpkin Seeds
Rose Bush
Flax Seeds (Silent Gear)
Canola Seeds
Coffee Beans
Sunflower
Flax Seeds (Actually Additions)
Sweet Berries
Mycelium Spores
Bamboo
Pink Petals
Poisonous Potato
Sourceberry
| 0-7
0-7
0-7
0-7
0-1
0-1
0-1
0-1
0-1
0-1
0-1
0-1
0-1
0-1
0-1
0-1
0-1
0-1
0-1
0-1
0-1
0-1
0-1
0-1
| *Avg. Output: 4.2*
*Avg. Output: 2.8*
*Avg. Output: 2.8*
*Avg. Output: 2.8*
30
15
15
15
13
13
12
12
6
6
6
6
6
6
5
5
4
3
3
3
|
| Iron | Stone Pebble
Deepslate Pebble
Flint
Grass Seeds
Wheat Seeds
Pumpkin Seeds
Carrot
Melon Seeds
Potato
Sugar Cane
Mycelium Spores
Flax Seeds (Silent Gear)
Flax Seeds (Actually Additions)
Rose Bush
Canola Seeds
Sunflower
Coffee Beans
Torchflower Seeds
Bamboo
Iron Nugget
| 0-8
0-3
0-1
0-1
0-1
0-1
0-1
0-1
0-1
0-1
0-1
0-1
0-1
0-1
0-1
0-1
0-1
0-1
0-1
0-1
| *Avg. Output: 5.2*
*Avg. Output: 1.35*
30
17.5
17.5
15
15
15
15
15
10
8
8
8
8
8
8
8
6
5
|
| Gold | Stone Pebble
Deepslate Pebble
Grass Seeds
Wheat Seeds
Flint
Potato
Carrot
Pumpkin Seeds
Melon Seeds
Mycelium Spores
Torchflower Seeds
Sunflower
Flax Seeds (Actually Additions)
Flax Seeds (Silent Gear)
Rose Bush
Coffee Beans
Canola Seeds
Iron Nugget
Bamboo
Golden Carrot
| 0-8
0-3
0-1
0-1
0-1
0-1
0-1
0-1
0-1
0-1
0-1
0-1
0-1
0-1
0-1
0-1
0-1
0-1
0-1
0-1
| *Avg. Output: 5.6*
*Avg. Output: 1.65*
25
20
20
17.5
17.5
16.5
16.5
13
8
8
8
8
8
8
8
5
5
2
|
| Diamond | Stone Pebble
Deepslate Pebble
Flint
Carrot
Potato
Grass Seeds
Rose Bush
Torchflower Seeds
Canola Seeds
Sunflower
Flax Seeds (Actually Additions)
Coffee Beans
Flax Seeds (Silent Gear)
Mycelium Spores
Bamboo
| 0-8
0-3
0-3
0-1
0-1
0-1
0-1
0-1
0-1
0-1
0-1
0-1
0-1
0-1
0-1
| *Avg. Output: 5.6*
*Avg. Output: 1.8*
*Avg. Output: 0.9*
25
25
15
11
11
11
11
11
11
11
10
6
|
| Netherite | Deepslate Pebble
Stone Pebble
Flint
Potato
Carrot
Flax Seeds (Silent Gear)
Canola Seeds
Rose Bush
Sunflower
Coffee Beans
Flax Seeds (Actually Additions)
Torchflower Seeds
Mycelium Spores
Grass Seeds
Bamboo
Golden Carrot
Golden Apple
| 0-4
0-5
0-3
0-1
0-1
0-2
0-2
0-2
0-2
0-2
0-2
0-2
0-1
0-1
0-1
0-1
0-1
| *Avg. Output: 2.6*
*Avg. Output: 2*
*Avg. Output: 1.2*
30
30
*Avg. Output: 0.22*
*Avg. Output: 0.22*
*Avg. Output: 0.22*
*Avg. Output: 0.22*
*Avg. Output: 0.22*
*Avg. Output: 0.22*
*Avg. Output: 0.22*
20
20
6
1
0.25
|
| **Block** | **Mesh** | **Drops** | **Quantity** | **Chance %** |
| **Soul Sand** | String | Nether Quartz
Bone
Gunpowder
Glowstone Dust
Nether Wart
Ghast Tear
| 0-1
0-1
0-1
0-1
0-1
0-1
| 12
8
7
6
6
6
|
| Flint | Nether Quartz
Bone
Gunpowder
Ghast Tear
Glowstone Dust
Nether Wart
Crimson Nylium Spores
Warped Nylium Spores
| 0-1
0-1
0-1
0-1
0-1
0-1
0-1
0-1
| 14
10
8
7
7
6
3
3
|
| Iron | Prosperity Shard
Nether Quartz
Bone
Gunpowder
Glowstone Dust
Ghast Tear
Nether Wart
| 0-1
0-1
0-1
0-1
0-1
0-1
0-1
| 20
15
8
7
6
6
5
|
| Gold | Prosperity Shard
Nether Quartz
Bone
Gunpowder
Glowstone Dust
Ghast Tear
Nether Wart
| 0-1
0-1
0-1
0-1
0-1
0-1
0-1
| 20
17
11
10
9
8
8
|
| Diamond | Prosperity Shard
Nether Quartz
Gunpowder
Glowstone Dust
Nether Wart
Ghast Tear
Soulium Dust
| 0-1
0-1
0-1
0-1
0-1
0-1
0-1
| 20
19
11
11
10
9
5
|
| Netherite | Prosperity Shard
Nether Quartz
Gunpowder
Glowstone Dust
Nether Wart
Ghast Tear
Soulium Dust
| 0-2
0-1
0-1
0-1
0-1
0-1
0-1
| *Avg. Output: 0.36*
21
14
13
12
11
10
|
| **Block** | **Mesh** | **Drops** | **Quantity** | **Chance %** |
| **Moss Block** | String | Oak Sapling
Spruce Sapling
Cherry Sapling
Acacia Sapling
Jungle Sapling
Dark Oak Sapling
Mangrove Propagule
Birch Sapling
Azalea
Small Dripleaf
Big Dripleaf
Glow Berries
Spore Blossom
Sourceberry
Blazing Archwood Sapling
Flourishing Archwood Sapling
Cascading Archwood Sapling
Vexing Archwood Sapling
| 0-1
0-1
0-1
0-1
0-1
0-1
0-1
0-1
0-1
0-1
0-1
0-1
0-1
0-1
0-1
0-1
0-1
0-1
| 13
11
11
11
11
11
11
11
8
7
5
4
3
1
0.5
0.5
0.5
0.5
|
| Flint | Oak Sapling
Glow Berries
Mangrove Propagule
Spruce Sapling
Cherry Sapling
Dark Oak Sapling
Birch Sapling
Jungle Sapling
Acacia Sapling
Small Dripleaf
Azalea
Big Dripleaf
Spore Blossom
Lily Pad
Glow Lichen
Flowering Azalea
Sweet Berries
Sourceberry
Blazing Archwood Sapling
Flourishing Archwood Sapling
Cascading Archwood Sapling
Vexing Archwood Sapling
| 0-1
0-1
0-1
0-1
0-1
0-1
0-1
0-1
0-1
0-1
0-1
0-1
0-1
0-1
0-1
0-1
0-1
0-1
0-1
0-1
0-1
0-1
| 13
11.5
11
11
11
11
11
11
11
9.5
9
7
4.5
4
4
3
3
1
0.5
0.5
0.5
0.5
|
| Iron | Glow Berries
Oak Sapling
Small Dripleaf
Spruce Sapling
Birch Sapling
Mangrove Propagule
Dark Oak Sapling
Acacia Sapling
Cherry Sapling
Jungle Sapling
Azalea
Big Dripleaf
Spore Blossom
Menril Sapling
Sourceberry
Growing Edelwood
Flashing Archwood Sapling
Vexing Archwood Sapling
Cascading Archwood Sapling
Flourishing Archwood Sapling
Blazing Archwood Sapling
| 0-1
0-1
0-1
0-1
0-1
0-1
0-1
0-1
0-1
0-1
0-1
0-1
0-1
0-1
0-1
0-1
0-1
0-1
0-1
0-1
0-1
| 19
13
12
11
11
11
11
11
11
11
10
9
6
1
1
1
1
0.5
0.5
0.5
0.5
|
| Gold | Glow Berries
Small Dripleaf
Oak Sapling
Azalea
Spruce Sapling
Mangrove Propagule
Acacia Sapling
Jungle Sapling
Big Dripleaf
Cherry Sapling
Birch Sapling
Dark Oak Sapling
Spore Blossom
Menril Sapling
Growing Edelwood
Flashing Archwood Sapling
Sourceberry
Vexing Archwood Sapling
Flourishing Archwood Sapling
Cascading Archwood Sapling
Blazing Archwood Sapling
| 0-1
0-1
0-1
0-1
0-1
0-1
0-1
0-1
0-1
0-1
0-1
0-1
0-1
0-1
0-1
0-1
0-1
0-1
0-1
0-1
0-1
| 26.5
14.5
13
11
11
11
11
11
11
11
11
11
7.5
2
2
2
1
0.5
0.5
0.5
0.5
|
| Diamond | Glow Berries
Small Dripleaf
Big Dripleaf
Oak Sapling
Azalea
Mangrove Propagule
Jungle Sapling
Dark Oak Sapling
Cherry Sapling
Spruce Sapling
Birch Sapling
Acacia Sapling
Spore Blossom
Growing Edelwood
Flashing Archwood Sapling
Menril Sapling
Sourceberry
Flourishing Archwood Sapling
Cascading Archwood Sapling
Blazing Archwood Sapling
Vexing Archwood Sapling
| 0-1
0-1
0-1
0-1
0-1
0-1
0-1
0-1
0-1
0-1
0-1
0-1
0-1
0-1
0-1
0-1
0-1
0-1
0-1
0-1
0-1
| 34
17
13
13
12
11
11
11
11
11
11
11
9
3
3
3
1
0.5
0.5
0.5
0.5
|
| Netherite | Glow Berries
Small Dripleaf
Big Dripleaf
Azalea
Oak Sapling
Mangrove Propagule
Spruce Sapling
Birch Sapling
Jungle Sapling
Dark Oak Sapling
Acacia Sapling
Cherry Sapling
Spore Blossom
Flashing Archwood Sapling
Menril Sapling
Growing Edelwood
Sourceberry
Blazing Archwood Sapling
Vexing Archwood Sapling
Cascading Archwood Sapling
Flourishing Archwood Sapling
| 0-1
0-1
0-1
0-1
0-1
0-1
0-1
0-1
0-1
0-1
0-1
0-1
0-1
0-1
0-1
0-1
0-1
0-1
0-1
0-1
0-1
| 41.5
19.5
15
13
13
11
11
11
11
11
11
11
10.5
4
4
4
1
0.5
0.5
0.5
0.5
|
| **Block** | **Mesh** | **Drops** | **Quantity** | **Chance %** |
| **Sand** | String | Flint
Iron Nugget
Cactus
Kelp
Dead Bush
Sea Pickle
Certus Quartz Crystal
Charged Certus Quartz Crystal
| 0-1
0-1
0-1
0-1
0-1
0-1
0-1
0-1
| 20
13
13
10
8
5
3
0.5
|
| Flint | Flint
Iron Nugget
Random Pottery Sherd
Certus Quartz Crystal
Dead Bush
Charged Certus Quartz Crystal
| 0-2
0-1
0-1
0-1
0-1
0-1
| *Avg. Output: 0.4*
16
4
4
3
0.5
|
| Iron | Flint
Iron Nugget
Fluorite
Cactus
Black Quartz
Dead Bush
Kelp
Certus Quartz Crystal
Prismarine Shard
Prismarine Crystals
Sea Pickle
Charged Certus Quartz Crystal
| 0-1
0-1
0-1
0-1
0-1
0-1
0-1
0-1
0-1
0-1
0-1
0-1
| 23
18
15
13
10
8
7
6
6
6
3
1.25
|
| Gold | Flint
Iron Nugget
Fluorite
Black Quartz
Cactus
Prismarine Shard
Prismarine Crystals
Certus Quartz Crystal
Dead Bush
Kelp
Raw Gold
Sea Pickle
Random Armor Trim
Charged Certus Quartz Crystal
| 0-1
0-1
0-1
0-1
0-1
0-1
0-1
0-1
0-1
0-1
0-1
0-1
0-1
0-1
| 18
16
15
11
10
8
8
7
6
5
4
3
2
1.5
|
| Diamond | Flint
Iron Nugget
Fluorite
Cactus
Black Quartz
Prismarine Shard
Certus Quartz Crystal
Prismarine Crystals
Kelp
Uraninite
Charged Certus Quartz Crystal
Allthemodium Nugget
| 0-1
0-1
0-1
0-1
0-1
0-1
0-1
0-1
0-1
0-1
0-1
0-1
| 23
22
15
12
11
9
9
9
7.5
7
2
1
|
| Netherite | Flint
Fluorite
Iron Nugget
Black Quartz
Uraninite
Cactus
Prismarine Shard
Prismarine Crystals
Kelp
Certus Quartz Crystal
Sea Pickle
Allthemodium Nugget
Charged Certus Quartz Crystal
| 0-2
0-2
0-1
0-2
0-2
0-1
0-1
0-1
0-1
0-1
0-1
0-1
0-1
| *Avg. Output: 0.46*
*Avg. Output: 0.24*
23
*Avg. Output: 0.22*
*Avg. Output: 0.16*
15
12
12
10
9.5
7
6
3.5
|
| **Block** | **Mesh** | **Drops** | **Quantity** | **Chance %** |
| **Red Sand** | String | Cactus
Redstone Dust
Dead Bush
Raw Gold
| 0-1
0-1
0-1
0-1
| 12
8
7
3
|
| Flint | Cactus
Redstone Dust
Dead Bush
Raw Gold
| 0-1
0-1
0-1
0-1
| 12
9
7
4
|
| Iron | Cactus
Redstone Dust
Dead Bush
Raw Gold
| 0-1
0-1
0-1
0-1
| 12
11
7
6
|
| Gold | Cactus
Raw Gold
Dead Bush
Redstone Dust
| 0-1
0-1
0-1
0-1
| 12
11
7
7
|
| Diamond | Redstone Dust
Cactus
Raw Gold
Dead Bush
| 0-1
0-1
0-1
0-1
| 14
10
8
3
|
| Netherite | Redstone Dust
Cactus
Raw Gold
| 0-1
0-1
0-1
| 17
12
10
|
| **Block** | **Mesh** | **Drops** | **Quantity** | **Chance %** |
| **Dust** | String | Bone Meal
Gunpowder
Certus Quartz Dust
Sky Stone Dust
Grains of Infinity
Redstone Dust
Glowstone Dust
Blaze Powder
| 0-1
0-1
0-1
0-1
0-1
0-1
0-1
0-1
| 10
10
6
6
6
6
4
3
|
| Flint | Gunpowder
Bone Meal
Redstone Dust
Sky Stone Dust
Glowstone Dust
Certus Quartz Dust
Grains of Infinity
Light Xychorium Gem
Red Xychorium Gem
Green Xychorium Gem
Dark Xychorium Gem
Blue Xychorium Gem
Blaze Powder
| 0-1
0-1
0-1
0-1
0-1
0-1
0-1
0-1
0-1
0-1
0-1
0-1
0-1
| 11
11
9
7
7
7
7
4
4
4
4
4
4
|
| Iron | Salt
Sulfur
Gunpowder
Bone Meal
Redstone Dust
Glowstone Dust
Grains of Infinity
Certus Quartz Dust
Sky Stone Dust
Iron Nugget
Green Xychorium Gem
Blue Xychorium Gem
Red Xychorium Gem
Dark Xychorium Gem
Blaze Powder
Light Xychorium Gem
Arcane Crystal
| 0-1
0-1
0-1
0-1
0-1
0-1
0-1
0-1
0-1
0-1
0-1
0-1
0-1
0-1
0-1
0-1
0-1
| 15
15
13
12
10
9
9
7.5
7.5
6
5
5
5
5
5
5
5
|
| Gold | Salt
Sulfur
Gunpowder
Redstone Dust
Glowstone Dust
Grains of Infinity
Bone Meal
Certus Quartz Dust
Sky Stone Dust
Blaze Powder
Arcane Crystal
Raw Gold
| 0-1
0-1
0-1
0-1
0-1
0-1
0-1
0-1
0-1
0-1
0-1
0-1
| 15
15
13
12
11
11
11
8
8
6
5
2
|
| Diamond | Sulfur
Salt
Gunpowder
Redstone Dust
Grains of Infinity
Glowstone Dust
Certus Quartz Dust
Sky Stone Dust
Bone Meal
Green Xychorium Gem
Red Xychorium Gem
Light Xychorium Gem
Dark Xychorium Gem
Arcane Crystal
Blue Xychorium Gem
Blaze Powder
| 0-1
0-1
0-1
0-1
0-1
0-1
0-1
0-1
0-1
0-1
0-1
0-1
0-1
0-1
0-1
0-1
| 15
15
14
12
12
11
10
10
10
6
6
6
6
6
6
6
|
| Netherite | Sulfur
Salt
Glowstone Dust
Gunpowder
Redstone Dust
Grains of Infinity
Bone Meal
Sky Stone Dust
Certus Quartz Dust
Blaze Powder
Dark Xychorium Gem
Light Xychorium Gem
Iron Nugget
Arcane Crystal
Green Xychorium Gem
Red Xychorium Gem
Blue Xychorium Gem
| 0-2
0-2
0-1
0-1
0-1
0-1
0-1
0-1
0-1
0-1
0-1
0-1
0-1
0-1
0-1
0-1
0-1
| *Avg. Output: 0.24*
*Avg. Output: 0.24*
15
14
14
13.5
13
11
11
10
8
8
8
8
8
8
8
|
| Introduction
[Introduction](https://wiki.siriusmc.net/books/modpack-guides-and-tutorials/page/introduction-atm10-to-the-sky)
Description
| | |
# Stoneblock 4
Guides and Tutorials for Stoneblock 4!
# Introduction | Stoneblock 4
|  |
| sb4.siriusmc.net Version · 1.16.0 |
| Getting started in Stoneblock 4 on SiriusMC? This guide covers everything you need to know, from choosing your starting base to crafting hammers, crooks, and brushes to begin gathering resources.
Stoneblock 4 is a skyblock-style modpack where you start in the middle of your own dimension, surrounded by stone. Rather than punching trees, you will be breaking stone into pebbles, converting materials through hammering and brushing, and building up your base from just a small hole deep within the dimension's core. This guide will walk you through your first steps to getting started on SiriusMC's version of Stoneblock 4.
|
## The Echo of Guidance and Creating Your Base
When you first join the server you will spawn at a dedicated spawn point. Ahead of you is the **Echo of Guidance**, an NPC you must interact with before you can access your dimension. Walk over to them and right-click to open the dialogue GUI. After reading, or listening through an audio button, you will notice at the bottom there is a **Complete Stage** button. Press this button to unlock access to the "Getting Started" chapter in your quest book, and to access the World Selection Portal.
Head up the stairs behind the Echo and walk through the large portal at the far end. Here you can choose which type of starting base you would like. Once selected, you will be taken to your dimension and can begin your adventure.
After completing the quest **Initialization**, you can purchase a Quest Book from the Echo of Guidance for 1 coin. Alternatively, it can be found in the top-left corner of your inventory screen at any time.
### Base Types
There are 6 different types of bases you can start with, with varying difficulties:
| A dark and eerie blackout zone
A small area covered with Black AntiBlocks. The player is unable to see anything.
Extreme | | A dark and mysterious cave
A small area similar to the blackout zone, but with a single torch to prevent mob spawning.
Hard |
| |
| A vibrant and colorful cherry tree
A larger lit area featuring a custom-built tree with cherry leaves, grass, moss, and mud blocks.
Medium | | A ruined pre-industrial complex
Stone brick pillars with spruce wood platforms, ladders, and torches to prevent mob spawning.
Medium |
| |
| A rugged and resilient tuff cave
Walls of tuff, cobblestone, and moss with braziers and cobblestone staircases.
Medium | | A lush and warm mangrove cave
Mangrove trees, a lily pad pond, braziers for lighting, and several types of stone. Recommended for new players.
Easy |
## Getting Started
In Stoneblock 4, stone replaces wood as the primary crafting material. You can craft stone crafting tables, stone sticks, and stone tools using the same recipes you would normally use for their wooden equivalents.
Start by breaking stone with your fists to collect pebbles. Each stone block you break will drop between 1 and 3 pebbles. You can then combine 4 pebbles together to craft 1 cobblestone, this will act as your wood equivalent for now. You make a stone crafting table using 4 cobblestone, or stone sticks using two cobblestone to help you get started.
### Crafting and Using Hammers, Brushes and Crooks
Next you will need some specialised tools to progress, these include hammers, crooks, and brushes. There are two different types of hammers, ones from the mod FTB Stuff & Things allows you to transform blocks into different blocks, the hammers from the mod Just Hammers allows you to break several blocks at once, stone crooks can be used on different blocks to gain materials associated with them, and brushes allow you to brush blocks for essential items.
#### Hammers
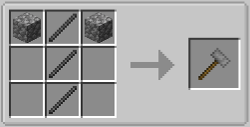Using stone sticks and cobblestone you can craft a **Stone Hammer** from the mod FTB Stuff & Things. These types of hammers break down blocks into different ones, forming the core of your early resource chain:
Cobblestone ⮕ Gravel ⮕ Dirt ⮕ Sand ⮕ Dust
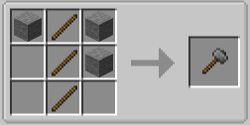You can also use hammers from the Just Hammers mod, these allow you to break blocks in certain patterns, at the start it will be in a 3x3x1 pattern, but you can upgrade these hammers to break in a 3x3x3, 5x5x1, 5x5x3, or 5x5x5 pattern. To make one of these hammers you will need to smelt cobblestone into stone, and use wooden sticks instead of stone sticks.
#### Stone Crook
Craft a **Crook** using 4 stone sticks. The crook is used to break blocks into a variety of different items. For example, using a crook on dirt can yield a range of saplings, using it on sand will yield a bunch of different crops, ranging from sugarcane, cactus, kelp and bamboo, all the way to Demon's Dream seeds, cocoa seeds, and canola seeds. It is an essential tool for generating resources early on.
#### Brushes
Brushes are your main source of material gathering, these are what allow for you to get various ores, seeds, and gems. However, to gather better materials you will need to increase your Unearther level, this is done by completing quests that have the level up icon  in their rewards.
The type of brush you use doesn't change the items blocks drop, however, it can help the process be less tedious. The first brush you will get is the Crude Brush, made using a wooden stick, a pebble, and a piece of straw, it's good, but it will only brush 128 blocks before breaking. As you gather more materials you will be able to upgrade your brushes:
Crude Brush ⮕ 128 blocks
Brush ⮕ 384 blocks
Reinforced Brush ⮕ 1,152 blocks
Unbreakable Brush ⮕ infinite blocks
**How to Upgrade Brushes
**Upgrading brushes is a huge quality of life improvement, especially when mass brushing or using Unearthers. Better brushes last longer, reducing how often you need to craft replacements. Each tier requires progressively better materials, but all are achievable in early to mid-game.
#### From Crude Brushes To Brushes
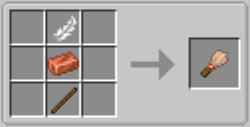Brushes, also known as "regular brushes" are crafted using **1x feather, 1x copper ingot, and 1x wooden stick**. It has a durability of 384 blocks, three times as long as the Crude Brush.
#### From Brushes To Reinforced Brushes
The Reinforced Brush is made in a smithing table using **1x brush, 1x diamond, and 1x smithing template**. It has a durability of 1,152 blocks, three times as long as the "Regular" Brush. Diamonds can be obtained by brushing gravel once you reach Unearther Level 3.
Smithing templates can be crafted using **4x stone, 2x gem-fused slates, and 1x mysterious scrap metal**, or purchased from the Echo of Guidance for 10 coins after completing Unknowing - Task 3.
#### From Reinforced Brushes To Unbreakable Brushes
Unbreakable brushes are the best tier of brush you can get. These brushes have unlimited durability, but cost a lot more than the previous brushes. The materials you need to craft an unbreakable brush are 2x netherite scrap, and 1x reinforced brush.
In addition to the base materials you will need, you also have to have upgraded your World Engine to contain either:
1\. 2x Sourcestone and 64x World Engine Machine Block (Ars Nouvaeu Pathway)
2\. 20x Shadow Casing, 64x World Engine Machine Block (Create Pathway)
**Using the Ars Pathway:**
When using the Ars Nouvaeu pathway you will need to supply the World Engine with Source. This can only be done once you have completed the "Meet The Magician" quest line from the quest chapter Tier 1: Foundation. You must have a minimum of 1,000 Source in the World Engine for the cores to begin crafting.
**Using the Create Pathway:**
When using the Create pathway you will need to supply the World Engine with kinetic energy. This can only be done once you have completed the "Meet The Machinist" quest line from the quest chapter Tier 1: Foundation. You must have a minimum of 32 rotations per minute (RPM) before the cores will begin crafting. **Note:** The stress impact during crafting is 16x RPM
Now that you have your core tools and understand the basic resource loop, you are ready to start making your base into a fully fledged home. The next steps are growing your first trees and getting a water source set up, if you haven't chosen a base with water and trees already on it, and eventually automating your brushing and hammering to free up your time for bigger projects. Check out our other guides for more information about Stoneblock 4!
To install Stoneblock 4 and learn more about the server and scheduled restarts, visit the [Stoneblock 4 Server Card](https://wiki.siriusmc.net/link/115#bkmrk-stoneblock-4).
It is recommended to allocate between 8GB and 10GB of RAM for Stoneblock 4.
SiriusMC bans certain items to protect server performance, the in-game economy, and claimed player bases. Use **/banneditems** in-game to see the full list of banned items on the server, or expand the Banned Items list below.
Banned Items ▼
Item-based chunk loaders
Watch of Flowing Time
Nuke
Ice Bomb
Paradox Machine
Infinity Nuke
Harvest Goddess Band
Dimensional Stabilizer
Advanced Time Wand
Time Twister
Spatial Anchor
Ticker
Time Sand Pouch
Time Wand
Confiscation Module
Upgrade Anchor
ItemStack Insert Transfer Label
ItemStack Extract Transfer Label
FluidStack Insert Transfer Label
FluidStack Extract Transfer Label
---
| Ready to Play?
Open Minecraft, select Multiplayer, and add a new server with the address below.
sb4.siriusmc.net
[Installation guide](https://wiki.siriusmc.net/link/115#bkmrk-installing-a-modpack-1) [Server rules](https://wiki.siriusmc.net/books/the-siriusmc-networks/page/server-rules-siriusmc) [Join Discord](https://discord.gg/siriusmc)
|
| Guide
[Automation Guide](https://wiki.siriusmc.net/books/modpack-guides-and-tutorials/page/automation-guide-stoneblock-4)
Set up cobble generators, auto hammers, and Unearthers to automate your resource chain.
| Boss Guide
[Mighty Ender Chicken](https://wiki.siriusmc.net/books/modpack-guides-and-tutorials/page/boss-guide-mighty-ender-chicken-stoneblock-4)
Defeat this boss to keep progressing, learn how to summon and defeat it.
| Boss Guide
[Chesed](https://wiki.siriusmc.net/books/modpack-guides-and-tutorials/page/boss-guide-chesed-stoneblock-4)
The first major boss. Learn how to defeat it and what drops you can earn.
|
# Automation Guide | Stoneblock 4
| At the beginning in Stoneblock 4 you'll be manually gathering resources through mining, hammering and brushing blocks. But, as you progress you'll unlock a multiblock called an Unearther, and machines called Cobble Generators, and Auto Hammers. This guide will take you through how to unlock them, how they work, and how to set them up.
|
## Unearthers
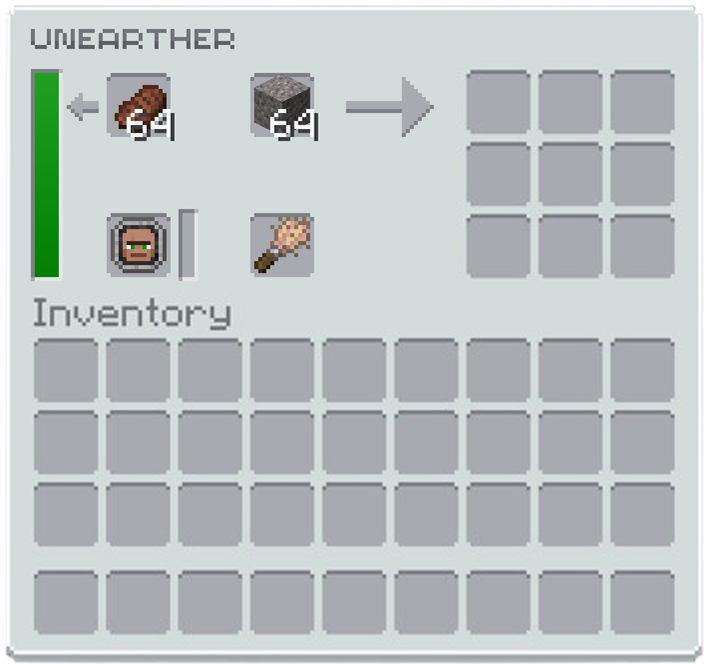Unearthers are 3x3x3 structures that allow you to use villagers to automate the brushing process. The structure is crafted using 5 tinted glass and 3 polished deepslate slabs, and you only need one Unearther block to build it.
To operate an Unearther you will need the following:
- A Villager Worker Token from an employed villager
- A brush
- Blocks to brush
- Food (optional, but increases brushing speed)
### Step 1: Getting a Villager
First, complete the quest **Chronon Generator** in the **Getting Started** chapter. This rewards you with **Dreadful Dirt**, which causes hostile mobs to spawn on it more frequently than usual. Place it in a dark area to allow a zombie villager to spawn.
Next, complete **Unknowing Task 3** from the Echo of Guidance to obtain the **Ender Lead**. Use it to pick up the zombie villager that spawns on the Dreadful Dirt.
### Step 2: Healing the Zombie Villager
Take the zombie villager to the **Healing Spring**, located to the north of your base's spawn point. Open your map with **M** to find it; it appears as a colourful circle on the map. Place the zombie villager down inside the Healing Spring, and it will begin converting into a regular villager.
### Step 3: Crafting the Echo Encoder
Head to the **World Engine** and craft an **Echo Encoder**. You will need the following materials:
- **Amethyst Resonance Charm:** Crafted from 1 amethyst shard (obtained from the Healing Spring) and 4 leather (from killing cows or smelting rotten flesh on a campfire).
- **Iron Stick:** Place 1 iron ingot in the top-right corner of the crafting table, with two wooden sticks diagonally below it.
Place the Amethyst Resonance Charm and Iron Stick into the World Engine. It will engage one of its cores and begin crafting the Echo Encoder.
### Step 4: Employing a Villager
With the Echo Encoder in hand, you can convert villagers into Worker Tokens. There are three Worker Token types that work in the Unearther, each requiring a specific workstation:
- **Archeologist** | Workstation: Decorative Pot | Brushes: Dirt, Dust, Mud, Sand
- **Geologist** | Workstation: Salvaging Table | Brushes: Gravel, Soul Sand, Crushed Kivi
- **Dimensionalist** | Workstation: Resonanz Engineering Block | Brushes: Netherrack, End Stone, Otherrock
Place down the workstation for the worker type you need, then place the villager nearby, and they will take on that job role. Once employed, use the Echo Encoder on the villager to pick them up as a Worker Token.
### Step 5: Setting Up the Unearther
Insert the Worker Token into the Unearther along with a brush and the blocks you want brushed. The villager will begin brushing automatically.
To fully automate the process, connect a chest filled with brushable blocks, brushes (unless using an Unbreakable Brush), and optionally food to increase speed. Use item pipes to feed items into the Unearther from the chest.
It is strongly recommended to use **Mekanism Logistical Transporters** as your item pipes. They can pull multiple different item types from the same chest simultaneously. Opaque Item Pipes from Oritech Machines will only extract the first item type in the chest and will ignore the rest.
## Auto Hammers and Cobble Generators
Once you have a handle on manually hammering and brushing, the next step is automating the process. This guide covers setting up a Stone Cobble Generator and chaining it into an Auto Hammer to produce resources passively.
### Step 1: The Stone Cobble Generator
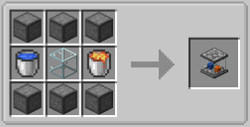Craft a **Stone Cobble Generator** using 6 compressed stone blocks, 1 lava bucket, 1 water bucket, and 1 glass. Once placed, it will automatically generate 1 cobblestone per tick.
The Stone Cobble Generator will generate 1 cobblestone per tick, but can be upgraded to iron, gold, diamond, and netherite versions by placing the generator into a casting basin, and pouring the corresponding molten ore on top of it, for example, to turn the Stone Cobble Generator into an Iron Cobble Generator you will pour molten iron onto it whilst it is inside a casting basin.
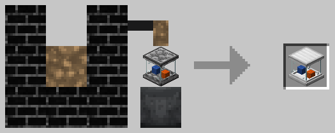
### Step 2: Collecting the Cobblestone
Place an inventory directly on top of the generator to collect the cobblestone it produces, these can be chests, barrels, or drawers. There are a couple of things to keep in mind:
- **Stone Chests** from the Stone Chest mod do not work with the generator.
- **Compacting Drawers** from Functional Storage must have a piece of cobblestone manually placed inside them before they will begin collecting from the generator.
### Step 3: Piping into the Auto Hammer
Now you need item pipes to move the cobblestone into the Auto Hammer, when starting out you can use the Opaque Item Pipes from Oritech Machines or Item Pipes from Pipez, however it is recommended to use Logistical Transporters, which are Mekanism's version of item pipes. Several options are available:
- **Opaque Item Pipes** from Oritech Machines: a good early option
- **Item Pipes** from Pipez: another early game alternative
- **Logistical Transporters** from Mekanism: recommended for the best performance and reliability
### Step 4: Chaining Auto Hammers
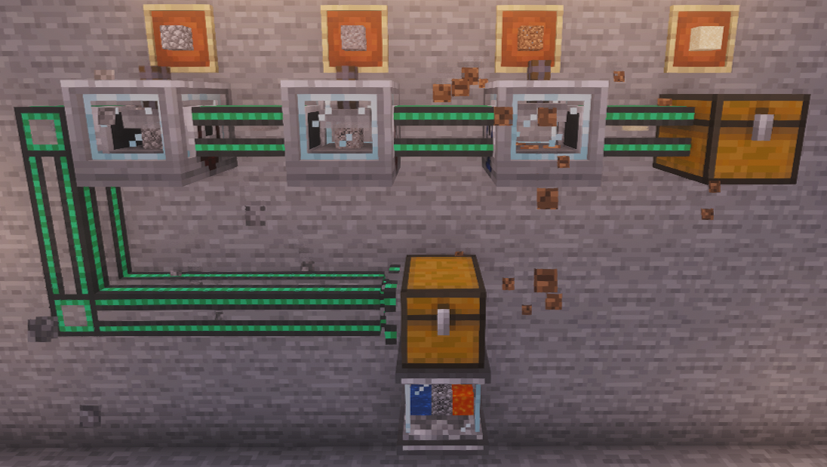Auto Hammers can be chained together to convert cobblestone all the way down the conversion chain, into dust, in a single pass. The number of hammers you need depends on the output you are after.
For example, to produce sand for brushing into gold chunks, you would chain 3 Auto Hammers together:
Cobblestone ⮕ Gravel ⮕ Dirt ⮕ Sand
| Introduction
[Introduction](https://wiki.siriusmc.net/books/modpack-guides-and-tutorials/page/introduction-stoneblock-4)
An introduction into Stoneblock 4, including how to get started and what mods are featured.
| Boss Guide
[Mighty Ender Chicken](https://wiki.siriusmc.net/books/modpack-guides-and-tutorials/page/boss-guide-mighty-ender-chicken-stoneblock-4)
Defeat this boss to keep progressing, learn how to summon and defeat it.
| Boss Guide
[Chesed](https://wiki.siriusmc.net/books/modpack-guides-and-tutorials/page/boss-guide-chesed-stoneblock-4)
The first major boss. Learn how to defeat it and what drops you can earn.
|
# Boss Guide (Chesed) | Stoneblock 4
|  |
| Chesed is a powerful boss that cannot be damaged directly. You must use the environment and mechanics of the arena to defeat it. A diamond axe is not just recommended; it is essential. All damage from Chesed ignores resistances, and the arena cannot be easily escaped from.
|
## Walkthrough
### Phase 1
A diamond axe is more than just recommended for defeating Chesed, it is essential. You cannot damage Chesed directly and must use your surroundings to deal damage to it, making the diamond axe the best early game weapon for this purpose. With the diamond axe you can disable the Chesed Monoliths. Chesed Monoliths have 50HP each, and you'll know when they've been disabled because they stop spinning. This is particularly important, because during the ability "Tenebrae Aeternae" Chesed drains power from the monoliths and uses it to unleash a lightning strike that damages everyone in the arena, and the amount of damage given depends on how many monoliths are in an active state. Deactivated monoliths become active again after this ability ends.
To defeat Chesed, you'll need to wait for the Crystals phase. This is when blue crystals will appear in the corners of the arena. Following this, Chesed activates the "Lightning Ray" ability that follows the player's movement. While charging the attack, Chesed tries to anticipate the player's movements, and aims slightly beyond the target's movement direction, and stops aiming seconds before releasing the lightning ray.
Using your axe, break one of the blue crystals from the "Crystals" ability, and then find a Lightning Ray Reflector at the far sides of the arena. You'll notice when you approach one with the Energized II effect, it will rise from the ground and glow blue. And, if aimed correctly, means that when Chesed fires a lightning ray, it will reflect from the Reflector and hit Chesed, dealing 1 point of damage.
### Phase 2 (below 50% HP)
When Chesed drops below 50% HP it enters its second phase, causing the Monoliths to regenerate with an additional 50 HP, bringing them to 100 HP each. Same as in phase 1, you will need to destroy them again to ensure that during the ability "Tenebrae Aeternae" you are not taking significant damage. Then you can wait again for the Crystals and Lightning Ray phase, and damage Chesed in the same way you did in phase 1.
## Abilities
### Passive
**Mightiness**
Chesed cannot be hurt directly, and its arena cannot be easily escaped from. All damage it inflicts ignores resistances. Gives all combatants Night Vision while alive. If a player looks away from Chesed, they are inflicted with Chesed Gaze. Second phase begins when HP drops below 50%.
**Electrified Air**
The air above Chesed crackles with power. Any entity that interacts with it takes damage.
**Monoliths**
Spawns 4 monoliths when summoned. Monoliths deactivate upon death and cannot be damaged further. Gain an additional 50 HP in second phase.
**Crystals**
Cast before the lightning ray attack. Destroys all existing crystals then summons 1 on each side of the battlefield. If a player destroys a crystal, they become Energized II.
### Active
**Block Barrage**
Tears out blocks from the earth and hurls them at the target.
**Earthquake**
Slams the earth, emitting a shockwave and lightnings that travel outward from Chesed's position. During second phase, more lightnings are summoned and they move faster.
**Tempest Core**
Releases ball lightnings that travel outward from Chesed. These cannot be reflected.
**Rolling Thunder**
Rolls around the arena damaging and knocking back anyone in its path. During second phase, leaves a fire trail behind.
**Rockfall**
Fires a lightning beam at the ceiling causing it to crumble, while summoning lightnings around all combatants. During second phase the frequency and quantity of lightnings are increased.
**Kinetic Field** *(second phase only)*
Traps players in a kinetic field that prevents escape. Periodically summons lightnings inside all active kinetic fields.
## Drops
### Lightning Core
A core that Chesed draws its power from, and can be applied to any weapon by using a crafting table. When attacking entities with a weapon that is enhanced with a Lightning Core there is a 33% chance to strike the target with Chesed lightning, summoning a lightning bolt that will deal 100% of the weapons damage whilst also inflicting the Shocked effect on the target. The Shocked effect reduces the target's outgoing damage by 25% for 200 ticks (10 seconds)
### Phase Sphere
The Phase Sphere allows you phase through blocks at high speed for 200 ticks (10 seconds), with a 100 tick (5 second) cooldown before you can use it again. However, you are only immune to suffocating inside blocks, and mobs can still damage you while phasing. So, it is recommended to use this as a mobility and traversal tool, and not to escape from combat.
### Chesed Trophy
A trophy of Chesed that you can place down to showcase your heroic deeds in defeating this boss.
| Introduction
[Introduction](https://wiki.siriusmc.net/books/modpack-guides-and-tutorials/page/introduction-stoneblock-4)
An introduction into Stoneblock 4, including how to get started and what mods are featured.
| Guide
[Automation Guide](https://wiki.siriusmc.net/books/modpack-guides-and-tutorials/page/automation-guide-stoneblock-4)
Set up cobble generators, auto hammers, and Unearthers to automate your resource chain.
| Boss Guide
[Mighty Ender Chicken](https://wiki.siriusmc.net/books/modpack-guides-and-tutorials/page/boss-guide-mighty-ender-chicken-stoneblock-4)
Defeat this boss to keep progressing, learn how to summon and defeat it.
|
# Boss Guide (Mighty Ender Chicken) | Stoneblock 4
|  |
| The Mighty Ender Chicken is a powerful boss found in the End rings, with several highly dangerous abilities at its disposal, and resembling a huge enderman-style chicken with a zombie on its back. It must be summoned using a specific item and can only be damaged through removing its shield mechanic.
|
## Finding and Summoning
The Mighty Ender Chicken can be found in the north and south parts of the End ring. To summon it, you will need to locate a **Dislocator Receptacle** 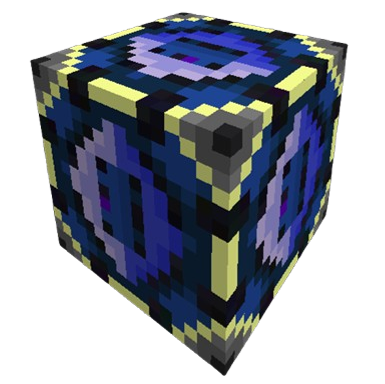 from the mod Draconic Evolution, then use a **Mighty Ender Chicken Egg** on it.
The Mighty Ender Chicken Egg is crafted using the following materials:
- 4 Dimensional Shard Gems
- 4 Ender Pearls
- 1 Dark Matter
Once summoned, the chicken will grow from a regular sized chicken into a giant one and will be protected by a shield that grants it full immunity to damage. To break the shield you must hit the Mighty Ender Chicken **4 times with the Chicken Stick** to deactivate the shield before you can deal any damage to it. Once the shield has been deactivated you have 30 seconds to damage it, after 30 seconds the shield regenerates, and you must deactivate it again to continue damaging it.
## Abilities
**Spinning Attack**
Generates a charging up sound before spinning around and shooting out Dragon Eggs that explode on impact.
**Clearing an Area**
Lets out a cry and quickly moves around the arena, breaking any blocks in its path.
**Forcefield Retaliate**
Regenerates its shield after 30 seconds. When this happens you will need to hit it with the Chicken Stick again to deactivate it.
**Clearing away Entities**
If it senses entities nearby it may begin flapping its wings to blow them away from it.
## Drops
1x Dragon Egg
6x - 10x Dragonskin
| Introduction
[Introduction](https://wiki.siriusmc.net/books/modpack-guides-and-tutorials/page/introduction-stoneblock-4)
An introduction into Stoneblock 4, including how to get started and what mods are featured.
| Guide
[Automation Guide](https://wiki.siriusmc.net/books/modpack-guides-and-tutorials/page/automation-guide-stoneblock-4)
Set up cobble generators, auto hammers, and Unearthers to automate your resource chain.
| Boss Guide
[Chesed](https://wiki.siriusmc.net/books/modpack-guides-and-tutorials/page/boss-guide-chesed-stoneblock-4)
The first major boss. Learn how to defeat it and what drops you can earn.
|
# Boss Guide (Malkuth) | Stoneblock 4
|  |
| Malkuth is a powerful boss found in the Void ring, also known as the Void Chasms. The Qliphoth of Malkuth, a benevolent king who ruled over a once-prosperous land, whose blind, excessive generosity became his kingdom's demise. Players cannot directly damage Malkuth and must instead use cannons to fight him on equal ground.
|
To get Malkuth to return to the players' side of the arena, move near the lava side to prompt him to jump back.
Flying over to the lava side of the arena will cause instant death.
### Malkuth's Marks
All combatants receive a **Mark of a Knight** at the start of the boss fight. If a combatant leaves the arena before the fight ends, they will be instantly killed in seconds, and the Mark of a Knight transforms into a **Mark of a Coward**. Stepping back into the arena with a Mark of a Coward will change it back to a Mark of a Knight.
## Abilities
**Divine Armor**
Malkuth wields impenetrable armor, capable of neglecting any damage.
**Fire and Ice**
While in the arena, combatants may be weak to Fire or Ice. Malkuth's abilities deal three types of damage: Basic (regular damage), Fire (makes targets weaker to Fire damage, deals reduced damage to targets weak to Ice), and Ice (makes targets weaker to Ice damage, deals reduced damage to targets weak to Fire).
**Fair Duel**
Combatants can use two cannons on their side to fight on equal ground with Malkuth. Right-click a cannon to fire a shot. Combatants can only use the cannon of the type they are currently weak to. After firing a shot, the cannon becomes unusable until the next use of Cannonade.
**Knights Duty**
During the boss fight all combatants receive Mark of a Knight. When a combatant escapes the arena before the fight ends, Mark of a Knight transforms into Mark of a Coward. When a combatant with Mark of a Coward steps into the arena once again, it changes back to Mark of a Knight.
**Slashes**
Charges one of his swords and releases an aerial slash traveling towards the target. The damage type of the slash is based on the sword that was charged. This slash is capable of slicing through crystals.
**Cannonade**
Malkuth jumps on the wall behind him and orders his cannons to fire devastating shots at the target. When this ability is cast, combatants' cannons can be used once again, unless they are broken. Second phase: Malkuth orders his cannons to break the cannons on the combatants' side.
**Arcslash**
Malkuth charges up his swords and releases aerial slashes in arcs, covering the whole arena.
**Boulder Volley**
Malkuth tears up boulders from the earth, imbues them with his magic, and hurls them at the player.
**Impaling Doom**
Malkuth slams the earth, releasing either Fire or Ice spikes that travel in the slam direction. When colliding with combatants, those spikes hurl them up into the air.
**Earthshatter**
Malkuth leaps to the target and crushes the earth, hurling everyone caught in the attack into the air. During the second phase, if there are broken cannons on the combatants' side, spawns a special crystal at the attack location that is capable of repairing cannons.
**Chainpunch**
Malkuth pulls every combatant who was in the air and punches them with overwhelming force.
**Tsars Wrath**
Malkuth summons two giant swords and orders them to slam the ground with devastating force. Second phase: Also fires his cannons before the attack lands.
**Hellshaper**
Malkuth slams the earth, summoning floating islands, hurling everyone into the air and rendering the floor impossible to walk on. Launches fireballs at these islands thereafter.
## Drops
**Fire and Ice Core**
The core of Malkuth. Can be attached to any item that has durability to summon Malkuth fireballs. Use an item to release a fireball that deals a percentage of item damage and ignites targets. Crouch while using an item to release an iceball that slows targets instead.
**Emberfrost Gauntlet**
In right hand: acts as a grappling hook for blocks, casting Malkuth's crush attack at the grapple position. If used on the ground while facing downwards, propels the user up into the air. In left hand: acts as a grappling hook for entities, making the user automatically attack the target before knocking them back. Combo: using the item in the left hand and then switching it to the right hand resets its cooldown.
**Malkuth Trophy**
A trophy of Malkuth to showcase your heroic deeds.
| Introduction
[Introduction](https://wiki.siriusmc.net/books/modpack-guides-and-tutorials/page/introduction-stoneblock-4)
An introduction into Stoneblock 4, including how to get started and what mods are featured.
| Guide
[Automation Guide](https://wiki.siriusmc.net/books/modpack-guides-and-tutorials/page/automation-guide-stoneblock-4)
Set up cobble generators, auto hammers, and Unearthers to automate your resource chain.
| Boss Guide
[Chesed](https://wiki.siriusmc.net/books/modpack-guides-and-tutorials/page/boss-guide-chesed-stoneblock-4)
The first major boss. Learn how to defeat it and what drops you can earn.
|
| Malum is a magic mod in FTB Stoneblock 4 centred around Spirit Arcana, derived from the souls of both the living and the undead. Players harvest spirits from slain mobs, use them to fuel a growing arsenal of crafting stations, and progress through an open-ended codex toward powerful magical equipment and unique world-altering rituals. As one of the primary magic mods in Stoneblock 4, Malum ties into several questline milestones and is a core part of mid-to-late game progression. |
This list includes common mobs, if you want an exhaustive list of what spirits mobs drop see the **Exhaustive Spirit List** below.
### Primary Arcana
| Spirit Type | Common Sources |
|---|
| Sacred (Innocent) | Sheep, Pigs, Cows, Chicken |
| Wicked (Malicious) | Zombies, Skeletons, Witch, Wither Skeleton |
| Arcane (Fundamental) | Witches, Skeletons, Blaze, Enderman |
| Spirit Type | Common Sources |
|---|
| Aerial (Swift) | Chickens, Bees, Rabbit, Spider |
| Aqueous (Malleable) | Cod, Squids, Salmon, Slime |
| Earthen (Steady) | Cows, Iron Golem, Mooshroom, Sheep |
| Eldritch (Esoteric) | Enderman, Endermite, Warden, Ender Chicken |
| Infernal (Radiant) | Blaze, Creeper, Ghast, Magma Cube |
Collected spirits can be stored in **Spirit Jars** and used as ingredients in Spirit Infusion crafting systems.
Mobs must spawn "naturally" to be able to collect their souls. It is recommended to use **Dreadful Dirt** and not **Spawners**.
Exhaustive Spirit List ▼
### Primary Arcana
| Spirit Type | Common Sources |
|---|
| Sacred (Innocent) | Allay
Armadillo
Axolotl
Bat
Bee
Camel
Cat
Chicken
Cow
Dolphin
Fluid Cow
Fox
Frog
Glow Squid
Guardian
Horse
Iron Golem
Ocelot
Panda
Parrot
Pigs
Polar Bear
Rabbit
Sheep
Sniffer
Squid
Strider
Tadpole
Villagers
Wandering Trader
Wolf
|
| Wicked (Malicious) | Bogged
Bulwark
Cave Spider
Commando
Drowned
Evoker
Fusilier
Goat
Guardian
Husk
Llama
Mossback Goliath
Phantom
Piglin
Piglin Brute
Pillager
Plunderer
Pufferfish
Ravager
Riftling Observer
Shadow Beast
Silverfish
Skeleton Horse
Skeleton
Sludgeling
Spider
Stray
Trader Llama
Vindicator
Witch
Wither Skeleton
Zoglin
Zombie
Zombie Horse
Zombie Villager
Zombified Piglin
|
| Arcane (Fundamental) | Blaze
Bogged
Breeze
Enderman
Evoker
Ghast
Glow Squid
Magma Cube
Mooshroom
Phantom
Shulker
Skeleton Horse
Skeleton
Slime
Stray
Strider
Vex
Wandering Trader
Wither Skeleton
Witch
|
| Spirit Type | Common Sources |
|---|
| Aerial (Swift) | Bat
Bee
Breeze
Cat
Cave Spider
Chicken
Donkey
Fox
Ghast
Horse
Llama
Mule
Ocelot
Parrot
Phantom
Rabbit
Skeleton Horse
Spider
Stray
Trader Llama
Vex
Zombie Horse
|
| Aqueous (Malleable) | Axolotl
Cod
Dolphin
Drowned
Elder Guardian
Ghast
Glow Squid
Guardian
Polar Bear
Pufferfish
Salmon
Slime
Snow Golem
Squids
Tadpole
Tropical Fish
Turtle
|
| Earthen (Steady) | Armadillo
Bogged
Cow
Donkey
Fox
Hoglin
Horse
Iron Golem
Llama
Mooshroom
Mule
Panda
Polar Bear
Sheep
Silverfish
Trader Llama
Tropical Fish
Zoglin
Zombie
Zombie Horse
Zombie Villager
|
| Eldritch (Esoteric) | Abyssal Sludge
Abyssal Winged
Corrosive Craig
Elder Guardian
Ender Chicken
Enderman
Endermite
Evoker
Malkuth Warrior
Ravager
Rift Demon
Rift Minotaur
Shulker
Tentacled Horror
Warden
|
| Infernal (Radiant) | Blaze
Creeper
Ghast
Hoglin
Husk
Magma Cube
Piglin
Piglin Brute
Strider
Wither Skeleton
Zoglin
Zombified Piglin
|
| Introduction
[Introduction](https://wiki.siriusmc.net/books/modpack-guides-and-tutorials/page/introduction-stoneblock-4)
An introduction into Stoneblock 4, including how to get started and what mods are featured.
| Boss Guide
[Mighty Ender Chicken](https://wiki.siriusmc.net/books/modpack-guides-and-tutorials/page/boss-guide-mighty-ender-chicken-stoneblock-4)
Defeat this boss to keep progressing, learn how to summon and defeat it.
| Boss Guide
[Chesed](https://wiki.siriusmc.net/books/modpack-guides-and-tutorials/page/boss-guide-chesed-stoneblock-4)
The first major boss. Learn how to defeat it and what drops you can earn.
|
# Roost Ultimate Guide | Stoneblock 4
| Roost Ultimate is a chicken-based resource generation mod in FTB Stoneblock 4. Players can hatch, breed, and train chickens that passively produce resources ranging from basic materials like iron and coal through to high-tier items such as diamonds, nether stars, and mod-specific resources. Roost Ultimate is one of the earliest and most scalable passive resource farms available in Stoneblock 4. |
Seed Tiers and Experience Gained ▼
| Seed Tier | Experience Gained |
|---|
| 1 | 50 |
| 2 | 200 |
| 3 | 300 |
| 4 | 500 |
| 5 | 700 |
| 6 | 1,000 |
| 7 | 1,500 |
| 8 | 2,500 |
| 9 | 5,000 |
| Introduction
[Introduction](https://wiki.siriusmc.net/books/modpack-guides-and-tutorials/page/introduction-stoneblock-4)
An introduction into Stoneblock 4, including how to get started and what mods are featured.
| Guide
[Automation Guide](https://wiki.siriusmc.net/books/modpack-guides-and-tutorials/page/automation-guide-stoneblock-4)
Set up cobble generators, auto hammers, and Unearthers to automate your resource chain.
| Boss Guide
[Chesed](https://wiki.siriusmc.net/books/modpack-guides-and-tutorials/page/boss-guide-chesed-stoneblock-4)
The first major boss. Learn how to defeat it and what drops you can earn.
|
| Apotheosis is a mod included in FTB Stoneblock 4 that expands Minecraft's enchanting system, adds a loot-based affix and gem progression system, and gives players full control over mob spawners. It is one of the most impactful progression mods in Stoneblock 4, influencing gear power from early game through to endgame. Apotheosis features an in-game guidebook, the **Chronicle of Shadows**, crafted with 1 Book and 1 Gold Ingot, that covers the mod in detail. |
| Shelf Tier | Maximum Eterna |
|---|
| Bookshelf | 30 |
| Hellshelf / Seashelf | 45 |
| Infused Hellshelf / Glowing Hellshelf / Infused Seashelf / Crystalline Seashelf / Heart-Forged Seashelf / Geode-Encased Bookshelf of Stability / Blazing Hellshelf | 60 - 65 |
| Deepshelf / Deepshelf of Arcane Treasures / Echoing Deepshelf / Soul-Touched Deepshelf | 70 - 75 |
| Echoing Sculkshelf / Soul-Touched Sculkshelf | 80 |
| Endshelf / Pearlescent Endshelf / Draconic Endshelf | 90 - 100 |
New Apotheosis Enchantments ▼
| Enchantment Name | Description | Type |
|---|
| Berserker's Fury | Player receives Resistance, Speed, and Strength after taking damage. | Corrupted |
| Boon of the Earth | Chance to receive ores when mining simple stones. | Masterwork |
| Chainsaw | Breaking logs will break the entire tree. | Masterwork |
| Chromatic Aberration | Shearing sheep gives a random colour of wool. | Normal |
| Crescendo of Bolts | Gain an extra arrow shot per level for free. | Masterwork |
| Endless Quiver | Arrows are never consumed no matter the type. | Masterwork |
| Growth Serum | Gives sheep a 50% chance to immediately regrow their wool. | Masterwork |
| Icy Thorns | Applies slowness to the attacker, duration increases with level. | Normal |
| Knowledge of the Ages | Mob drops are converted into experience orbs. | Masterwork |
| Life Mending | Uses the player's received healing to fix tools instead of experience. | Corrupted |
| Miner's Fervor | Break blocks quickly, but never instantaneously. | Twisted |
| Natures Blessing | Allows hoes to be used as bonemeal. | Normal |
| Rebounding | Causes melee attackers to be knocked back. | Normal |
| Reflective Defenses | Inflict 15% of the damage blocked back to the attacker. Higher levels inflict more damage. | Normal |
| Scavenger | Give a 2.5% chance per level to roll loot tables twice when a mob is killed. | Masterwork |
| Shield Bash | Makes melee attacks with shields do extra damage. | Normal |
| Spearfishing | Kills with a trident give a 3.5% chance per level to drop a random fish. | Normal |
| Stable Footing | Removes the break speed penalty for flying. | Normal |
| Tempting | Animals will follow the player when holding a hoe with this enchantment. | Normal |
| Worker Exploitation | Causes damage to sheep, but doubles wool drops. | Corrupted |
| Rarity | Name Colour | Notes |
|---|
| Common | Grey | Basic stat affixes, few or no sockets |
| Uncommon | Green | More affixes, occasionally socketed |
| Rare | Blue | Multiple affixes, sockets more common |
| Epic | Purple | Effect affixes and multiple gem sockets |
| Mythic | Orange | Maximum affixes, strongest possible stats |
| Tier | Unlock Condition |
|---|
| Haven | Starting tier, no requirement |
| Frontier | Obtain a full set of Common affix gear |
| Ascent | Obtain a full set of Uncommon affix gear including a weapon, and slay at least one Apothic Invader |
| Summit | Obtain a full set of Rare affix gear and defeat the Wither |
| Pinnacle | Obtain a full set of Epic affix gear, an Epic affix weapon and defeat the Ender Chicken Jockey |
- **Salvaging Table**: Breaks down affix items into Rarity Materials. Common items yield low-tier scrap; Mythic items yield Godforged Pearls. Gems can also be salvaged here into Gem Dust. Rarity Materials are the primary currency for reforging.
- **Simple Reforging Table**: Turns any item into an affix item with randomised modifiers using Rarity Materials and Sigils of Rebirth. Limited to Rare rarity, making it suitable for early and mid-game.
- **Reforging Table**: An upgraded version of the Simple Reforging Table capable of producing Epic and Mythic items, at a higher material cost.
- **Augmenting Table**: Allows individual affixes on an item to be upgraded in power (+25% per upgrade) or rerolled into an alternative affix. Fuelled by Sigils of Enhancement and costs large amounts of XP. Intended for late-game fine-tuning of the player's best gear.
- **Gem Cutting Table**: Used to upgrade gem quality by combining two identical gems with Gem Dust and a Rarity Material.
- **Gem Case**: A storage block that can automatically combine gems into higher tiers. Breaking this block keeps the gems inside.
### Gems and Sockets
Gems drop from hostile mobs and can be found in loot chests. They come in the same five rarity tiers as affix items and provide bonuses specific to the type of item they are socketed into. A gem socketed into a sword may give a bonus that the same gem socketed into a chestplate does not. Gems are inserted by right-clicking an item while hovering it with the gem, or via a Smithing Table.
Gem quality can be upgraded at the **Gem Cutting Table** by combining two identical gems with **Gem Dust** and a **Rarity Material**. Or by having enough of the same gem inside a Gem Case, which players can use to automatically produce perfect gems.
Gem Dust is obtained by dropping an anvil onto a gem, or by salvaging gems in the Salvaging Table, and rarity material can be obtained by placing affixed items into the Salvaging Table, giving back a certain amount of items that the tool or armour is made from, along with the corresponding rarity material.
### Sigils
Sigils are consumable items used to fuel workstations or apply special effects to affix gear. The key sigils are:
- **Sigil of Rebirth**: Fuel for the Reforging Table.
- **Sigil of Enhancement**: Fuel for the Augmenting Table.
- **Sigil of Unnaming**: Clears the affix name from an item without removing the affixes themselves.
- **Sigil of Malice**: Randomly modifies an affix item in an unpredictable way. High risk, high reward.
- **Sigil of Supremacy**: Overcharges every affix on an item to its maximum possible value. Obtained by completing Wave 100 of the Endless Gateway of Apothic Invaders.
## Apothic Spawners
Apotheosis gives players full control over mob spawners. In vanilla Minecraft, breaking a spawner destroys it. With Apotheosis, a spawner can be collected by mining it with a **Silk Touch** pickaxe. The spawner retains all of its properties when picked up and can be placed elsewhere. Alternatively, in Stoneblock 4, players can use Cardboard Boxes from the Mekanism mod to pick up spawners.
### Modifying Spawners
Spawner stats can be modified by right-clicking the spawner with specific items. If a modifier can be applied, the item is consumed. Most upgrades can be applied multiple times up to a cap. To reverse an upgrade, hold Quartz in the off-hand while applying the modifier item. The modifiable stats include spawn delay, spawn count, and spawn range. Shifting and looking at a placed spawner will show what modifiers have already been added.
| Item | Modifier |
|---|
| Turtle Egg | Youthful |
| Piston | +2 Spawn Range |
| Fermented Spider Eye | +2 Spawn Count |
| Wool | Silent |
| Redstone Comparator | Redstone Control |
| Prismarine Crystals | +4 Activation Range |
| Chorus Fruit | No AI |
| Sugar | -10 Min Spawn Delay |
| Ghast Tear | +2 Max Entities |
| Clock | -20 Max Spawn Delay |
| Pointed Dripstone | -5% Initial Health |
| Nether Star | Ignores Players |
| Soul Lantern | Ignores Light |
| Conduit | Ignores Conditions |
| Echo Shard | +1 Echoing (Built In Looting) |
| Campfire | Burning |
Mobs from spawners in Stoneblock 4 are unable to produce Gems or Affixed Gear automatically. Players must initiate the killing blow.
| Introduction
[Introduction](https://wiki.siriusmc.net/books/modpack-guides-and-tutorials/page/introduction-stoneblock-4)
An introduction into Stoneblock 4, including how to get started and what mods are featured.
| Guide
[Malum Guide](https://wiki.siriusmc.net/books/modpack-guides-and-tutorials/page/malum-guide-stoneblock-4)
A guide to Malum, the spirit magic mod. Covers spirit harvesting, infusion, equipment, and curios.
| Boss Guide
[Chesed](https://wiki.siriusmc.net/books/modpack-guides-and-tutorials/page/boss-guide-chesed-stoneblock-4)
The first major boss. Learn how to defeat it and what drops you can earn.
|
| The Fission Reactor is a multiblock structure, in the Mekanism mod, used to generate large amounts of power by burning Fissile Fuel. The reactor converts water into steam for power generation in a Steam Turbine, through heat generation. It also generates nuclear waste as a by-product.
|
Small Reactor (3x4x3) ▼
| Component | Quantity |
|---|
| Fission Reactor Casings | 26 |
| Reactor Glass | 4 |
| Fission Reactor Ports | 4 |
| Fission Fuel Assemblies | 1 |
| Control Rod Assemblies | 1 |
At this size all flexible face slots are already used by the 4 Ports and 4 Reactor Glass, so there is no spare room for additional components such as the Fission Reactor Logic Adapter, on the side faces. The top, bottom, and edges remain mandatory Fission Reactor Casings regardless of size.
Medium Reactor (12x12x12) ▼
| Component | Quantity |
|---|
| Fission Reactor Casings | 328 |
| Reactor Glass | 396 |
| Fission Reactor Ports | 4 |
| Fission Fuel Assemblies | 450 |
| Control Rod Assemblies | 50 |
The top, bottom, and four corner columns are mandatory Fission Reactor Casings. One Reactor Glass window has been placed on each of the four sides for visibility, with the minimum 4 Fission Reactor Ports. There are many spaces for Fission Reactor Logic Adapters.
Large Reactor (18x18x18) ▼
| Component | Quantity |
|---|
| Fission Reactor Casings | 712 |
| Reactor Glass | 1,020 |
| Fission Reactor Ports | 4 |
| Fission Fuel Assemblies | 1,920 |
| Control Rod Assemblies | 128 |
18x18x18 is the maximum possible Fission Reactor size. The top, bottom, and edges are mandatory Fission Reactor Casings. There is one Reactor Glass window placed on each of the sides for visibility, with the minimum 4 Fission Reactor Ports. There are many spaces for Fission Reactor Logic Adapters.
- 1x Electrolytic Separator
- 3x Chemical Infuser
- 2x Chemical Oxidizer
- 1x Rotary Condensentrator
- 1x Chemical Dissolution Chamber
- 1x Enriching Factory
- 1x Isotopic Centrifuge
#### Chemical Chain
During production, you will have excess oxygen, which can either be stored in tanks or a storage system such as an ME System, or can be voided using a Fluid Trash Can.
## Cooling
Fission Reactors use two types of coolants, water, and sodium. Water is the easiest coolant, it can be piped in from any type of source and will cool 20,000 mB/t when burn rate is at 1 mB/t . Sodium is more involved, needing a whole new process to create it, but once created it can cool the reactor at a rate of 200,000 mB/t when burn rate is at 1 mB/t, a 100% increase from water cooling. To input the coolant into the reactor you will need to use a Fission Reactor Port set to Input Only.
### Water Production
Stoneblock 4 offers several different ways of getting infinite water sources. Commonly, an ME Infinite Water Cell from the Echo of The Catalyst, bought for 50 coins, is ported out of an ME System through the use of Fluix Cables and Export Buses, with added Acceleration Cards for an unlimited and fast supply of water. However, Stoneblock 4 offers a new way of piping infinite water from Pitcher Plants, obtainable from the Wandering Trader. These plants act like infinite storage tanks, and are able to be connected to from all sides.
### Sodium Production
To set up the chemical chain to create Sodium you will need the following machines:
- 1x Thermal Evaporation Plant (4x3x4) *Multiblock - Can be scaled up to 4x18x4*
- 1x Thermal Evaporation Controller
- 3x Thermal Evaporation Valve
- 32x Thermal Evaporation Block
- 1x Resistive Heater
- 1x Water Source
- 1x Electrolytic Separator
The Thermal Evaporation Plant can use Structural Glass the same way the Fission Reactor can use Reactor Glass.
#### Chemical Chain
During production, you will create Chlorine as a byproduct, which can either be stored in tanks or a storage system such as an ME System, or can be voided using a Fluid Trash Can.
## Operation & Output
A Fission Reactor does not generate power on its own. It produces steam, which must be piped into an Industrial Turbine to actually generate energy. The reactor burns Fissile Fuel at a configurable rate, up to a maximum of 1mB per Fission Fuel Assembly per tick, down to a minimum of 0.1mB per tick. Increasing the burn rate increases steam output, but also increases coolant demand and the rate at which nuclear waste accumulates, so all three need to scale together.
### Monitoring with Logic Adapters
Fission Reactor Logic Adapters can be attached to the reactor the same way Fission Reactor Ports are and will read live information such as when the Reactor is activated or deactivated, when it reaches dangerous temperatures, critical levels of Nuclear Waste, critical damage, and insufficient fuel. They can also be used to turn the reactor on and off automatically, or remotely.
These are commonly used to build a simple safety circuit, where the reactor is shut off automatically if temperature or damage crosses a set threshold, rather than relying on a player noticing in time. Additionally, players can wire an Industrial Alarm to the Fission Reactor Logic Adapter, which will trigger, when activated via a Redstone signal, giving an audio cue that something is wrong with the reactor.
## Safety & Common Issues
When a reactor doesn't get enough coolant it won't stop running, instead it will cause the reactor to overheat, take damage, and eventually explode if it is not turned off soon enough, releasing radioactive material into the surrounding area. Additionally, failing to empty the waste tank causes waste to leak into the environment and accumulate as radiation, even without an explosion.
#### Waste Handling
The primary way to handle Nuclear Waste is to store it in a Radioactive Waste Barrel, this can be done by transferring it using a Fission Reactor Port set to Output Waste and piping it out through Pressurized Tubes. Alternatively, it can be piped into an ME System if a ME Fluid Storage Cell is fitted into an ME Drive.
Nuclear Waste, and Spent Nuclear Waste, will decay inside a Radioactive Waste Barrel overtime at a rate of 1 mB / 20 ticks. Breaking a Radioactive Waste Barrel will cause it's contents to spill into the atmosphere creating radiation.
#### Insufficient Cooling
When the coolant supply cannot keep up with the reactor's burn rate, the reactor's internal temperature begins to climb instead of stabilising. This usually happens when the amount of coolant being inputted is less than the amount of coolant being burnt away. This can be caused when coolant production has not been scaled up to match a recent burn rate increase, or when a coolant port has been disconnected or misconfigured.
A reactor in this state will not show any obvious warning beyond a rising temperature reading and decreasing coolant in the tank, so it is worth monitoring temperature directly with a Fission Reactor Logic Adapter rather than assuming the reactor is safe simply because it has not exploded yet.
#### Excessive Burn Rate
Increasing the burn rate increases steam output, but it also increases coolant demand and waste production at the same time, and all three need to scale together. Raising the burn rate faster than coolant and waste handling can keep up with is one of the most common causes of reactor damage, since the temperature spike happens immediately while pipes, coolant production, and waste storage often take longer to catch up.
It is safer to increase burn rate gradually, checking that the temperature has stabilised at each step, rather than jumping straight to a high rate on a newly built reactor.
| Guide
[Apotheosis Guide](https://wiki.siriusmc.net/books/modpack-guides-and-tutorials/page/apotheosis-guide-stoneblock-4)
Covers Apotheosis's enchanting overhaul, affix gear, gems, world tiers, and full control over mob spawners.
| Guide
[Malum Guide](https://wiki.siriusmc.net/books/modpack-guides-and-tutorials/page/malum-guide-stoneblock-4)
A guide to Malum's spirit-magic system: harvesting spirits, the Spirit Altar, Soulstained gear, totems, and curios.
| Guide
[Roost Ultimate Guide](https://wiki.siriusmc.net/books/modpack-guides-and-tutorials/page/roost-ultimate-guide-stoneblock-4)
A guide to Roost Ultimate. Guides player's through chicken-based resource farming: Roosts, breeding, training chickens, and full automation.
|
# Random Events Guide | Stoneblock 4
| Events are randomly triggered occurrences that affect players during gameplay. They are categorised as beneficial, harmful, or neutral. These events can be turns off or on, depending on a player's preferences. |
| Event ID | Description |
|---|
| ftb:gift\_of\_pets | Triggers random drops from Minecraft's vanilla cat gift loot table. When it triggers, it checks for a nearby tamed pet then spawns rewards from that loot table.
These include a rabbit's foot, rabbit hide, string, rotten flesh, feathers, raw chicken, and phantom membranes. |
| ftb:stick | Drops a random stick that can be equipped in the curios menu's stick slot. There is a selection of sticks with different NBT data that grant different effects when equipped, the most sought after being the creative flight stick. |
| ftb:questingram | Spawns a passive questing ram. Feed or drop one of each colour of vanilla wool to the ram, and for each colour the ram's body grows a matching stripe.
Completing the quest can award a single block of diamond, emerald, gold, iron, or lapis, or a crumble horn. The ram can be trapped, and the quest completed at any speed.
|
| Event ID | Description |
|---|
| ftb:creeper | Summons a creeper jumpscare, spawning an explosive creeper that detonates next to the player. This does not cause any explosive damage. |
| ftb:collapse | Summons a cluster of sand and gravel blocks above the player, with an alert reading "The ceiling is crumbling above you". Some of these sand and gravel blocks will be Suspicious, allowing the player to brush items from them.
These blocks can contain high value early to mid-game loot, most notably netherite scrap.
|
| ftb:goat | Spawns a Quantum Goat in your base, which targets either a player or a passive mob or pet and attacks by ramming, causing knockback.
Killing, or having the goat ram a player, causes the goat to drop a reward. These may be (from most common to least common): Iron Ingot, Copper Ingot, Obsidian, Flux Dust, Dimensional Shard Gem, Greater Experience Gem, Lightning Bottle, Cognitive Flux, Gold Ingot, Ender Pearl, Wilden Horn, Teleportation Core, or a Clapple.
|
| Event ID | Description |
|---|
| ftb:wandering\_trader | Spawns a wandering trader. The trader can have between 6-10 different trades picked from the list below.
Potential Trades:
1x Ectoplasm *for* 4x Delightful Dirt
1x Red Mushroom *for* x4 Glowing Mushroom
4x Diamond *for* 1x Pitcher Plant
4x Ersatz Leather *for* 1x Silk Touch Enchanted Book
1x Otherflower *for* Magebloom Crop
1x Fluix Pearl *for* 1x Mysterious Cube
1x Ender Pearl *for* 1x Teleporter
4x Nether Wart *for* 1x Bastian Pod
1x Emerald *for* 1x Diamond
1x Emerald *for* 4x Brown Mushroom
1x Emerald *for* 16x Podzol
1x Emerald *for* 8x Mycelium
1x Emerald *for* 2x Small Dripleaf
1x Emerald *for* 2x Big Dripleaf
3x Random Online Playerheads
3x Random Pre-coded Playerheads
|
| ftb:chicken\_jockey | Summons the End Chicken boss, required for quest line progression.
**It is not recommended to toggle this event off unless resetting a bugged boss fight, and only when advised to do so by staff.**
|
| Introduction
[Introduction](https://wiki.siriusmc.net/books/modpack-guides-and-tutorials/page/introduction-stoneblock-4)
An introduction into Stoneblock 4, including how to get started and what mods are featured.
| Guide
[Apotheosis Guide](https://wiki.siriusmc.net/books/modpack-guides-and-tutorials/page/apotheosis-guide-stoneblock-4)
Covers Apotheosis's enchanting overhaul, affix gear, gems, world tiers, and full control over mob spawners.
| Boss Guide
[Chesed](https://wiki.siriusmc.net/books/modpack-guides-and-tutorials/page/boss-guide-chesed-stoneblock-4)
The first major boss. Learn how to defeat it and what drops you can earn.
|