Updating Java 8
|
Recently, Mojang changed its authentication system. Players using Java 8 versions older than Update 91 can no longer log in to Minecraft servers, including ours. To resolve this issue, update Java 8 on your computer. |
Step 1: Uninstall Your Existing Java 8 Version
CurseForge users may not have an existing Java 8 version installed. If not, skip to Step 2.
Older Java 8 versions lack critical security fixes and must be removed before installing the new version.
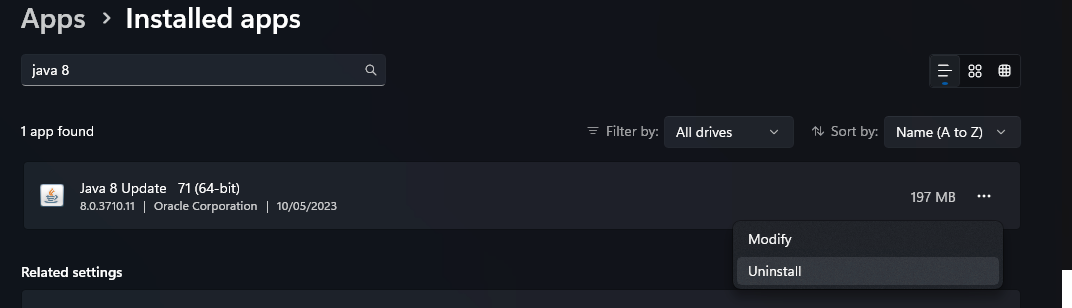
- Open Settings → Apps → Installed Apps.
- Search for Java 8 in the list.
- Select it and press Uninstall.
- Follow the confirmation prompts until it's entirely removed.
Step 2: Install the Latest Version of Java 8
|
This guide covers installing Oracle Java. Other Java binaries also exist from organisations such as Adoptium and Amazon, which can also be used. |
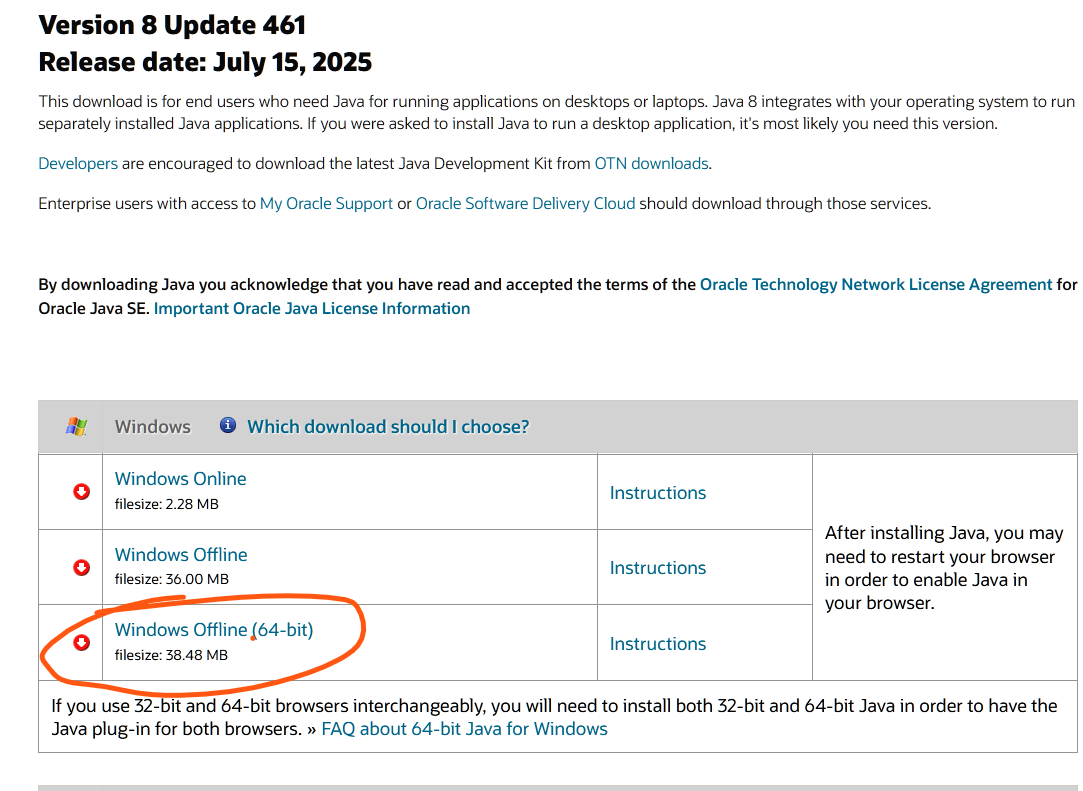
- Go to the official Java download page: Java 8 Manual Downloads.
- Under Windows, choose Java 8 (Offline 64-bit) and download the installer.
- Once downloaded, run the installer and follow the on-screen instructions.
Following this, you should have the latest Java 8 installed.
If you have other versions of Java installed, you may need to uninstall them or select the correct Java version in the relevant launcher settings.
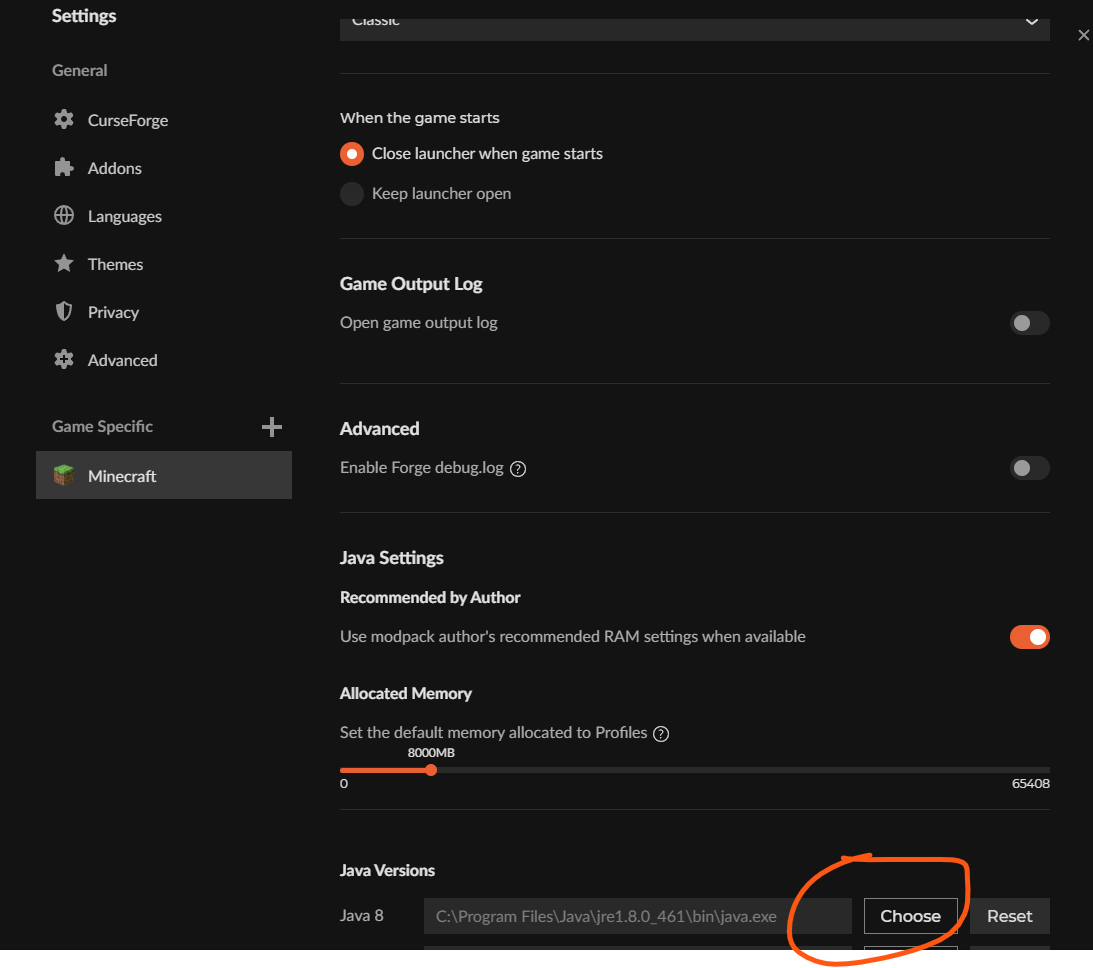
Step 3: (CurseForge Only) Update Java Path in CurseForge Launcher
If you use the CurseForge launcher, you may need to change the Java path to point to the correct Java version.
- Open the CurseForge launcher.
- Select the settings cog on the bottom left of the launcher.
- Select Minecraft and scroll down to Java Versions.
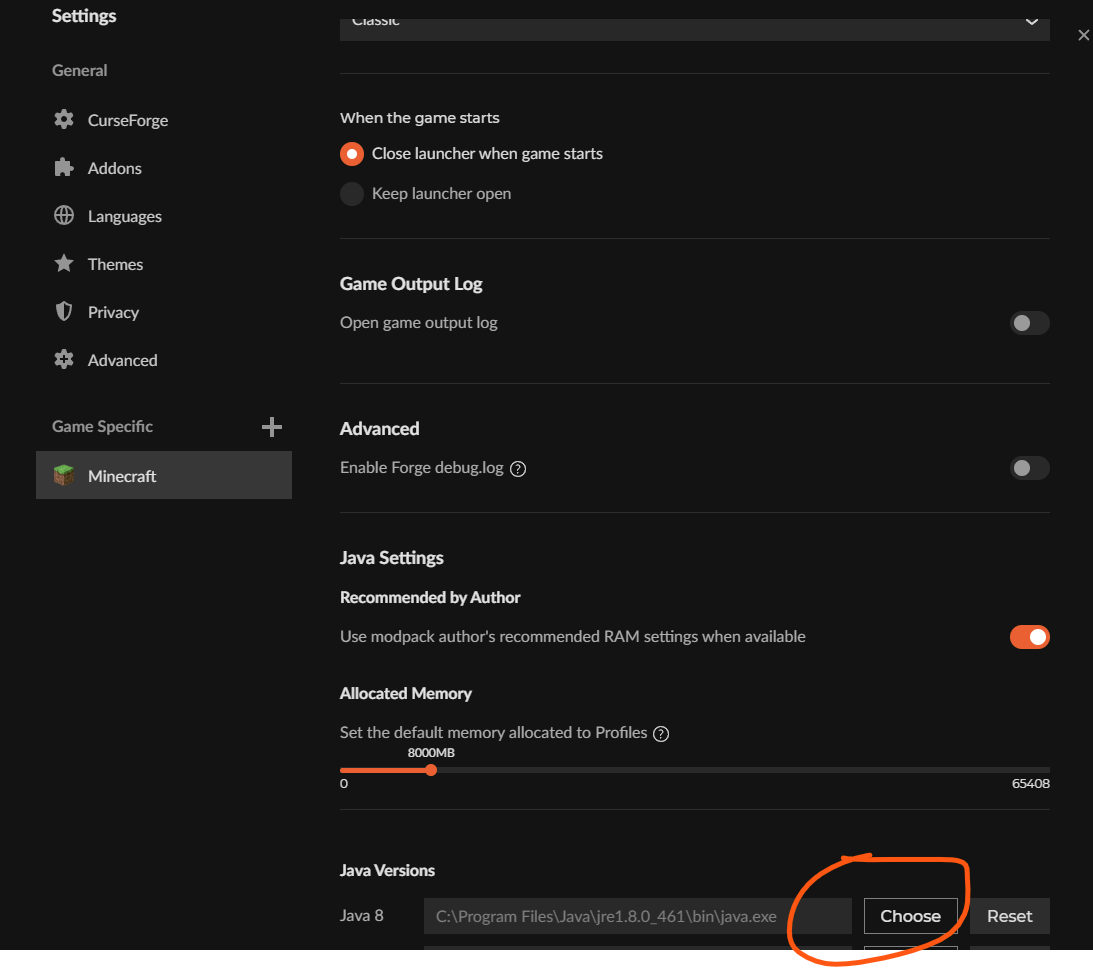
- Select Choose.
- Type C:\Program Files\Java\jre1.8.0_461\bin as the file name and press Enter.

- Select java.exe.
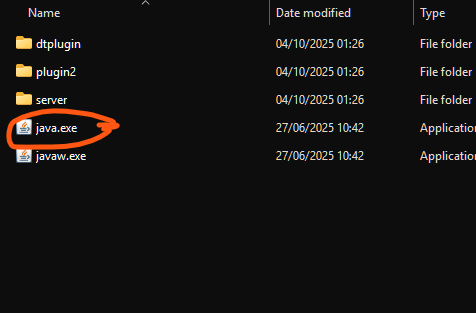


The file location may differ on certain systems. Contact staff if you are unable to find java.exe.
After this you should be able to join our servers using the CurseForge launcher.